
I’ve discussed my frustration with various trip planning apps and GPS products at length, including my preference for paper up until very recently. Per my comments back in February, REVER has become my go-to trip planning software. Needless to say, I’ve received quite a few questions about Rever, along with showing several friends and associates how it works. In preparation for the upcoming Triumph Dragon Raid (Triumph Rally near Deal’s Gap, North Carolina), I have built about a dozen local routes around the area for attendees to utilize during their stay at the rally this year, if they decide they don’t want to join up with another group. After chatting with the event organizers, they suggested that I could type up a “how-to” for Rever so newcomers would have a step-by-step guide on how to get started.
Who Needs a Route Planner?
I’m sorry, I’m a planner, I try not to… but it keeps happening; I don’t know how to stop it. If you like to ride your bike, get lost on purpose, and “follow your front wheel around” as some say, a route planner is not for you. 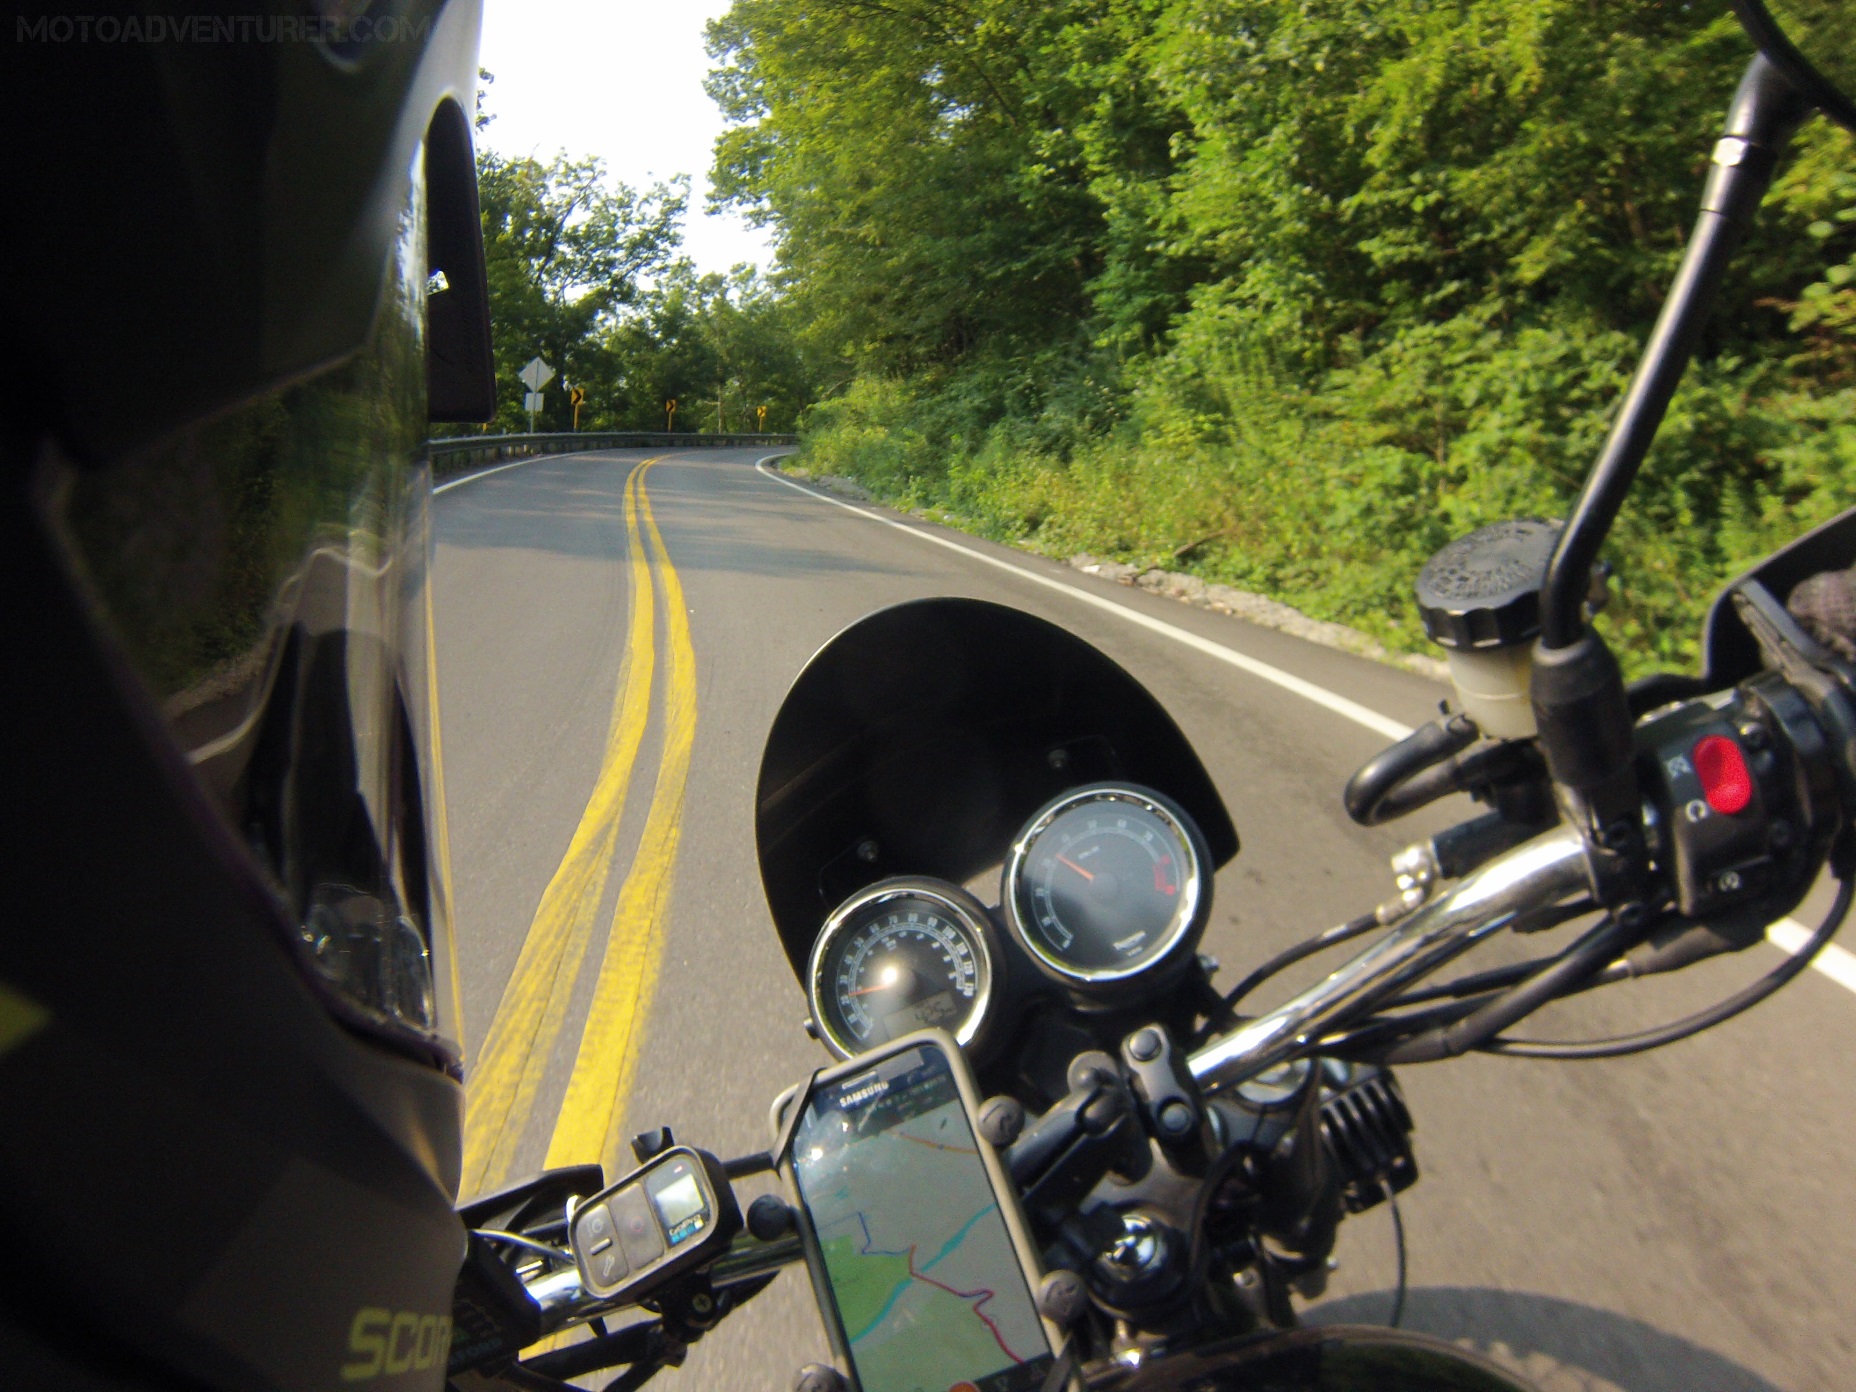 In my case, I have about 100 miles of fun and then the bike starts barking at me about needing fuel. In the city that’s no problem, but I find that on the Appalachian backroads, gas stations can be few and far between; getting lost while evading banjos and running out of gas can make for a long day. I also find that I’m typically of the mindset that I tend to jam as much sight-seeing as possible into a given vacation or motorcycle weekend. Not to say that it’s one destination to the next and I don’t stop to appreciate the view, but simply that I like to have a plan, and see how long it actually takes to ride roads “A” and “B” while still seeing landmark “X”. A route planner is still useful even if you want to have a “loose” plan for the afternoon; you have a starting point and then you can start ad-libbing as the ride progresses. I’ve also been known to do that, I’ve planned a route to a given destination, and then just made things up on the way back home; I’ve also changed routes mid ride after I realized that two planned routes overlap at a given point and I just felt like switching gears.
Short answer: Anyone that doesn’t want the fastest route, the shortest route, and has any sort of time/distance constraint, that’s who needs a route planner.
What is REVER?
Rever (“rev-er” like revving a motorcycle) is a mapping, route planning, and recording application that is both web based and a mobile application. From the rever.co website, you can login to create rides on their mapping software, network with other riders, join riding communities (similar to Facebook groups, but with maps), share planned and recorded rides, join riding challenges (win free stuff!), and track your mileage. From your phone you have the ability to record your rides at any time, monitor your position on the map just like a traditional GPS device, check your status in ride challenges, load routes from your riding communities, or load pre-planned routes from your own personal “planned rides”.
All of the before mentioned features are included with the standard, free membership to Rever. When you upgrade to a premium membership ($6 a month or $60 a year) you get access to Butler Maps best road recommendations, access for off-line maps (recommended for backroads riders…), the ability to export routes as GPX (so you can upload them to your Garmin for turn-by-turn directions), and the ability to create riding groups in the Rever “Communities”.
Why Would I Choose REVER?
Route planning software is obviously not new, I suspect Garmin’s Basecamp has been around for some time now (along with Mapsource and Roadtrip before that). I also suspect that those familiar with Basecamp (et al) are not likely to stray far from it unless there are significant features or time savings to be had elsewhere. If you have an existing GPS unit and are familiar with various trip planning software, Rever is probably not for you; you might find it to be a convenient solution in a pinch, but you have probably used your GPS long enough that you have well established habits.
On the other hand, if you’ve been looking at dedicated motorcycle GPS units, you’ve likely discovered that a good functioning GPS unit is going to set you back upwards of $250 used, and easily $400 new. Most of us have a cell phone by now, and most of them are also smart phones, including an embedded GPS unit (which is actually pretty accurate these days). I find quite a few riders already have a cell phone mount on their bike, and like myself, many riders are already using Google Maps and Waze depending on where they’re headed. If you’re already using your phone for maps and are looking to avoid the expense of a dedicated GPS unit, Rever is a reasonable option if you’re looking to put together rides that are more complex than “fastest” or “shortest distance”.
There is also one last caveat, Rever does a great job placing the magical “blue line” on a map for you to follow, however they have not yet launched “turn-by-turn” directions. I have been running paper, and watching GPS tracks with no audio for some time now, so the lack of turn-by-turn is an inconvenience, but it’s not a deal breaker, if you absolutely need that feature, Rever may not be for you; however, considering it’s free, it’s worth it to at least give it a shot.
Getting Started with Rever
 From Rever’s homepage (http://rever.co), you’ll find a brief video, and several links that explain more about the features of the app and additional features available to premium members, along with the background about the founders, help, and FAQs.
  To get started, click on the “Sign Up For Free” button to open an account. The button links to the login page where existing members only need an email address and password, but new members should hit the “Click Here to Register” button by the “Not a member yet?” text. While I’ve never tried it, you can also login with Facebook. Several folks in a hurry used the Facebook option at a rally I attended back in April, so it does work if that’s easier for you.
 Once you’ve clicked “here” to register as a new member, the login page changes to include first and last name, e-mail address, location, and password with confirmation. Choose your name carefully, that will ultimately become your “handle” on Rever and that’s how your friends can find you under the friend search.
Once you’ve successfully logged in, Rever will take you to your “Dashboard”. From the Dashboard, users will find their ride statistics, tracked and planned rides, challenges, ride feeds from your Rever friends, communities, and obviously the ride planner.

How to “Plan a Ride”
From the Dashboard, Rever offers you at least two ways to get to the ride planning feature, the “Plan Ride Now” feature dead in the center of the screen, along with the orange crosshair in the upper right hand corner of your browser window; when you hover the mouse over the cross hair it expands to “Plan A Ride”. Clicking on either of those links will launch the ride planner.
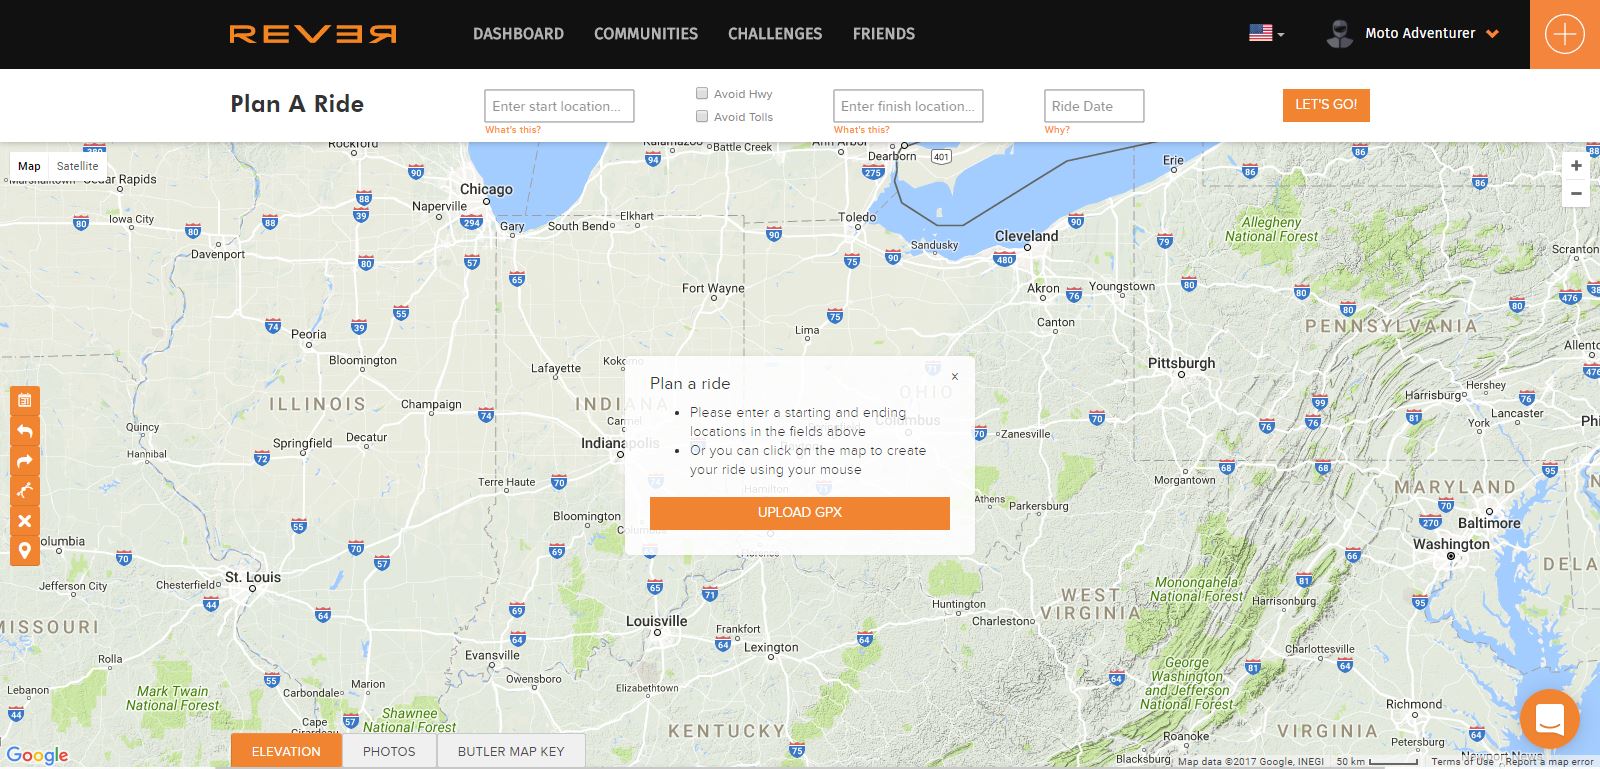 Once on the Ride Planner screen, you’ll notice a dialogue box in the center of the screen prompting you to upload a GPX file. This is a very convenient feature when you have a friend that wants to share a GPX track with you, or in my case, I have downloaded the GPX files from TheDragonRaid.com so I can upload pre-planned Dragon Raid routes at this year’s rally without having to make them manually. GPX files are convenient when routes are complete, but there are limitations; you cannot make changes to an uploaded GPX track. You can however, use it as reference for a new route by using a separate browser tab. In this case, we want to make a new route from scratch, so go ahead and click the “x” to close the GPX upload prompt.
 Rever can be used in a similar fashion as Google Maps, if you know the addresses for your start and end points, you can type them into the “Start Location” and “End Location” boxes and Rever will provide you with the fastest route between those points. We’re talking about riding a motorcycle here, so needless to say I’m not interested in the fastest route, so similar to Google maps, you can drag the route “line” around on the map to modify the ride to suite your taste. Unlike Google Maps, Rever provides you with up to 24 waypoints.


The Rever route planner also starts with the “Terrain” map overlay enabled as the default view. I like the ability to look at the terrain when I’m getting into the specific details of the ride, but I typically turn terrain “off” when laying out the initial route (un-check the “terrain” box under the “Map” tab in the upper left hand corner). I will also admit, I seldom know the exact address for my ride destinations. Fortunately Rever offers an alternate method for route planning, you can also click on the map to insert additional waypoints. You can click the orange “X” on the left hand side of the screen to end the active route and start over fresh. You’ll have to close the GPX upload prompt box again and you can get started.  Wherever you first click on the map will be your ride start point; from there you can click additional places along roads or intersections and add additional waypoints to the ride, the last click being the end location. You may also find that your waypoint “pins” are not quite in the locations you want them in. You can hover you mouse over those pins, click, and drag those pins to the desired locations to adjust the route as needed.
 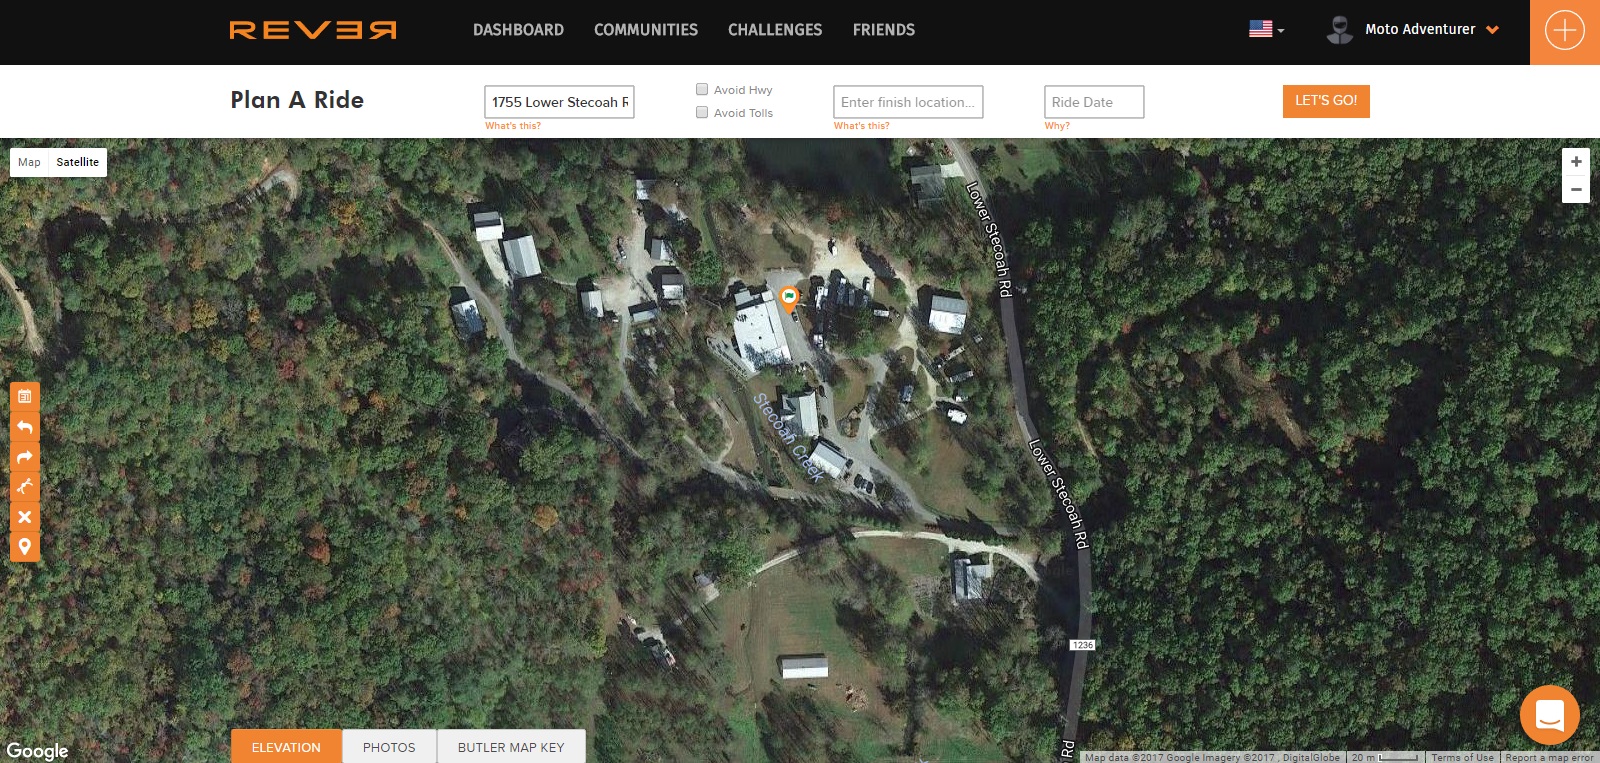 There’s also a waypoint “pin” icon on the left side of the screen, clicking on the icon will open a list of all of the waypoints on the map. You can drag those waypoints up and down the list to reorder your ride as necessary; you can also delete unwanted waypoints from that list. Similar to the before mentioned “Terrain” map overlay, Rever also offers Google Satellite views, which I often use to fine tune waypoints or end locations.
Once you’re happy with the route you have laid out, you’ll want to save it for later use.  You’ll want to click the “Save” button in the upper right corner, which will drop down additional options. Rever will want you to provide a name for your route in the “Title” box. You can also change the ride from “public” to “private” in a drop down box if you don’t want anyone to have access to your route. You can also dictate the type of ride the route is, such as “Street”, “Singletrack”, or “Adventure”. I typically mark “Adventure” for dual sport rides I put together, that way my friends don’t unsuspectingly end up riding down a gravel road. While not required, you can also add comments to the route; I will occasionally add details about the breaks, highlight specific roads, or include notes about difficulty in that field. Once finished, hit the “Save” button a second time to upload the route on to the Rever server. Once saved, Rever will take you to a ride overview screen where you can review the map, see the route statistics (elevation, time, distance), along with “Share”, “Copy”, and “Delete” buttons. The “Share” feature will let you send the route to Rever friends, e-mail addresses, or offer you a link to your ride to share on your website or social media. Once you’ve reviewed the ride, you can plan another route or go back to the Dashboard.
Adding Rides from Rever Groups
Before I talk about riding your planned routes, I want to show you a second option for adding routes to your “planned” rides.  From the dashboard, there’s a section called “Communities” where you can find Rever groups, including “Red River Scramble” and the “Triumph Dragon Raid”. Scrolling down your dashboard to the communities section, click the “Go To Communities” button. On the Groups page,
  you can scroll down the list and look at all the Rever groups or you can type keywords into the search box, like “Dragon Raid”. Rever will take a moment to search the groups list and eventually return results for your search criteria. When you find the desired group, you’ll see a “Join” button on the right side of the group stats. If the group is listed as private, you see a “Send Request” button instead of “Join” (an Admin will have to approve you to see the group details). By clicking on the link in the group name, Rever will take you to the group page where you can see additional details about the group and its members.
 On the group page you’ll find a brief description of the group, statistics about the group’s riders, announcements, and featured group rides. Under the “Community Featured Rides” you can browse pre-planned routes available to group members. By clicking on one of the ride names it will take you to a ride overview screen; from that screen you can click “Copy Ride” button to place that ride into your “Planned Rides” queue.
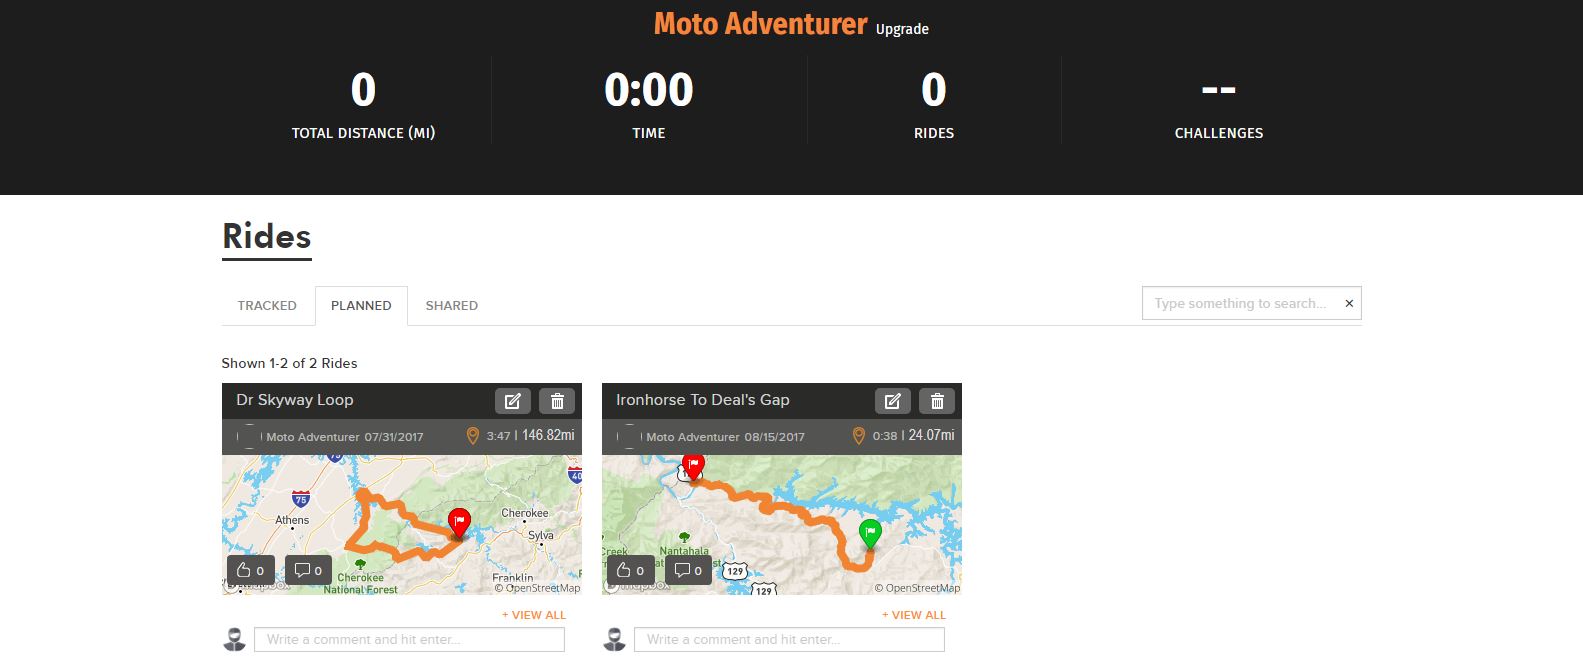 Back on your dashboard, you can scroll down to the “Rides” section and click on the “Planned” tab to review the rides that are listed in your planned route queue. You can click on the route names to look closer at the route details, copy, delete, or share those rides.
How to Load a Planned Ride on your Phone
Once you’ve finished planning or copying a ride to your Planned Rides you’ll need to download the Rever mobile app from Google Play or the App store. Once the application is installed on your phone, you’ll need to “Log In” to Rever with the same credentials you used from your website profile. Once logged in, and assuming your GPS is turned on, Rever will show your current location on the map.  From this screen you can “Start Tracking” a ride immediately if you don’t want to ride a pre-planned route. On the other hand, if you want to bring up a pre-planned route, you’ll want to hit avatar icon on the lower right hand corner to bring up your rider profile stats and rides.
  From the profile screen, you’ll see a button called “Rides”; clicking on the “Rides” button will take you to your “tracked” rides by default, you’ll want to click the “Planned” tab to switch to pre-planned routes. From the Planned tab, scroll through your list of pre-planned routes and click on the name of the desired route. Depending on the complexity of the route, it may take a moment for Rever to download the route information to your mobile.
  Once the ride has loaded, you’ll see the map on your screen along with ride statistics (estimated time and distance) and a button at the top that says “Ride it”. When you click “Ride it” Rever will automatically start recording your ride and switch to the “Tracking” home screen. You’ll see your position on the map, along with the highlighted blue line that shows you the pre-planned route. From here, all you have to do is follow the blue line and enjoy the ride.


Caveats about using the Rever App on your Phone
It’s important to note, if you’re in a location with no cell service, you will not be able to pull up a pre-planned routes from your “Planned Rides”. You can continue a ride if you lose cell service, however data service is necessary for uploading or downloading rides. If you’re using the free version of Rever, you may also lose map data in the event you lose cell service. The blue line will remain on the screen, but the roads may disappear until you return to cell service. I forgot to download the West Virginia maps a few weeks ago and actually experienced this problem. It’s a little frustrating, but when you see the blue line make a hard left, it’s obvious what you need to do. It also goes without saying that your phone battery will be heavily taxed when you leave the screen on while running a route. I highly recommend you get a USB port or SAE 12V adapter to charge your phone if you plan on using Rever.
As I mentioned earlier, Rever does not currently offer turn-by-turn directions. In the event you stray from the pre-planned route path, Rever will not tell you that you have missed a turn, and there are no signals on the screen that you need to turn around. There have been a few instances where I have been so engaged in the road that I have missed a turn. Most of the time it has happened in the first few feet and I have been able to do a U-turn and continue the ride, but on a couple occasions I had to pull over and consult the map to determine where to backtrack. Fortunately, Rever leaves a “trail” on the map where you have been, so it’s not too tough to find the fork in the road you missed.
As I mentioned in the beginning, Rever is not necessarily the best solution for many of the technophiles out there. However, from what I’ve found, Rever is one of the most user friendly options available for route planning, and has an impressive user interface for a company that’s building a motorcycle GPS solution from the ground up; not to mention that the Rever team has been ultra-responsive to questions and issues in my experience. Rever is now on version 3 for the Android platform; during some of the previous releases, I experienced a few minor issues with my Rever app, both of which have been addressed by the team with their updates.
I’ve tried to cover the basic user skills for the Rever website and mobile app in this write up, for folks that are looking for more step-by-step instruction, you can also catch some Rever how-to videos in the links below and also on their blog.
Planning a Ride Video

Hi. Does Rever show nearest gas stations? Even yes – how? Thanks.
LikeLike
Hey Helika! Sorry, my wife was in the hospital when you left this comment and I totally missed it, my apologies! To my knowledge Rever does not currently show gas stations. I suspect this is something they’re working on, but they’re a pretty small group, so they have to tackle one challenge at a time.
LikeLike