

Somewhere in late 2020, I started writing this update on the status of Rosie the Scrambler and it “got lost in the move”. At any rate, a buddy of mine asked me the other day if I planned on posting something that covered all the stuff I’ve done to the Scrambler since I’ve had it. As I’m publishing a library of “scrammy knowledge” here on the blog, it seemed fitting to post that update here first.
Springy Bits

Somewhere during “3 months to slow the spread” a buddy sent me a screenshot of A&J Cycles selling a suspension kit for the 865 Scrambler. Considering I hadn’t driven my Jeep in months, the wife didn’t seem too upset about me spending saved gas money on a suspension upgrade I’d been putting off for years. I’d put something like 66,000 miles on the Hagon 2810 shocks and they were pretty much tapped at that point. For folks interested, I have advised elsewhere and will continue to say, I wouldn’t buy the 2810s again. They were a good shock for $375, but I would scrape together another $150 and buy a better set for your Triumph twin if given the opportunity.
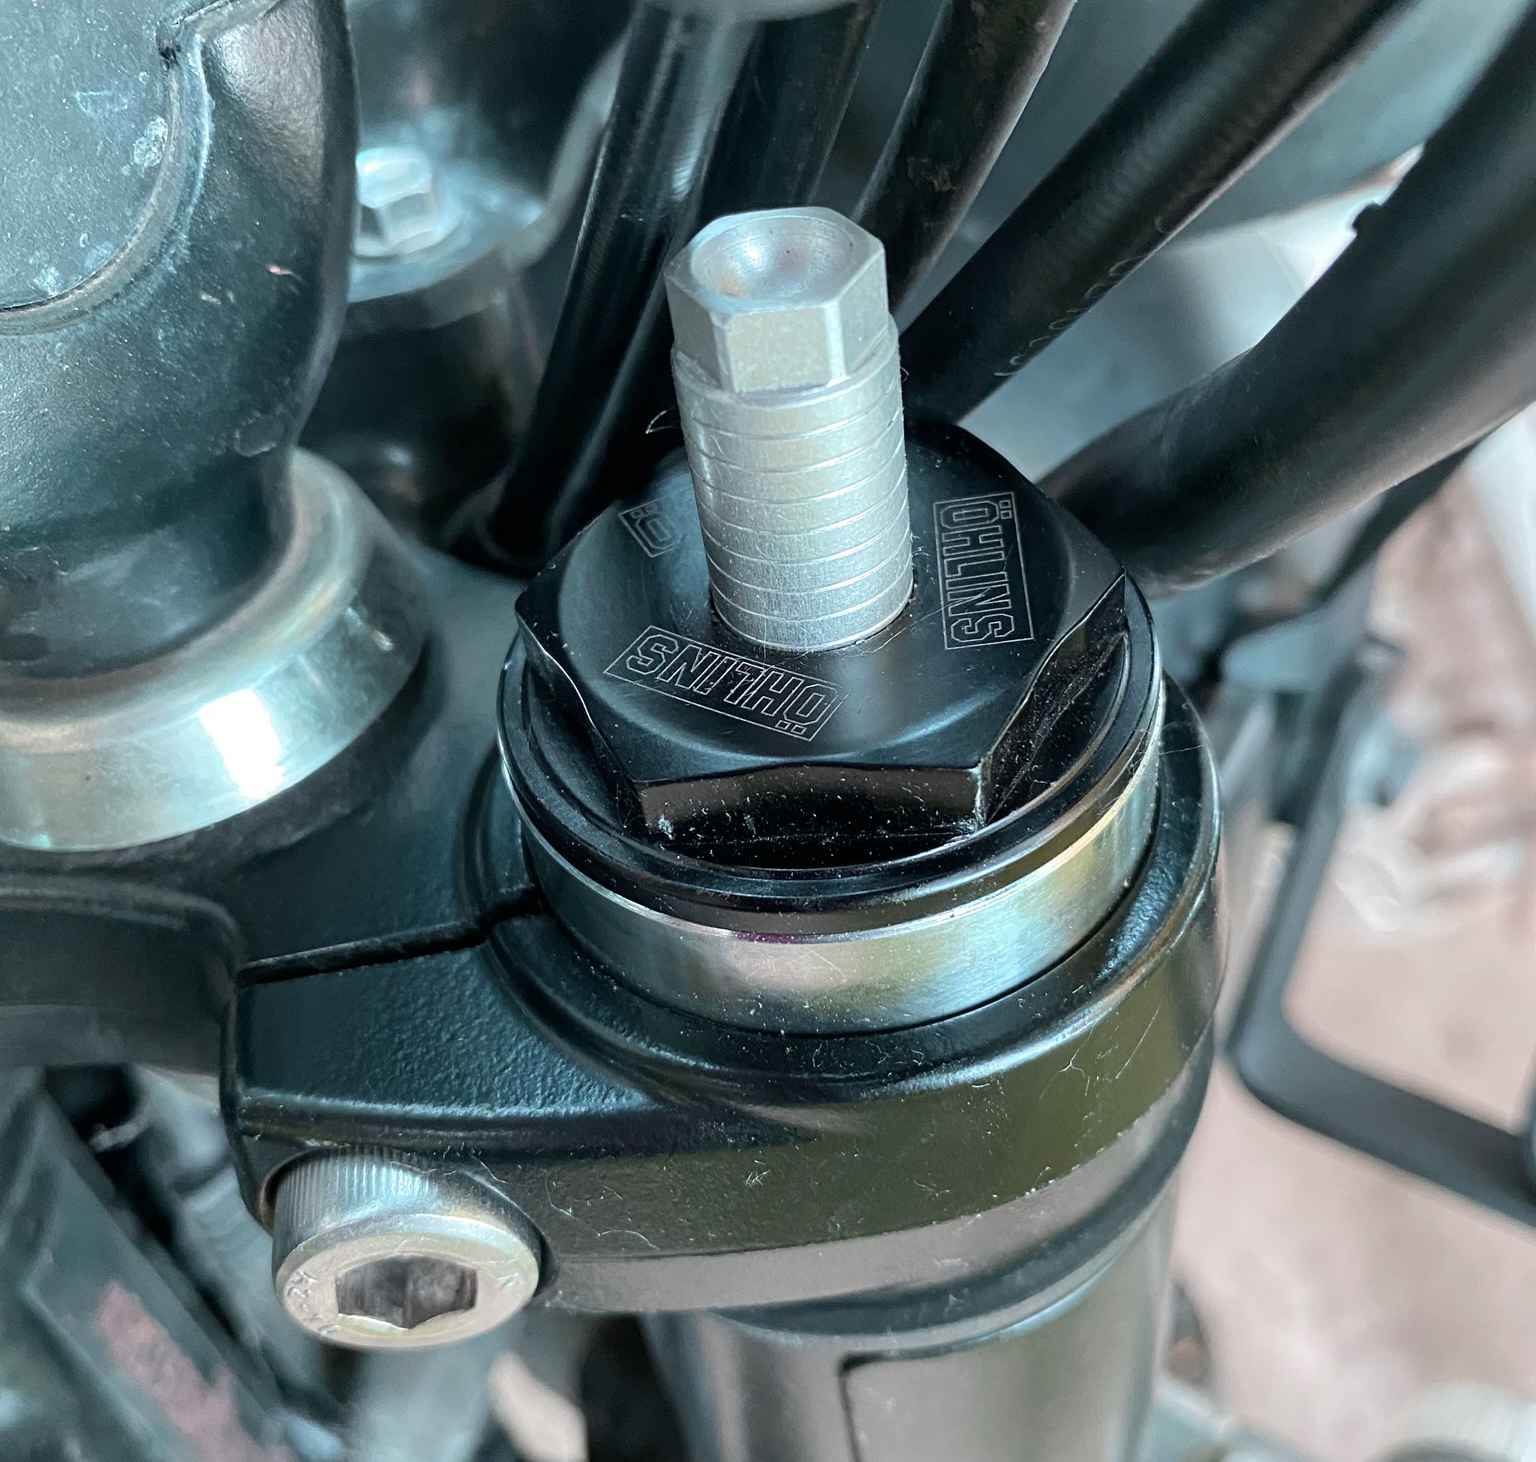
Anywho, A&J was selling a set of Ohlins S36 TR538 twin shocks, Ohlins fork springs, Free Spirit +30mm travel kit, and Ohlins fork pre-load adjusters for a bundled price. The parts were gently used for like 500 miles or less so I jumped on them. I’d been wanting to add the extra travel to the front forks for a long time, essentially giving the front end of the bike 6″ of overall travel. Equating that at the back of the machine is still a bit elusive, but at the moment, the new Swedish shocks add a little extra over stock, along with increasing the overall length to balance out the gains in the front. The bike handles better on the road and also gains a significant lean angle now that the entire bike is an inch taller.
After the upgrade, the bike leaned over on the kickstand significantly. I drilled a hole in the foot of the stand and bolted a 1″ piece of Delrin rod to the bottom of the foot to get the bike back to a more acceptable lean angle. There are more elegant solutions for this problem, but the “puck” on the bottom of the kickstand also serves as a wider footprint to avoid sinking in the mud.


Pegs
After the suspension upgrade, I took the Scrammy to Red River Scramble 2020. While blasting around contrary creek below Lago Linda Hideaway, I cut a corner a little too close and my left peg had a run-in with a healthy log. I kept the bike up and enjoyed the rest of the day, but my foot was a bit sore for the next week and I swore the bike felt funny. When I got home I realized I’d bent the aluminum mounting point in the Joker Machine pegs I’d installed back in phase 2.
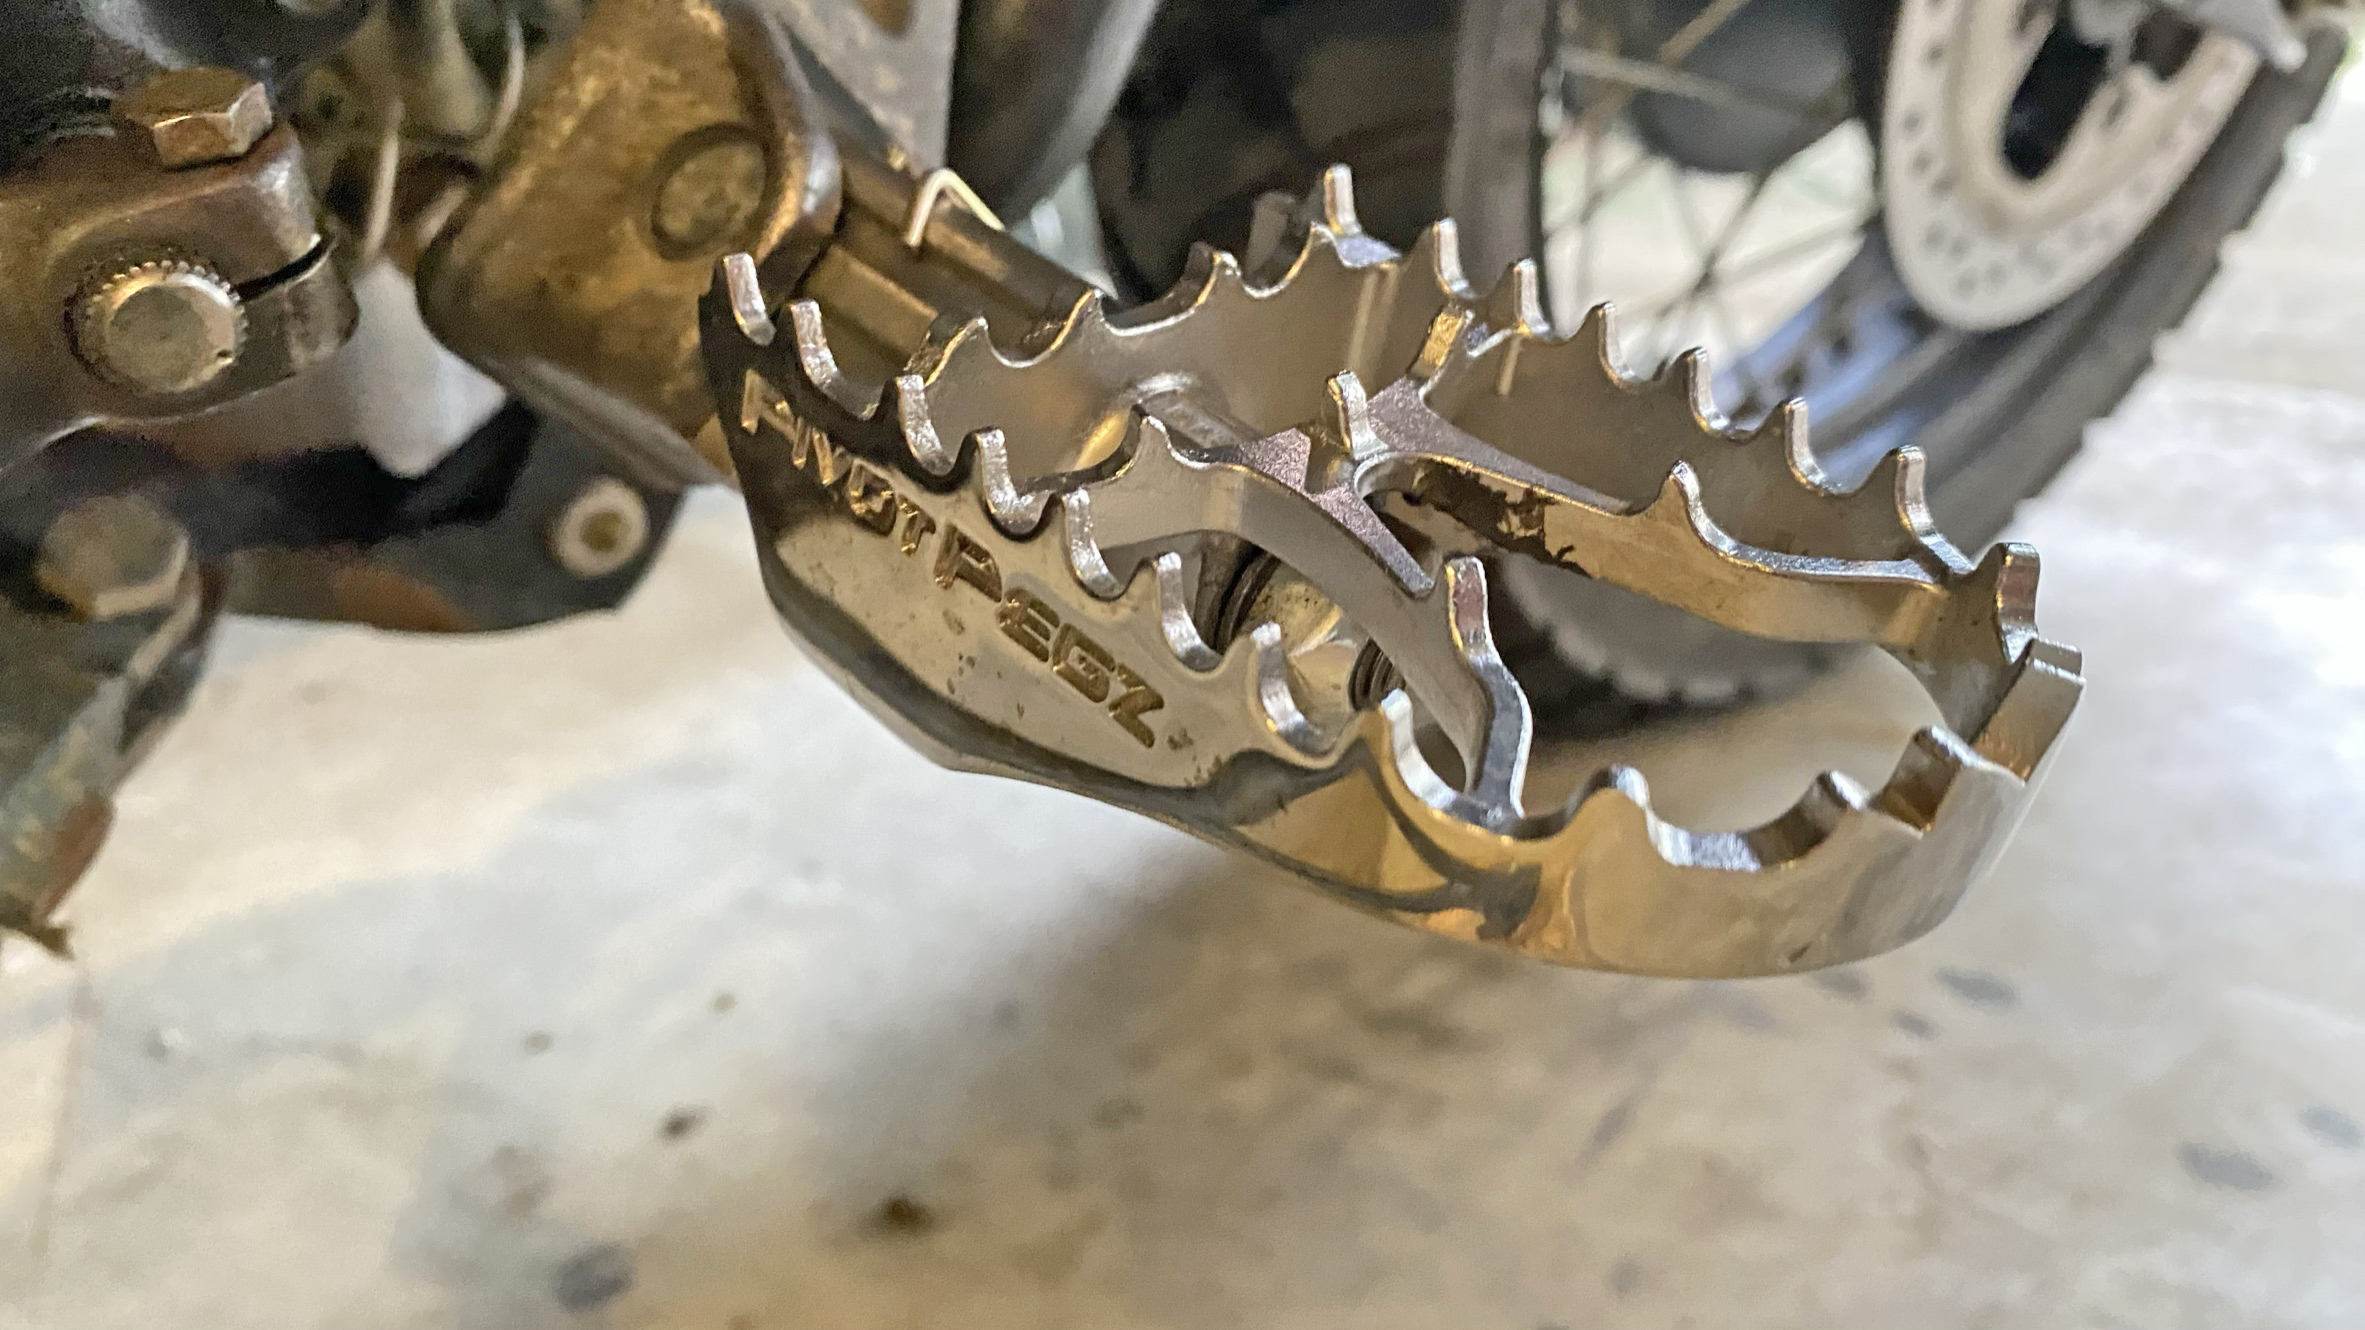
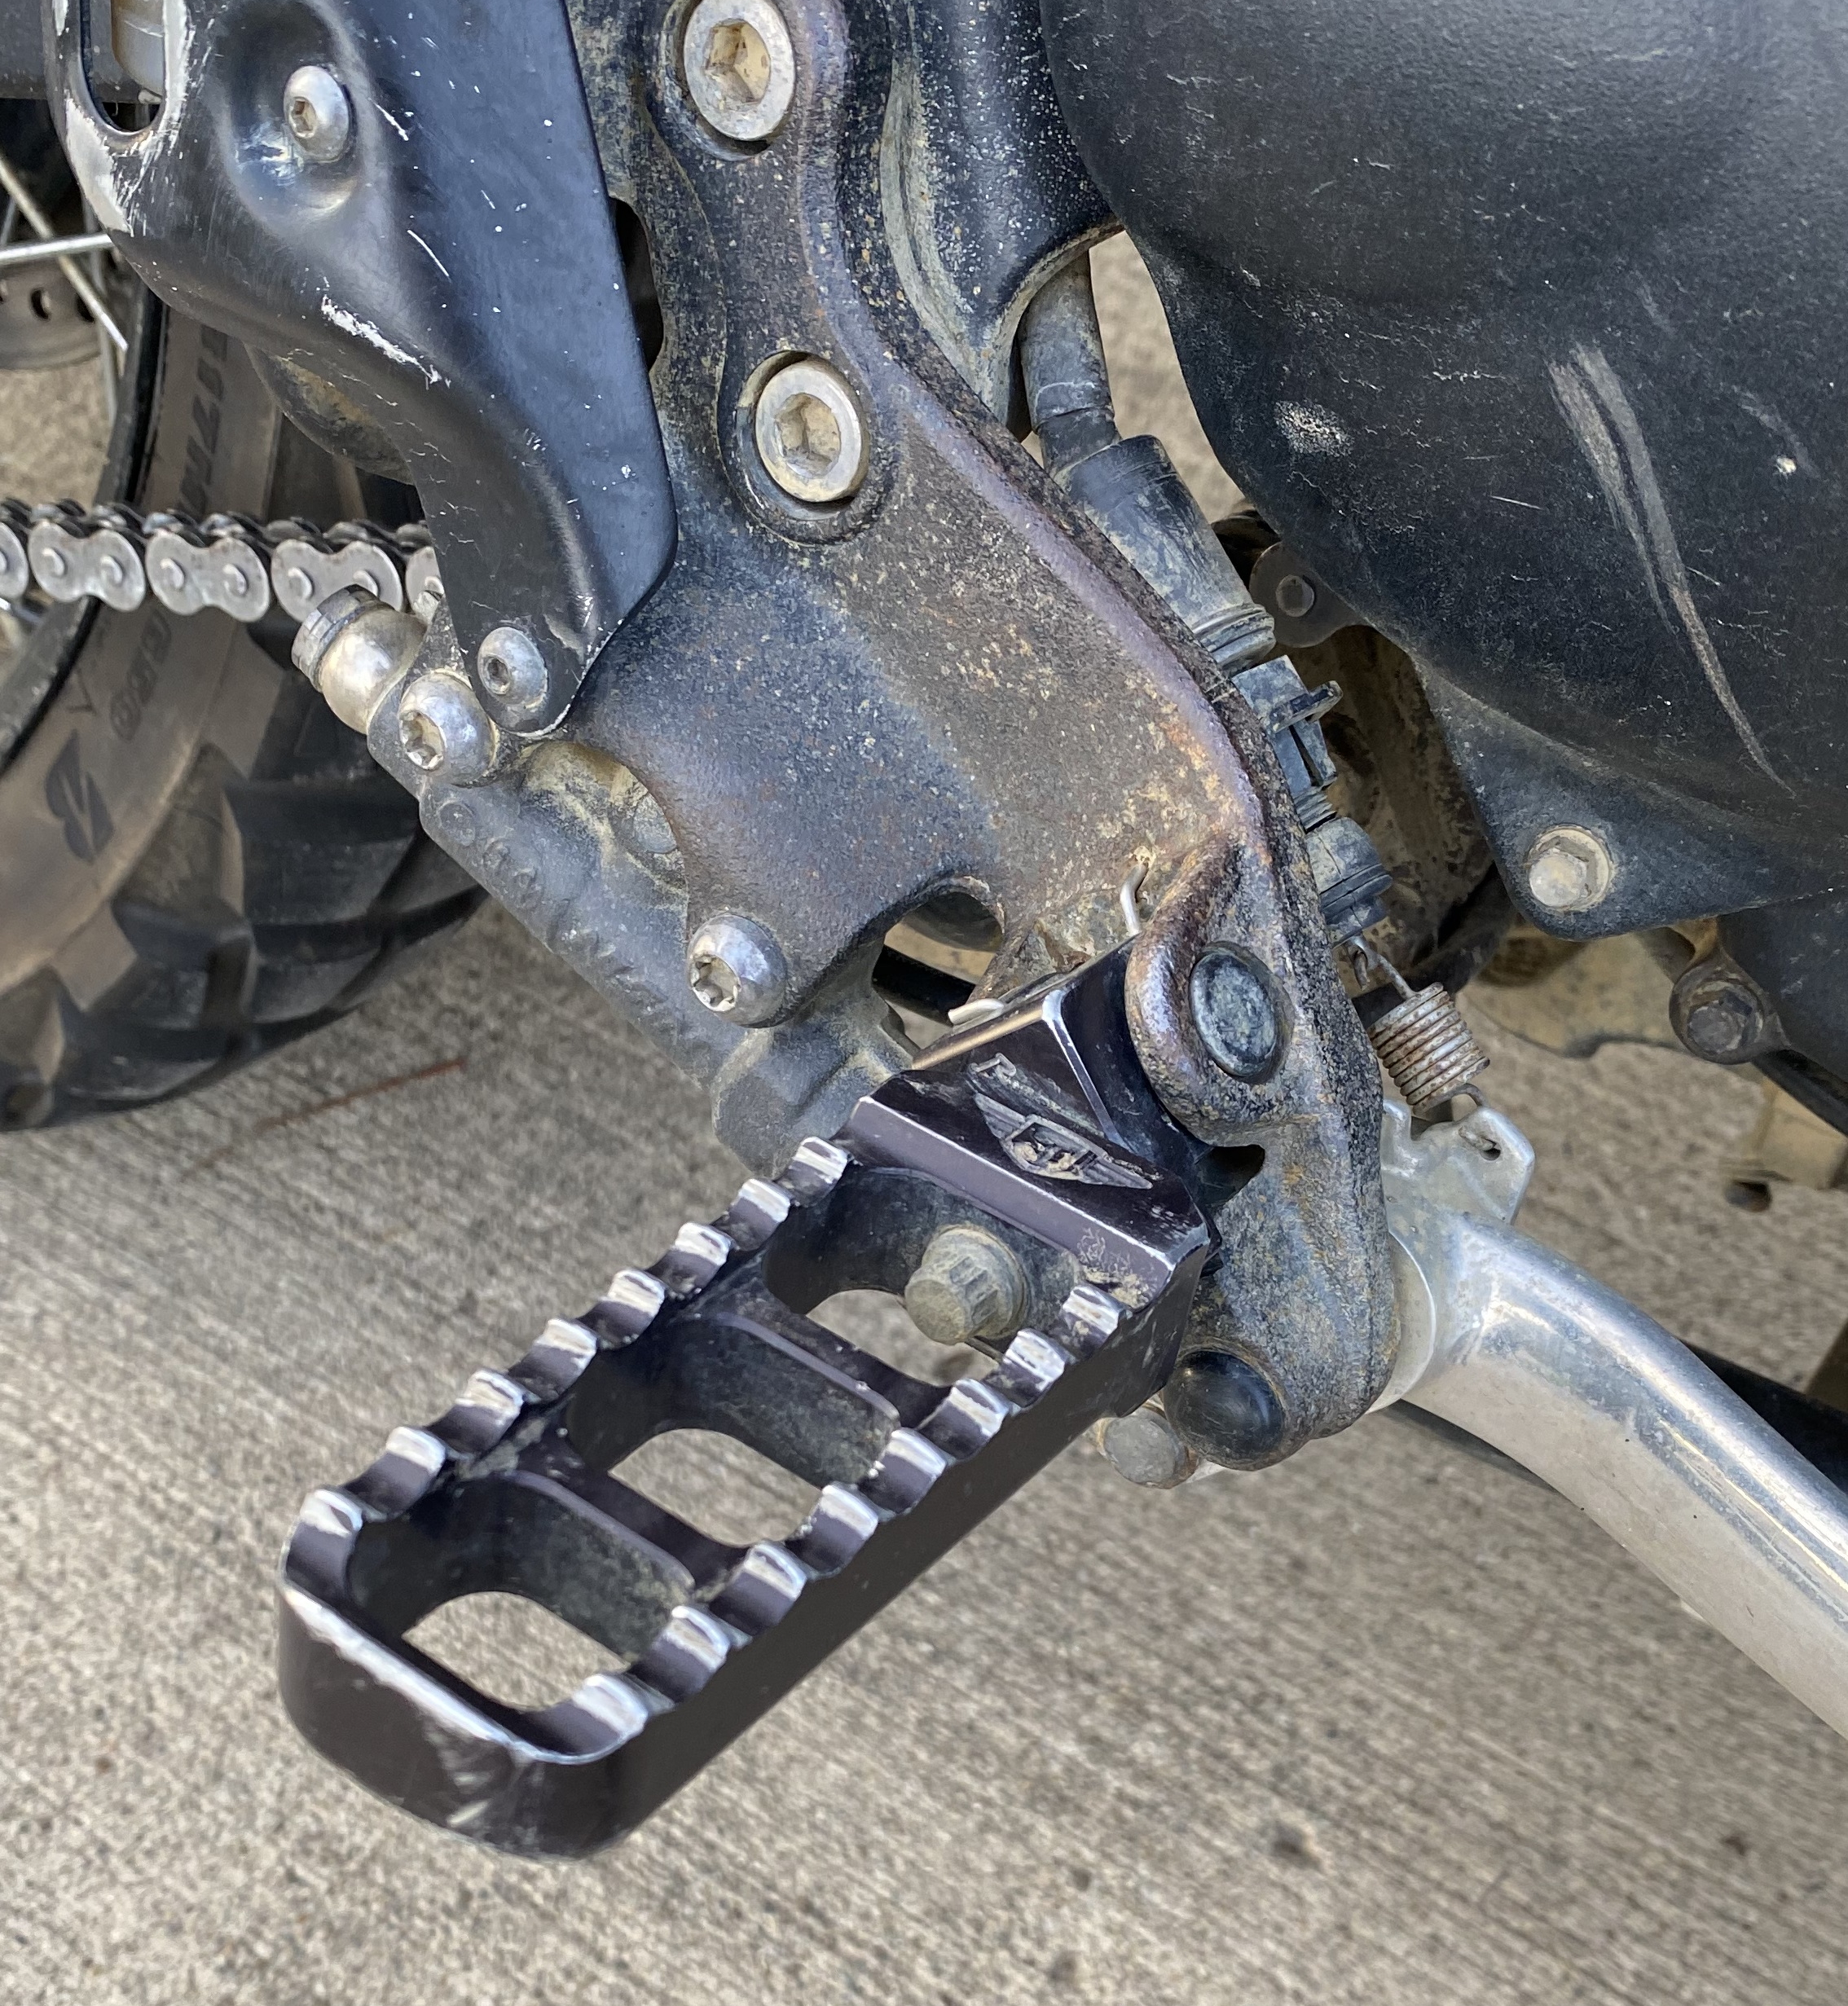
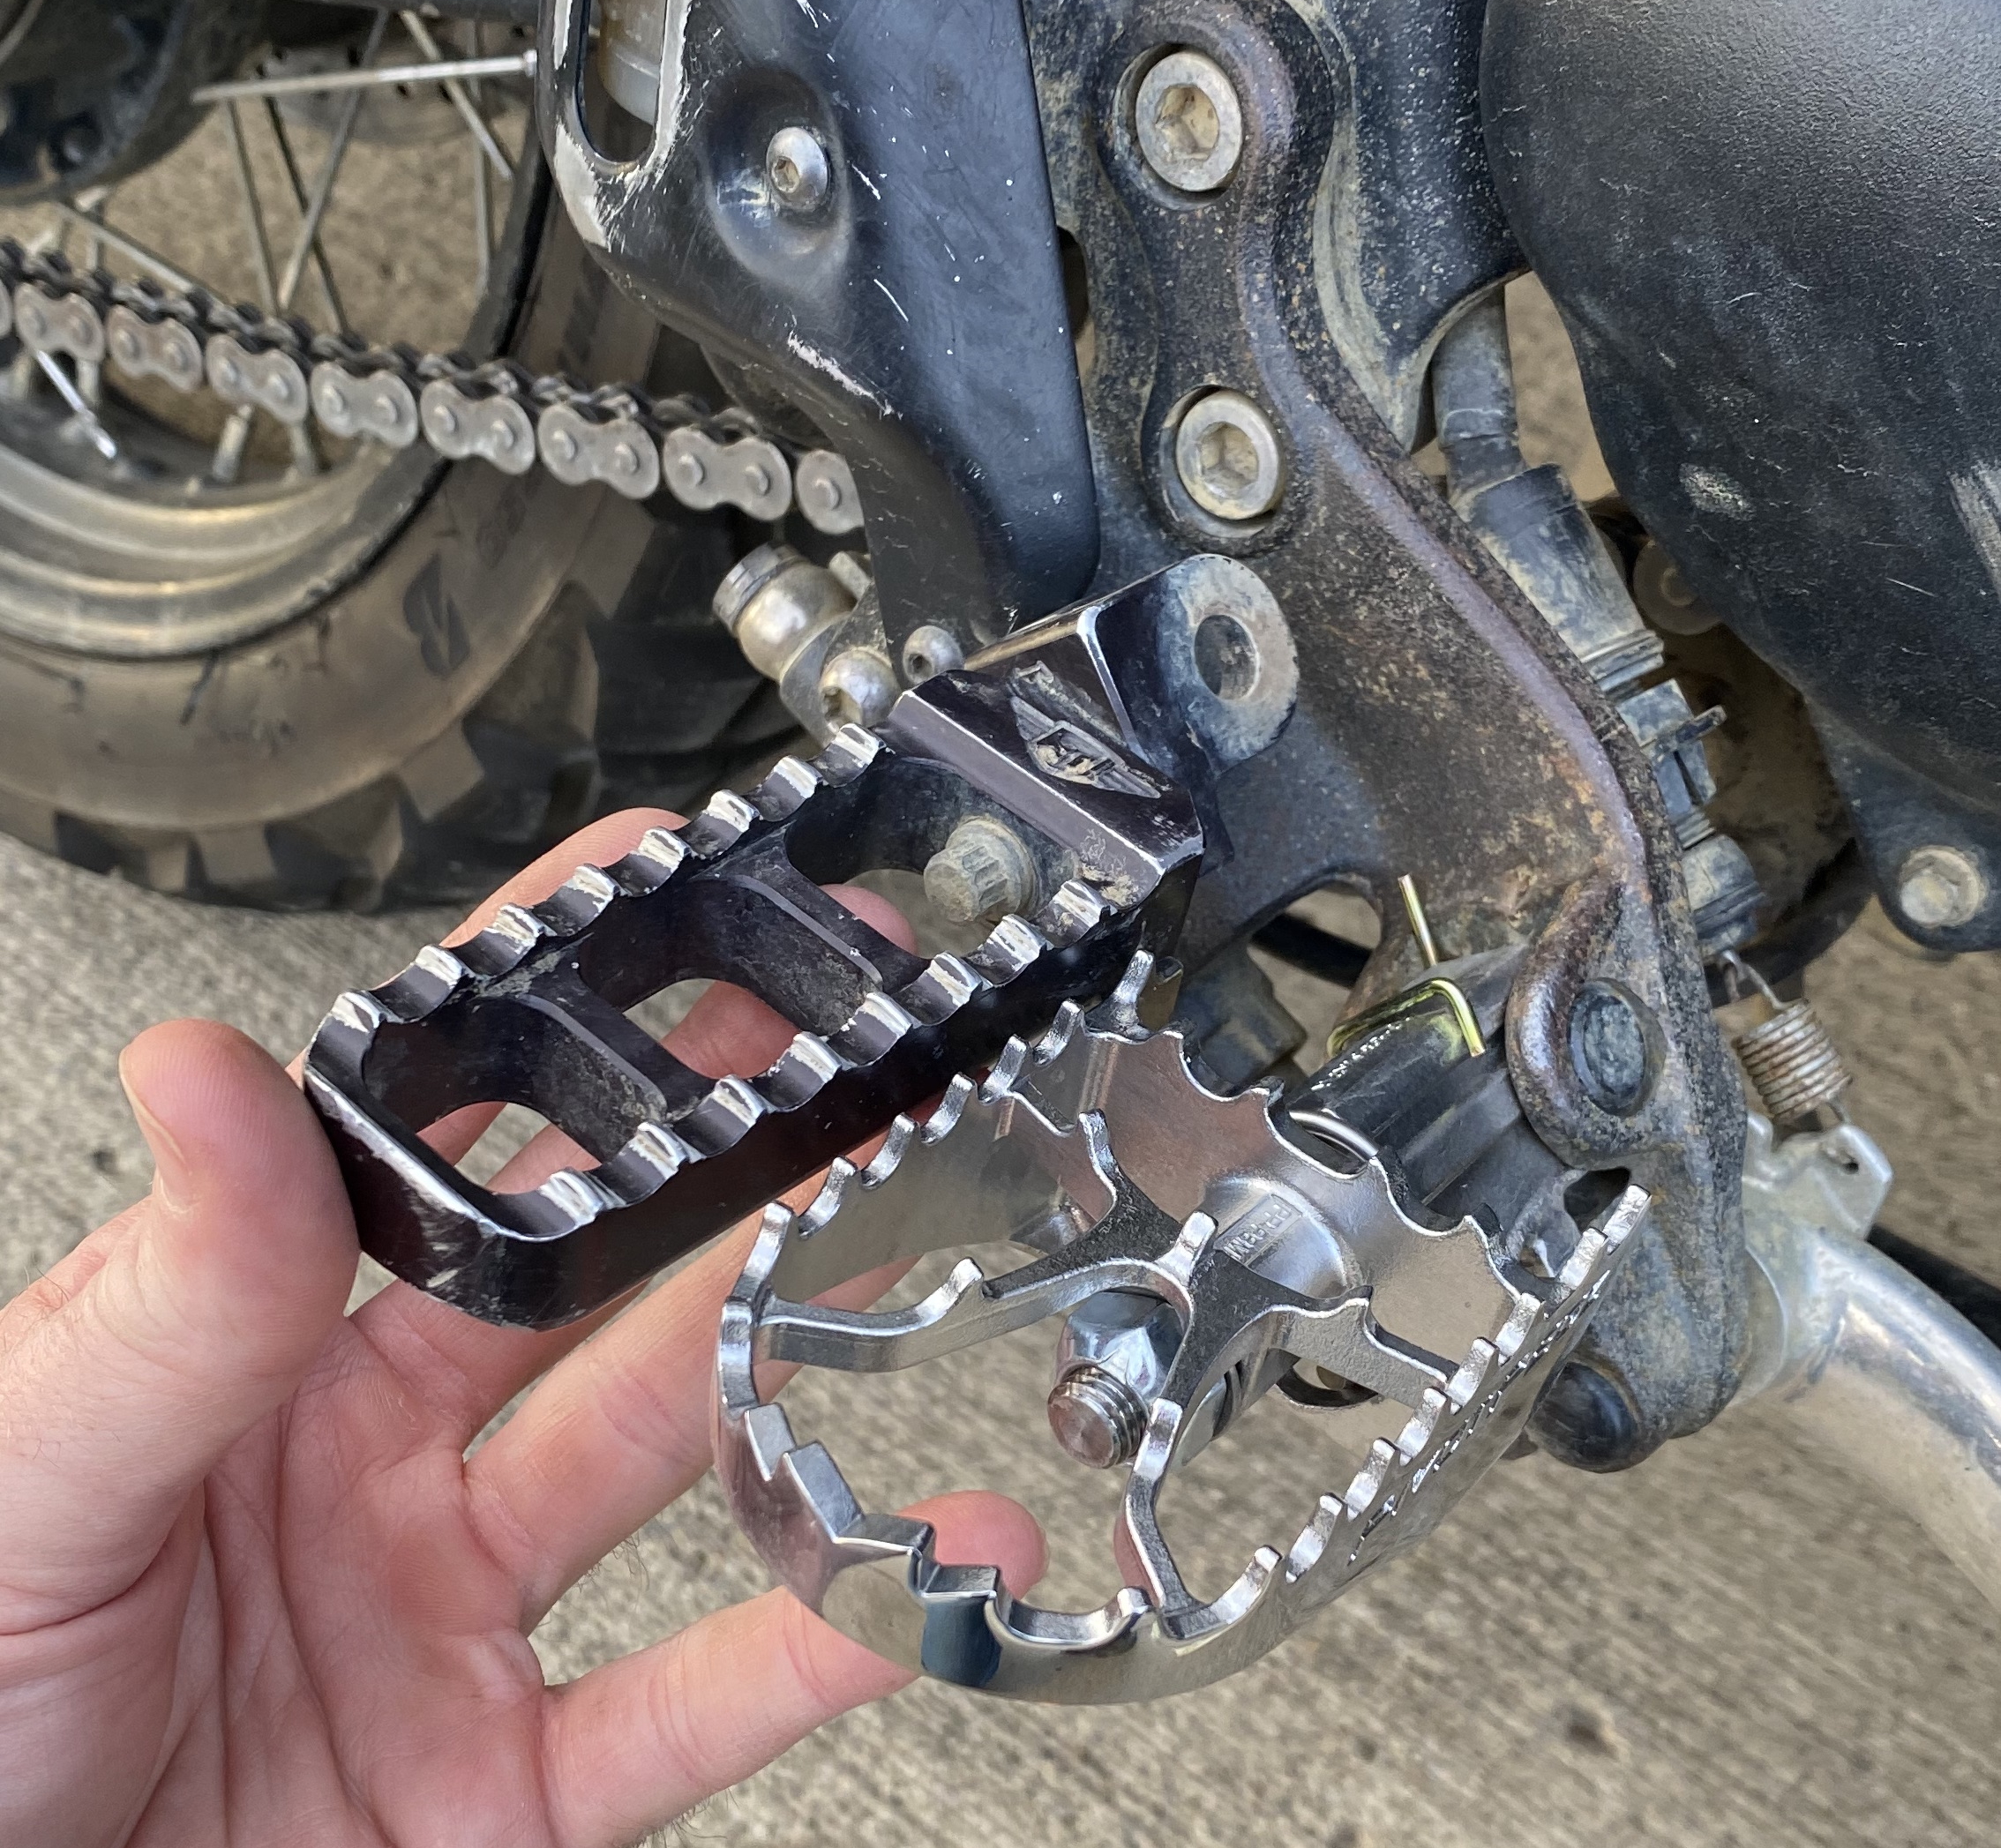
Up to this point, I was actually sharpening the teeth on the Joker Machine pegs every so often as they were wearing down with use. I was actually thinking about replacing them when the universe intervened. I had my eye on the SW-Motech pegs, however, due to supply chain issues I couldn’t find them anywhere. Fortunately, I stumbled on Pivot-Pegz while googling alternatives. Originally I wasn’t a big fan of Pivot-Pegz; I felt like they would be unnerving as your feet rotate forwards and backward with the bike for like 15 degrees or something. After riding my buddy Krey’s CRF450L with pivot pegz, I was sold. In the end, the Pivot Pegz struck me as higher quality and better looking than what was offered from SW-Motech for Triumph twins, and the price was the same so it turned out to be a win-win. That also combined with the fact the Pivot Pegz are a shade higher than the stock or Joker Machine pegs which adds just a hair more ground clearance.
Bars
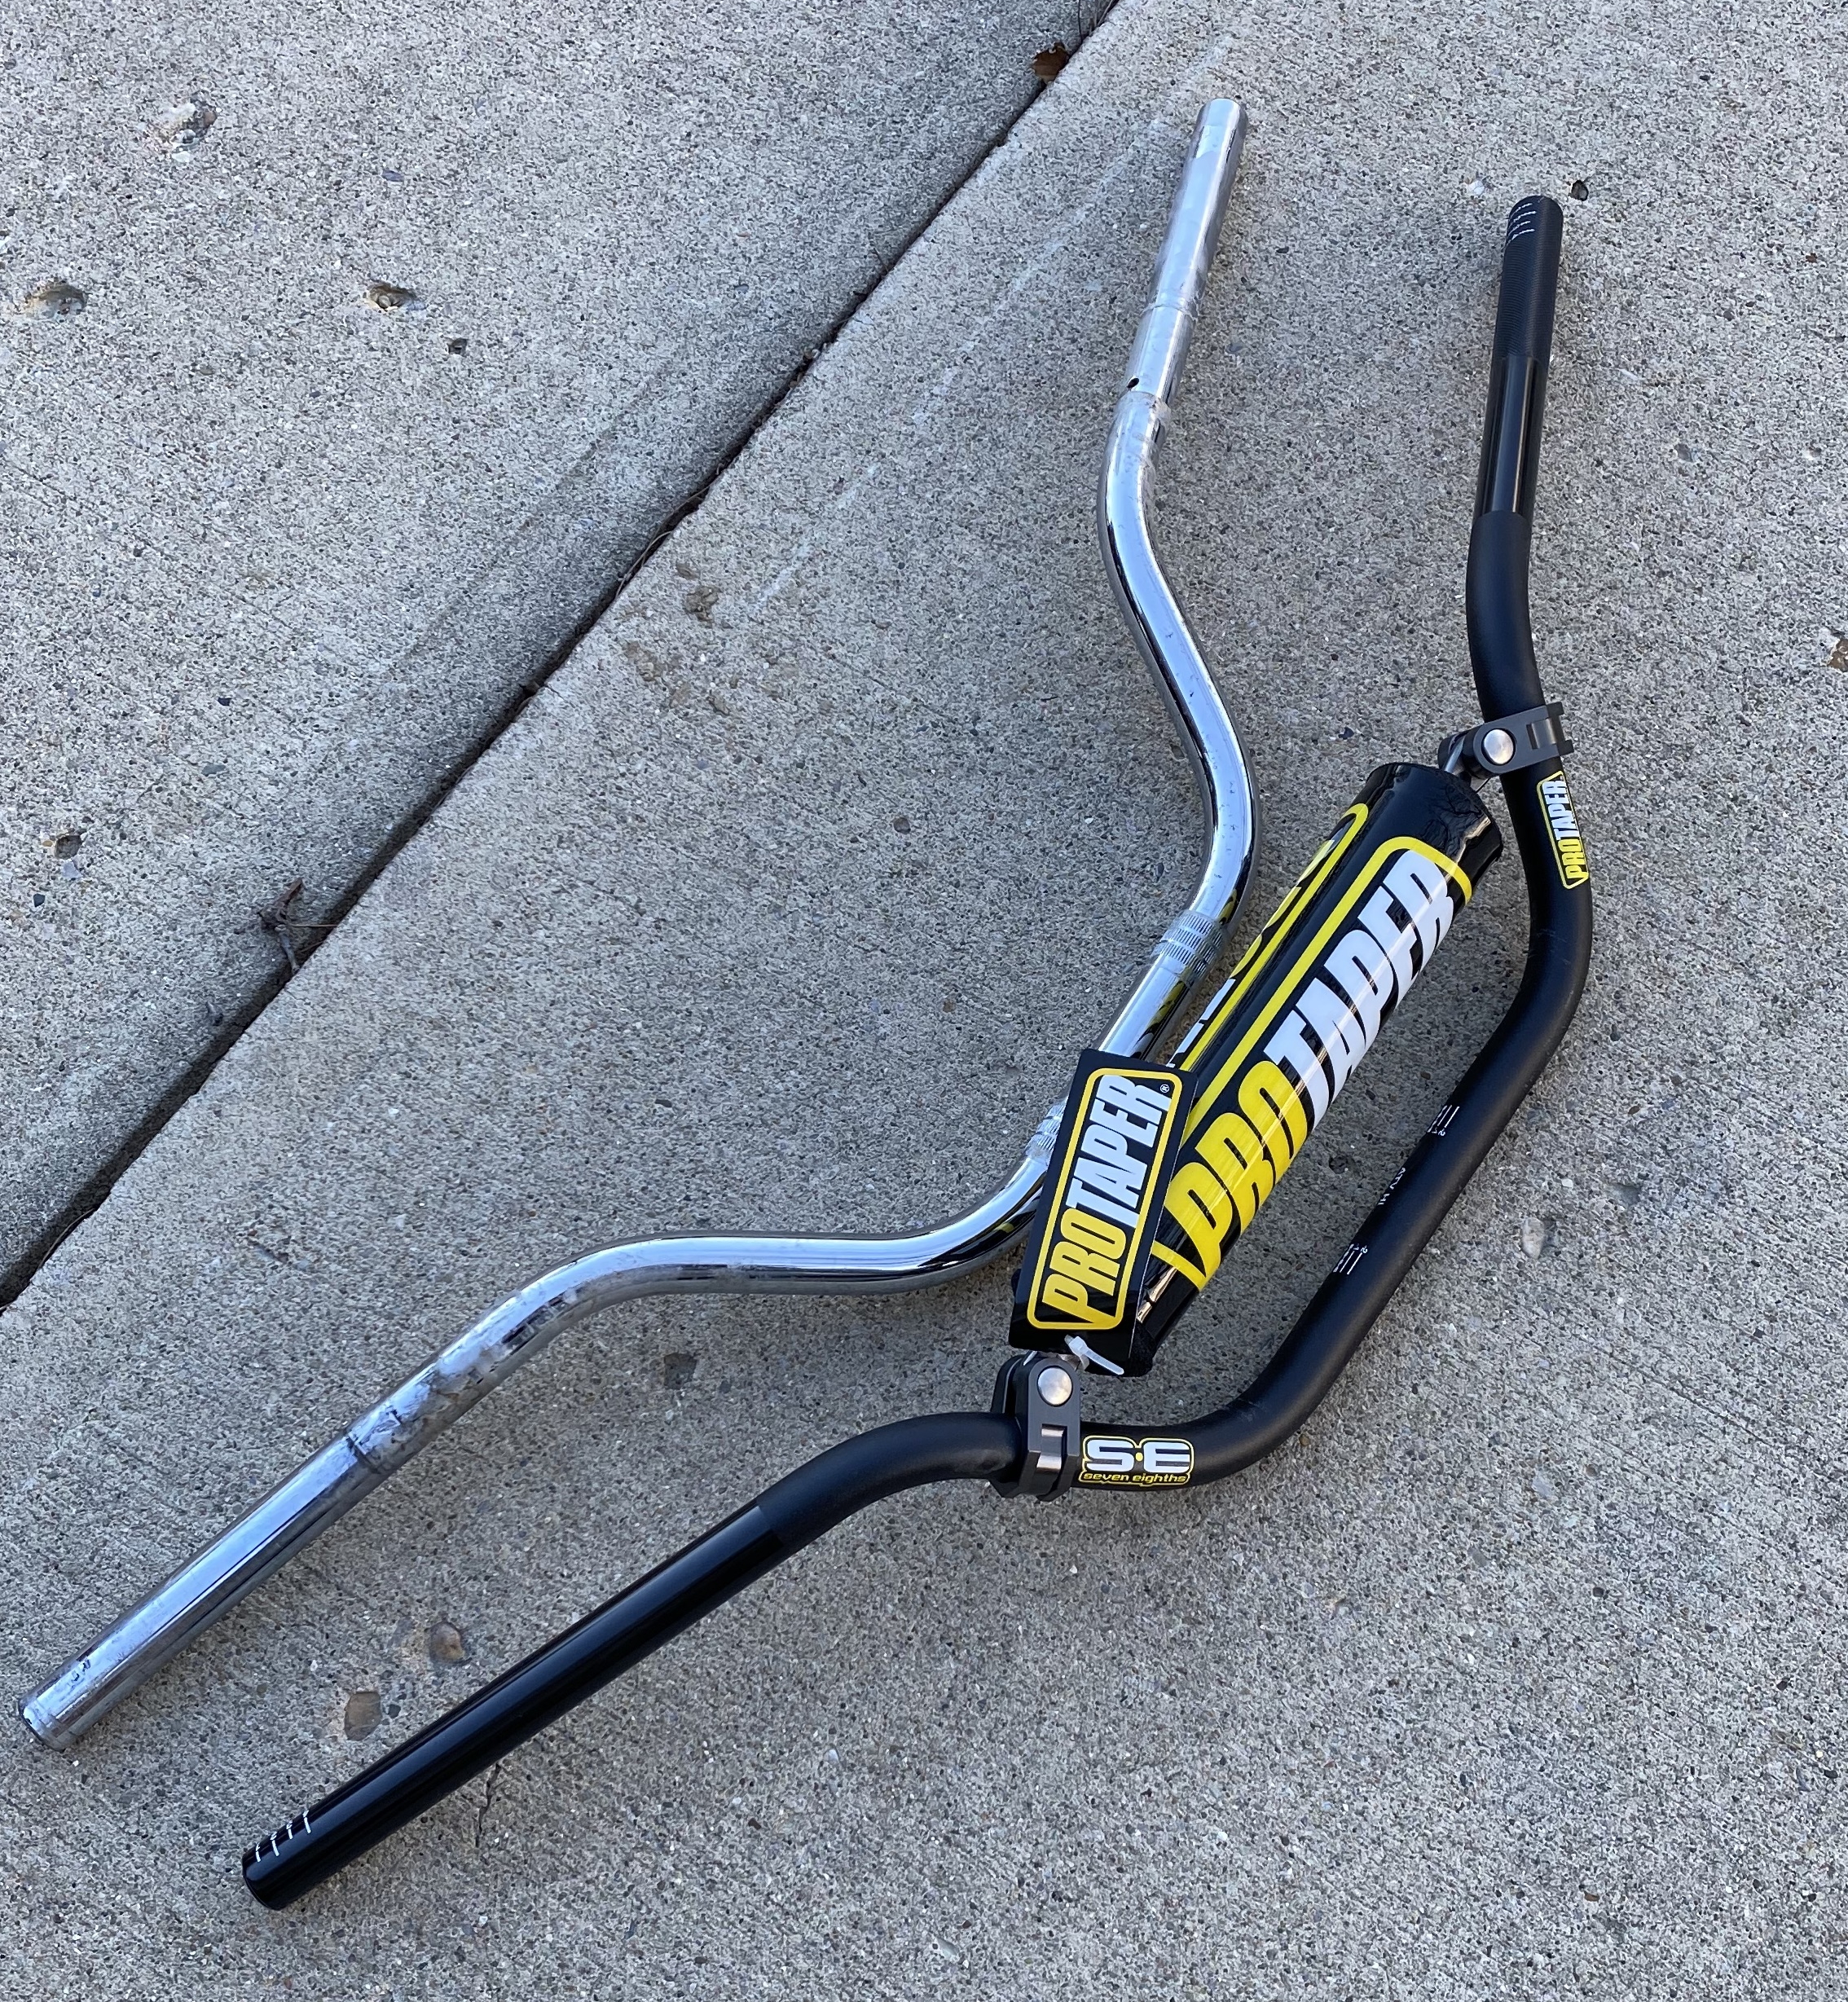
I’ve hated the chrome bars on the Scrambler since day one. After endless winter riding and living outside the chrome was starting to rust, and there’s no doubt the steel was heavy. I don’t even recall the circumstances, but I had an ADV-rider thread pinned with compatible bars sizes so I was already primed when the time came to pull the trigger. While I hated the chrome, I had always liked the stock bar dimensions, so I wanted to stay as close to that as I could. Ultimately I went with the Pro-Taper ATV high bend. The stock bars were 7/8″ and both sets of risers I have are also 7/8″ so I skipped out on the “far-bar” options, while I do prefer those over the traditional crossbar. The crossbar makes it slightly more difficult to mount your phone on the bars and so on, but it’s a worthy compromise at this stage.
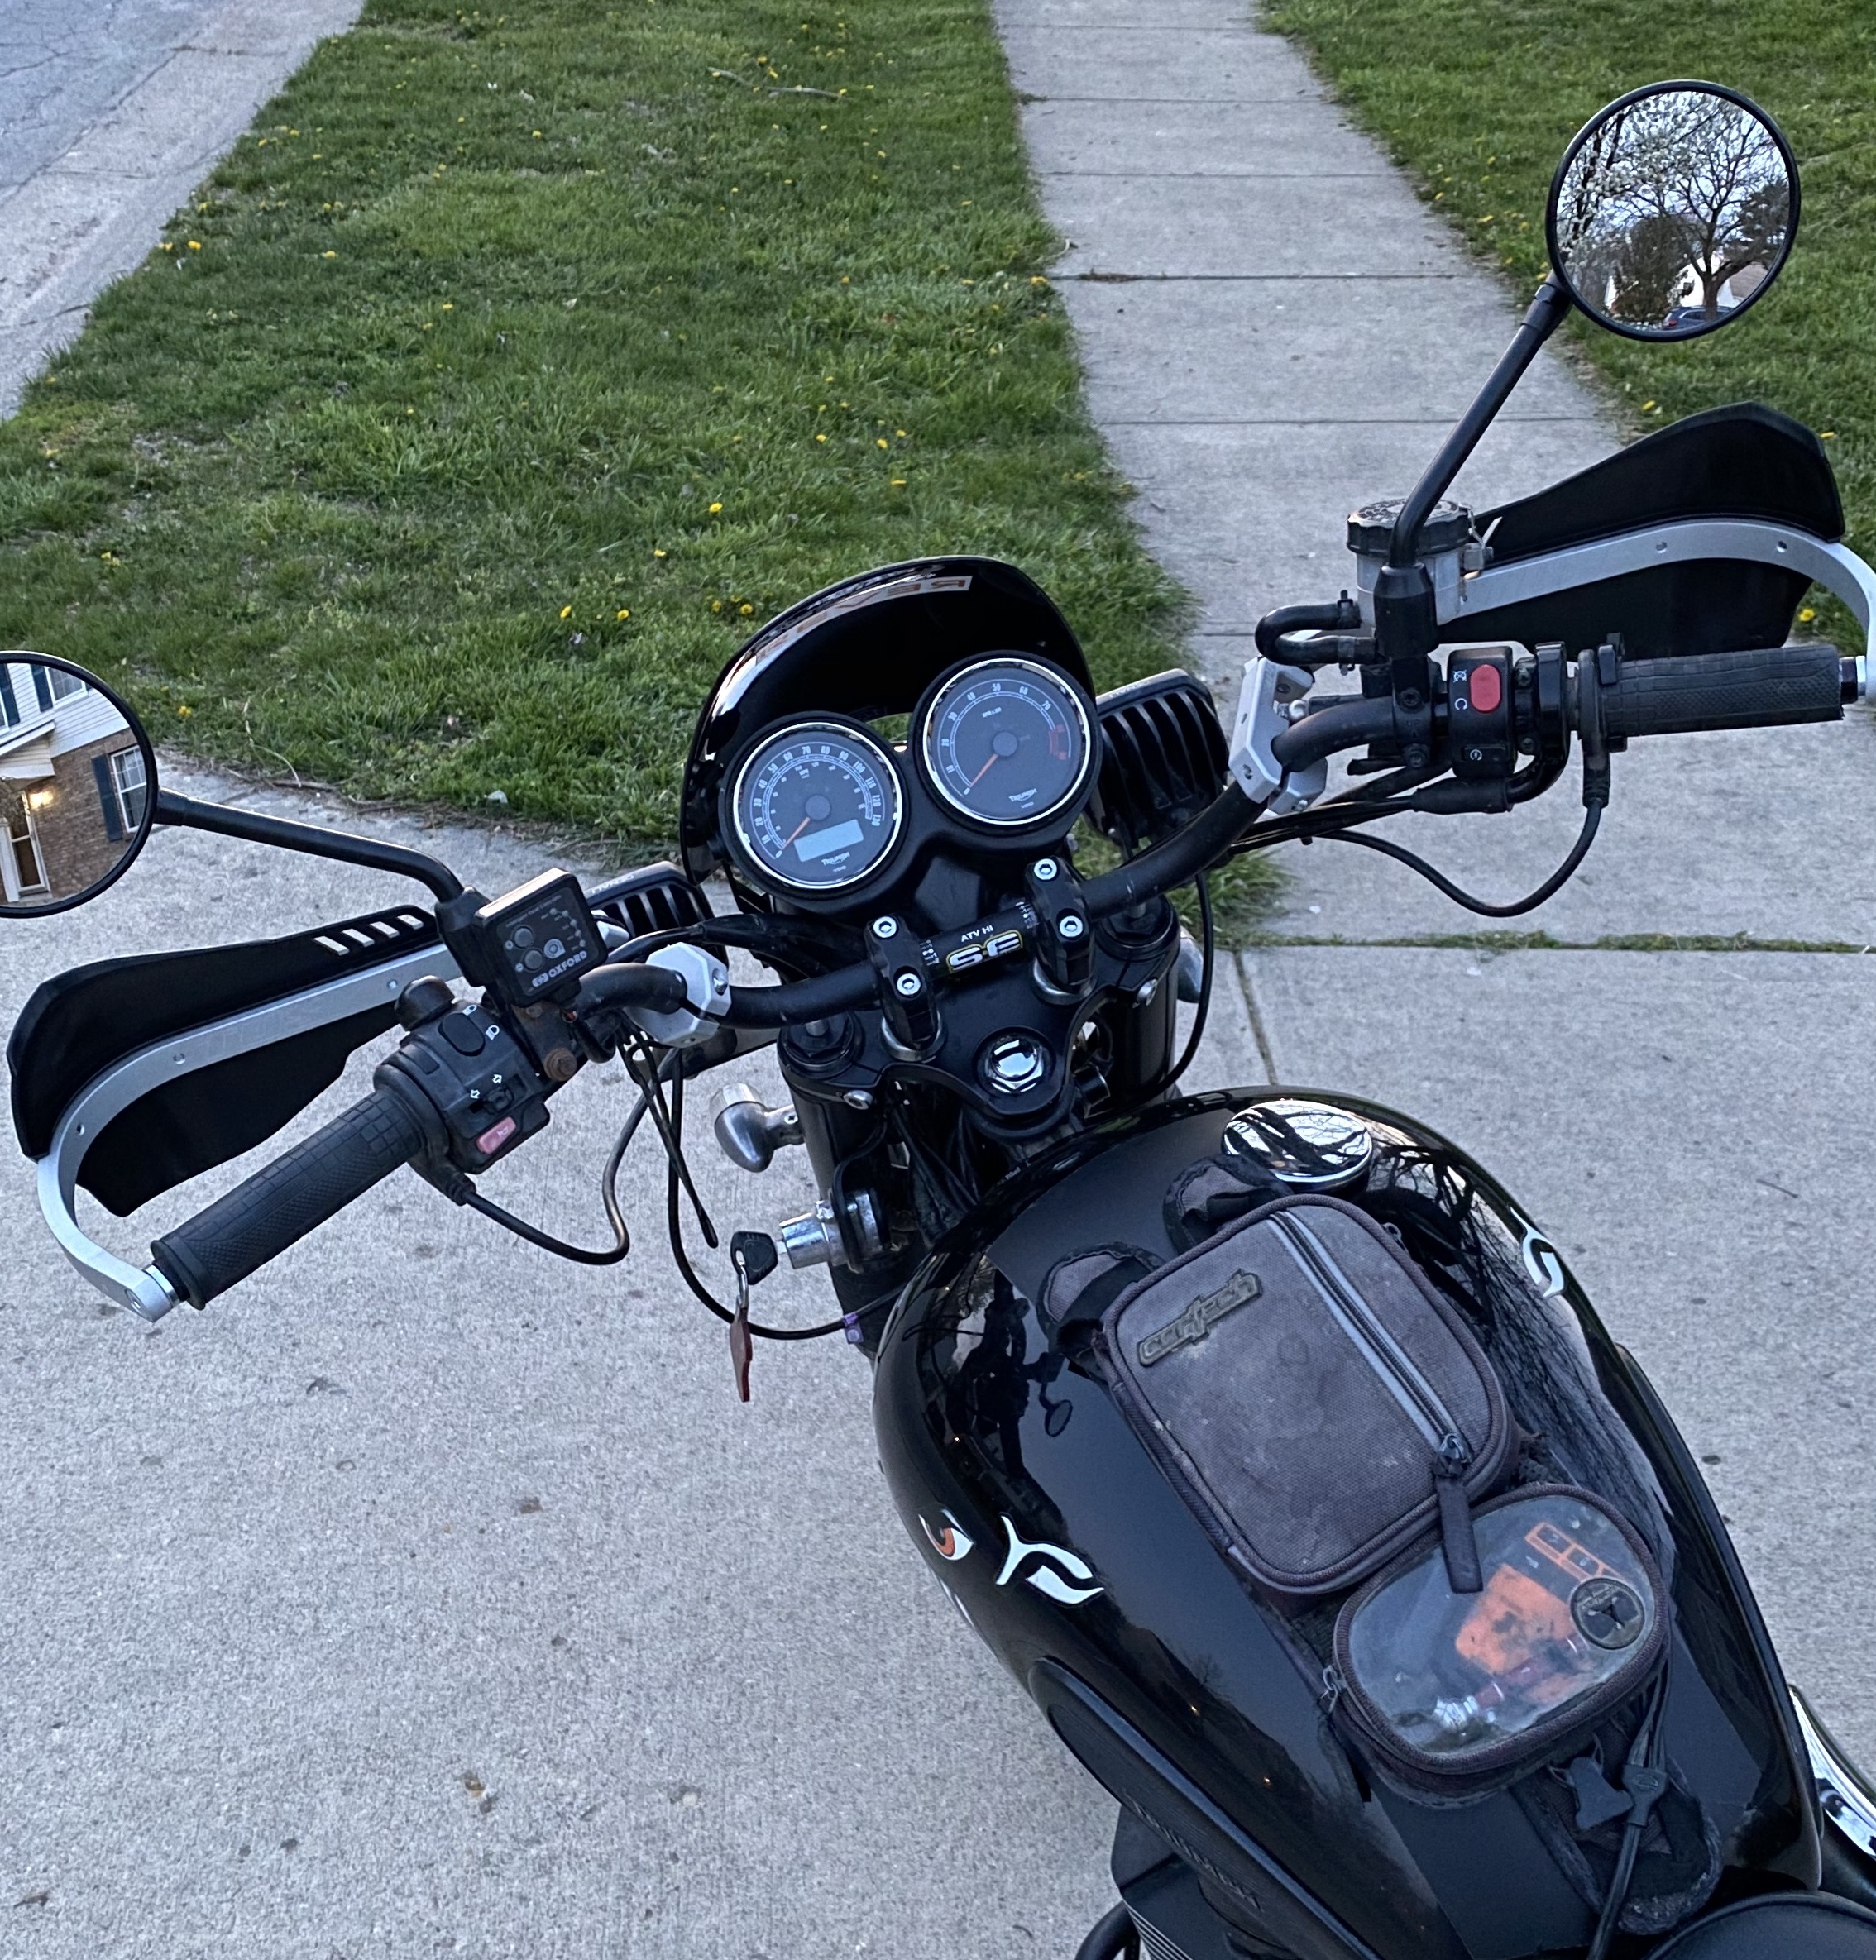
Beefier Handguards
When I mounted the Tiger 800 handguards on the Scrambler, lots of wisdom on the internet said “that cheap plastic won’t protect your bike in a fall!”
While that proved partially correct, I know many tiger owners with significant slides where those handguards protected their bike just fine. Ultimately I wanted harder wrap-around protection that would be more robust against tree limbs and whatnot as my eyes were on taking the Scrambler deeper into the woods. The fact I lost the threaded bar ends of the stock bars also made this decision easy.
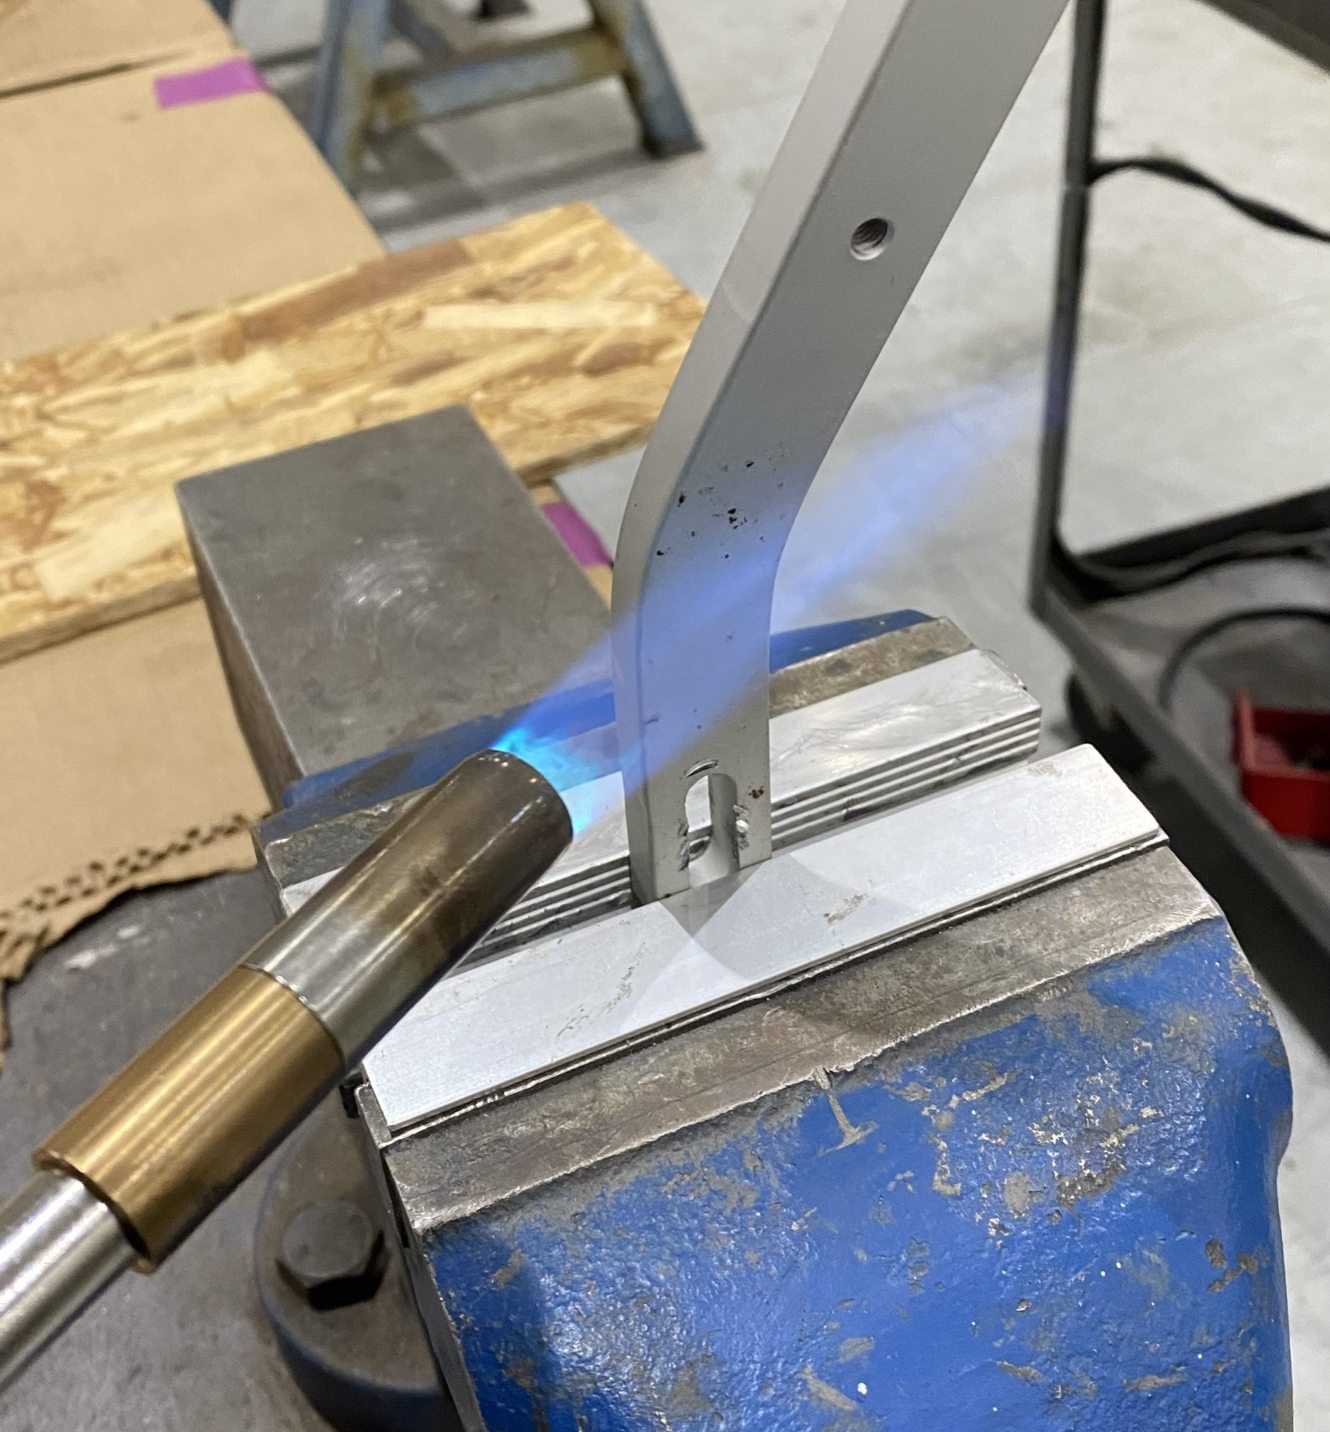
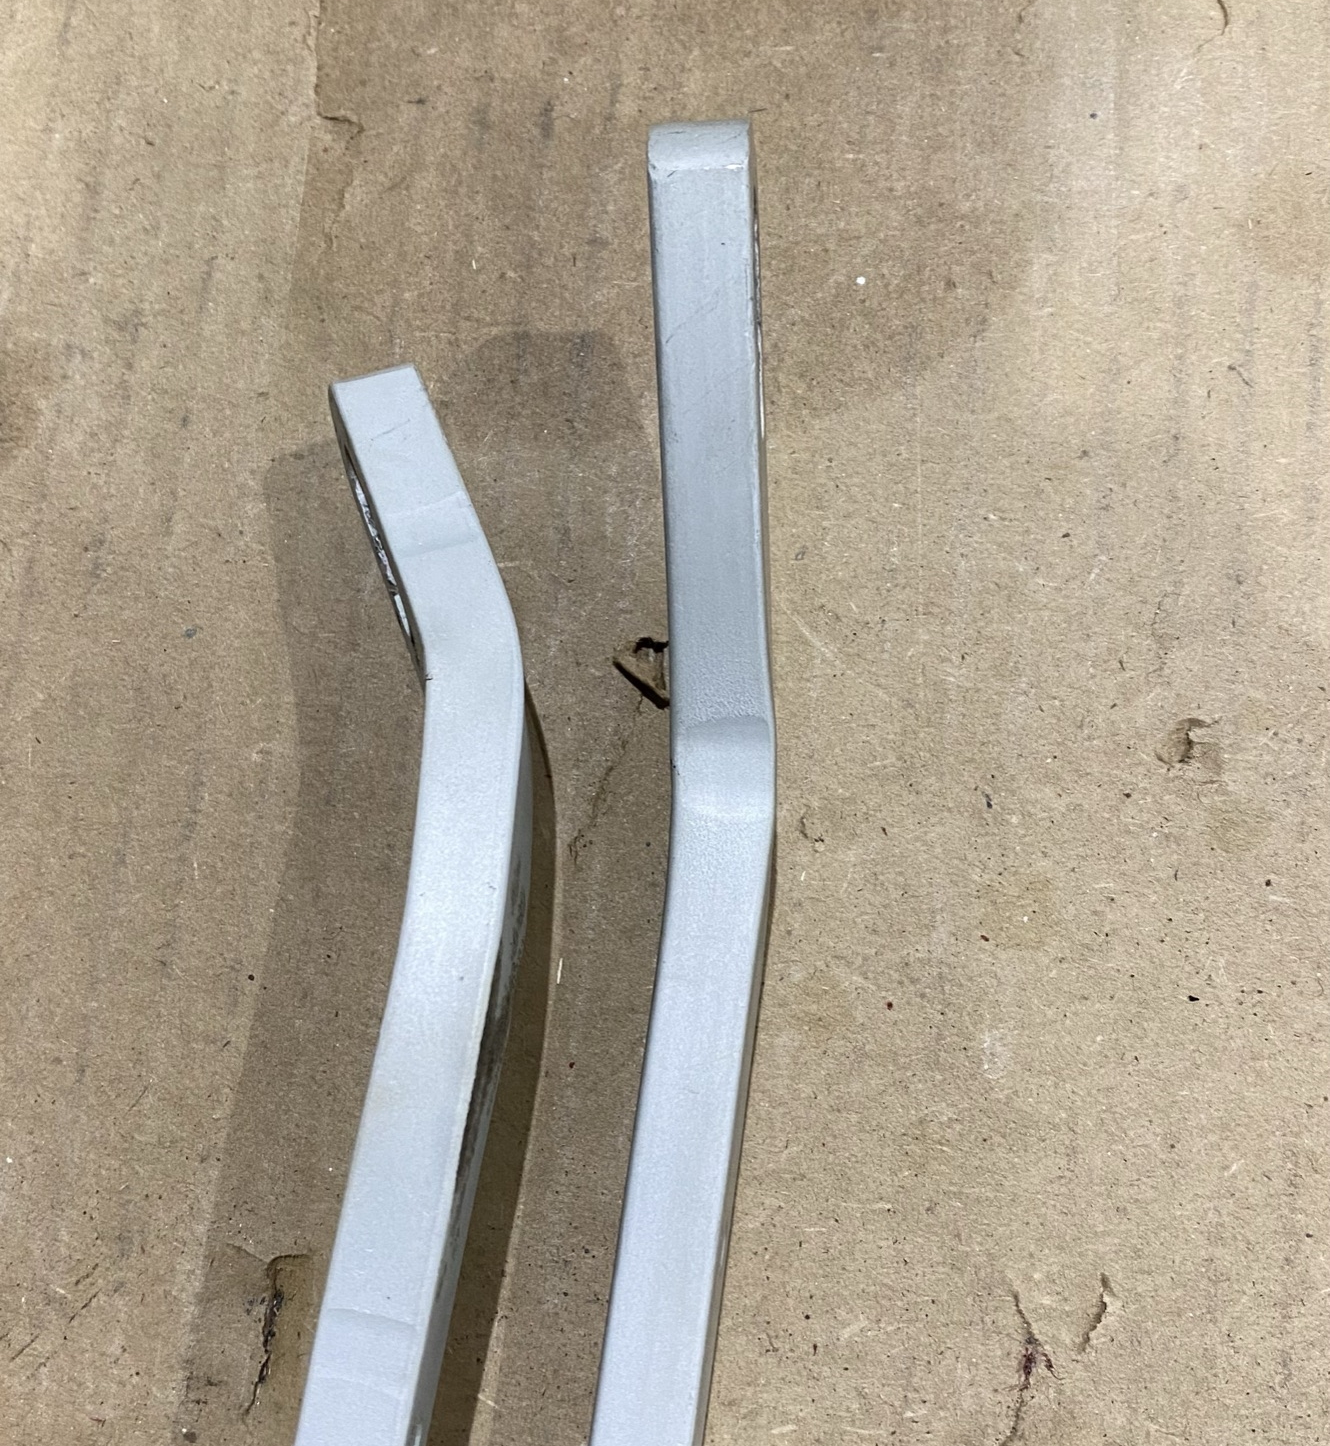
I was looking for a good set of Acerbis handguards but wasn’t entirely sure the fitment was going to be right so I decided to be “cheap” and buy a set of generic Tusk handguards. The universal fitment proved to be “one size fits most”, which left a bit to be desired initially. I took the aluminum guards to work, put them in a vice, heated them with a propane torch, and added a 10-degree bend at the end of the forward mounting point and now they fit great. Easy peasy.

Front Sprocket Cover

Way back when, I said I wanted to remove dead weight from the bike. There are no less than 4 retail options for replacement front sprocket covers for air-cooled Triumph twins on the market right now. Several of which leave the front open, which will naturally lead to chain lube and grime baking on the engine case. Rosie’s paint is far from factory finish at this stage, but I still don’t want to bake oil on the case if I can help it.
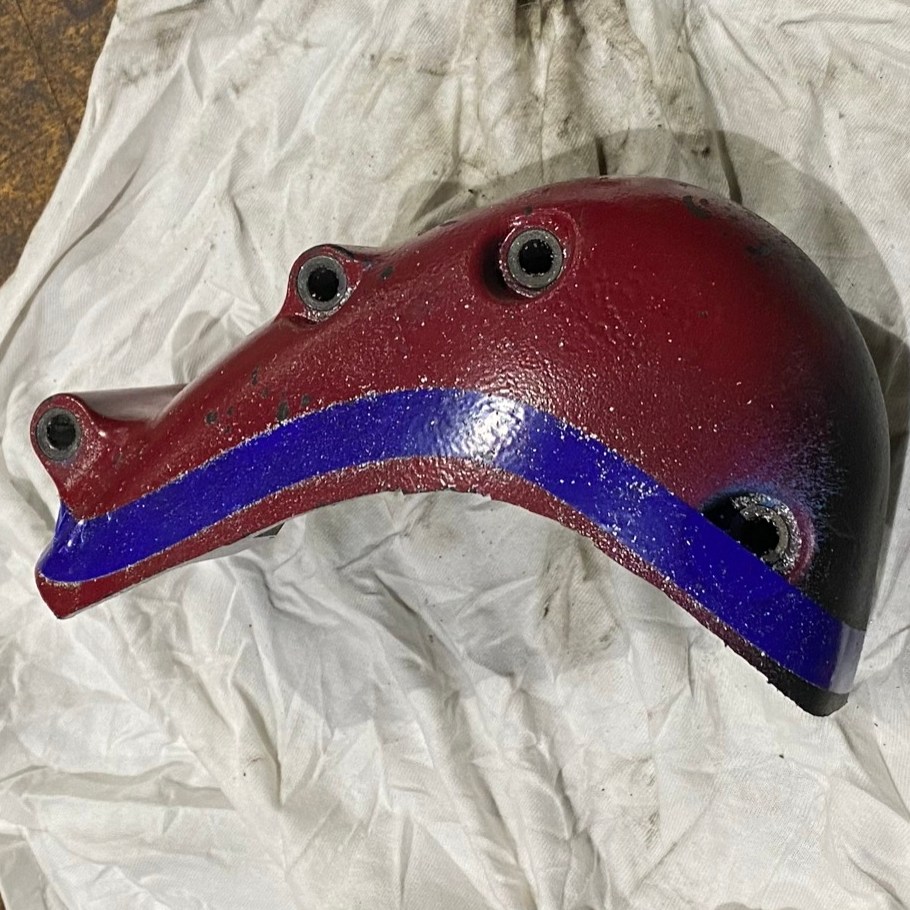
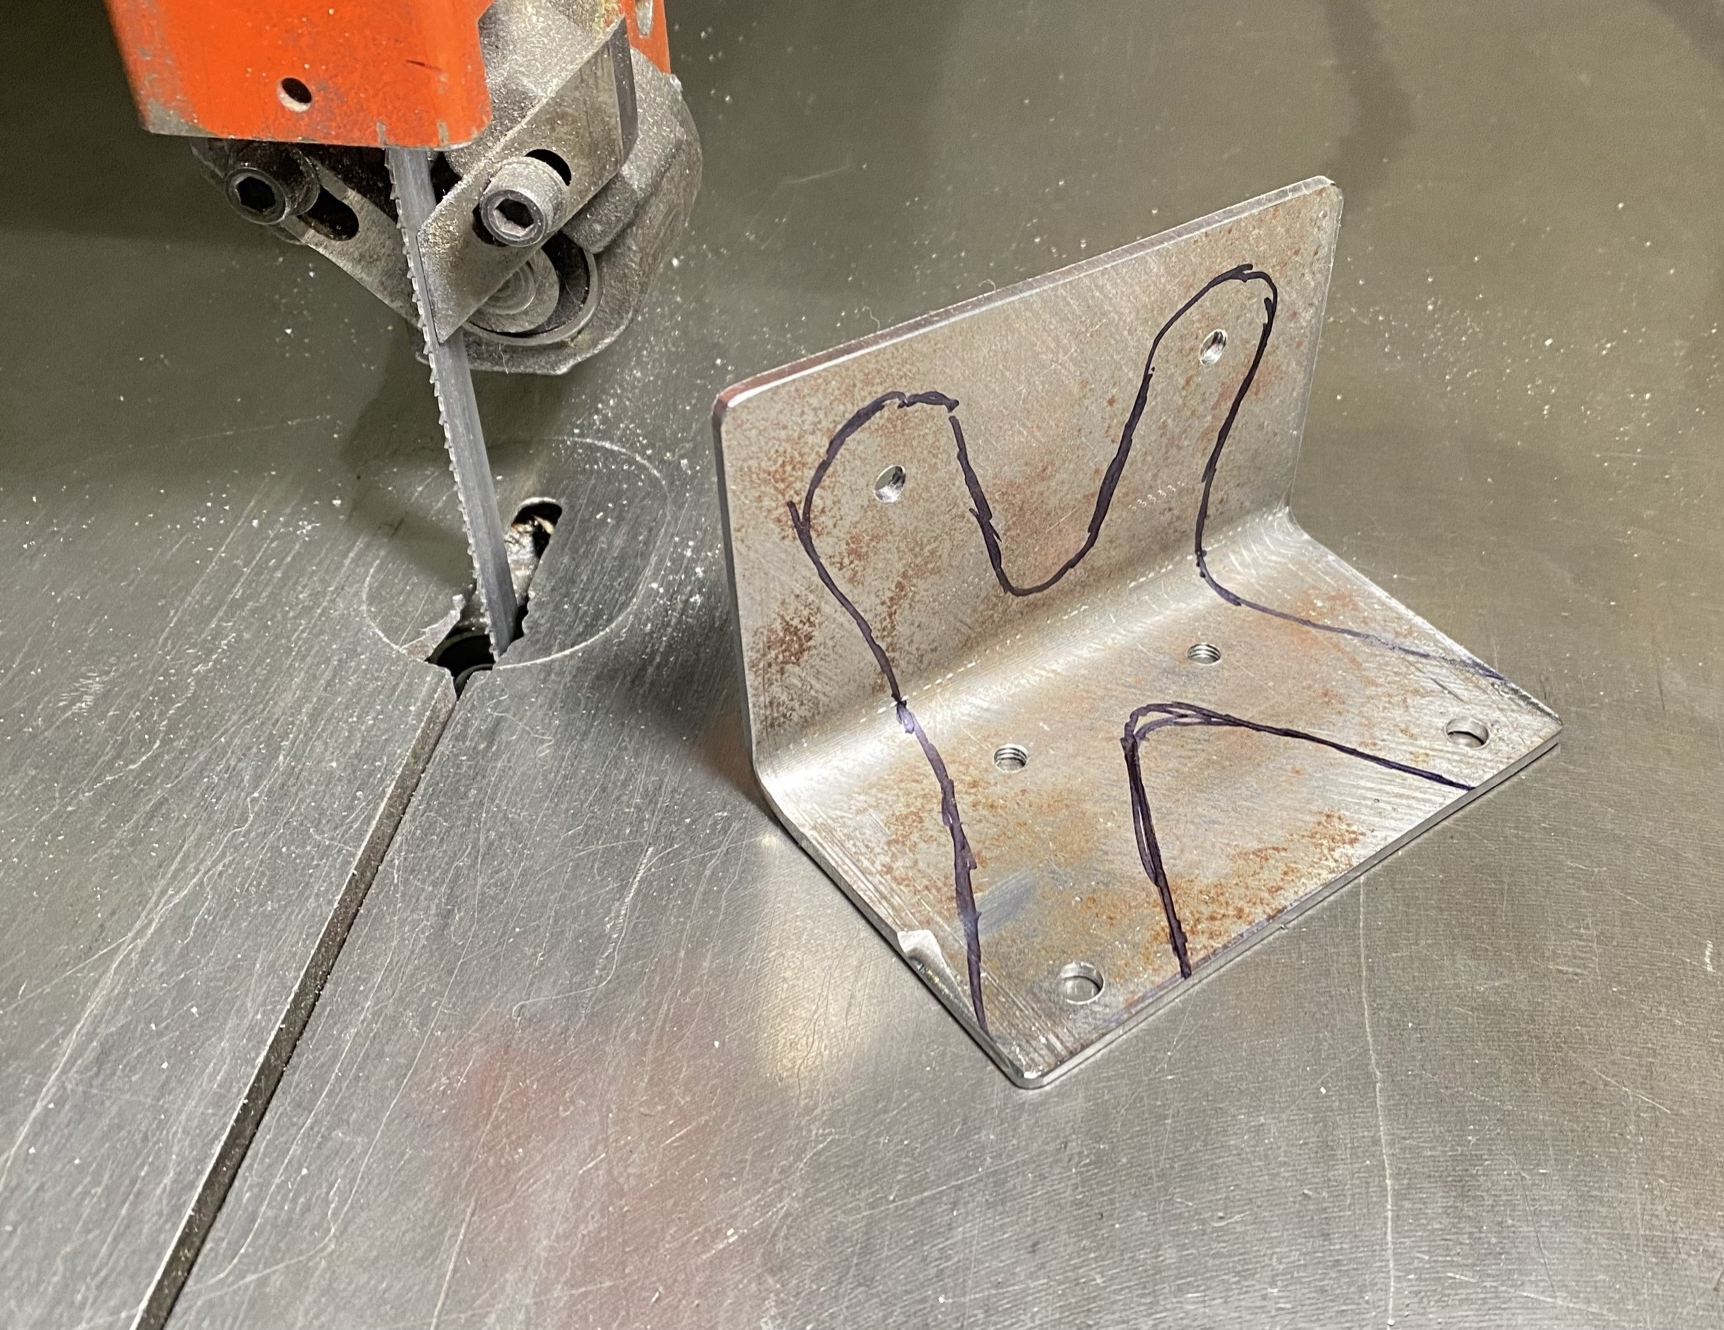
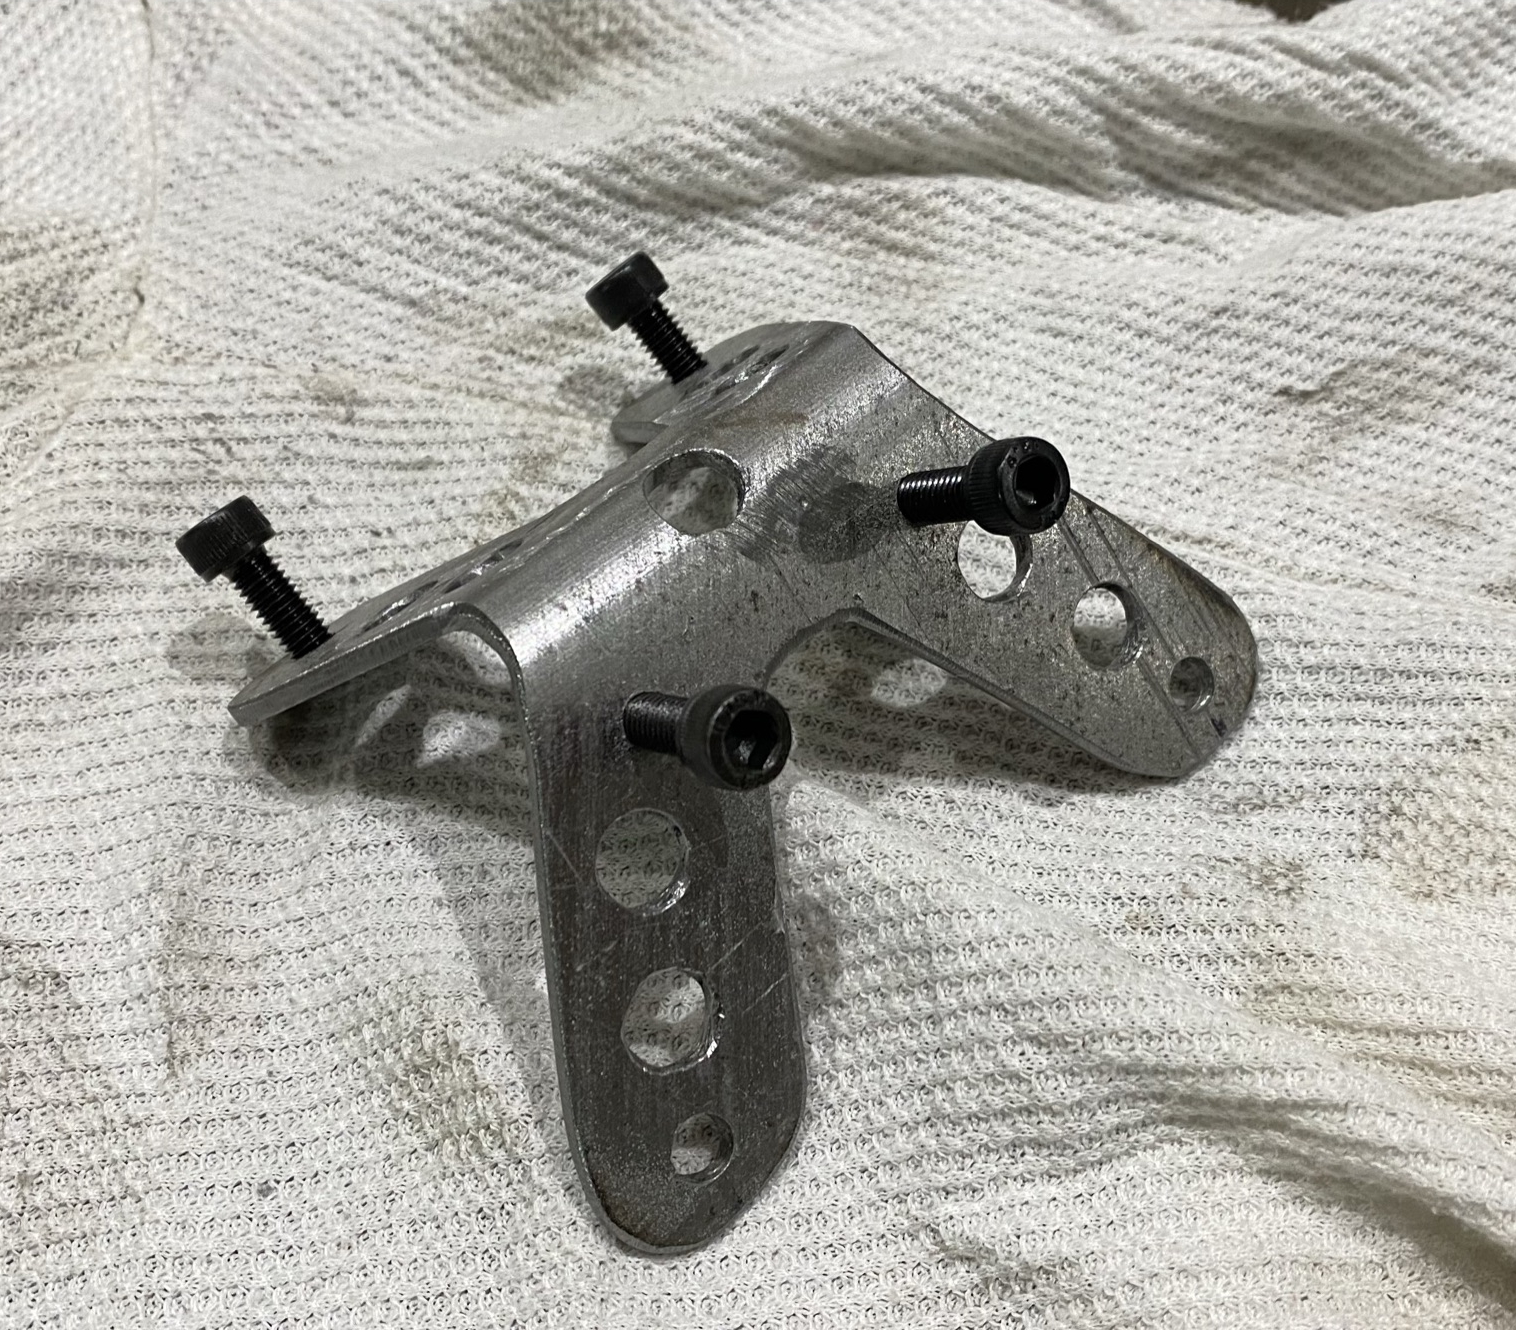
In the search for a suitable front sprocket cover, I had an inkling to make my own. Low and behold, a used front sprocket cover was available on eBay for $12. That’s over $100 cheaper than anything available from a retail store.
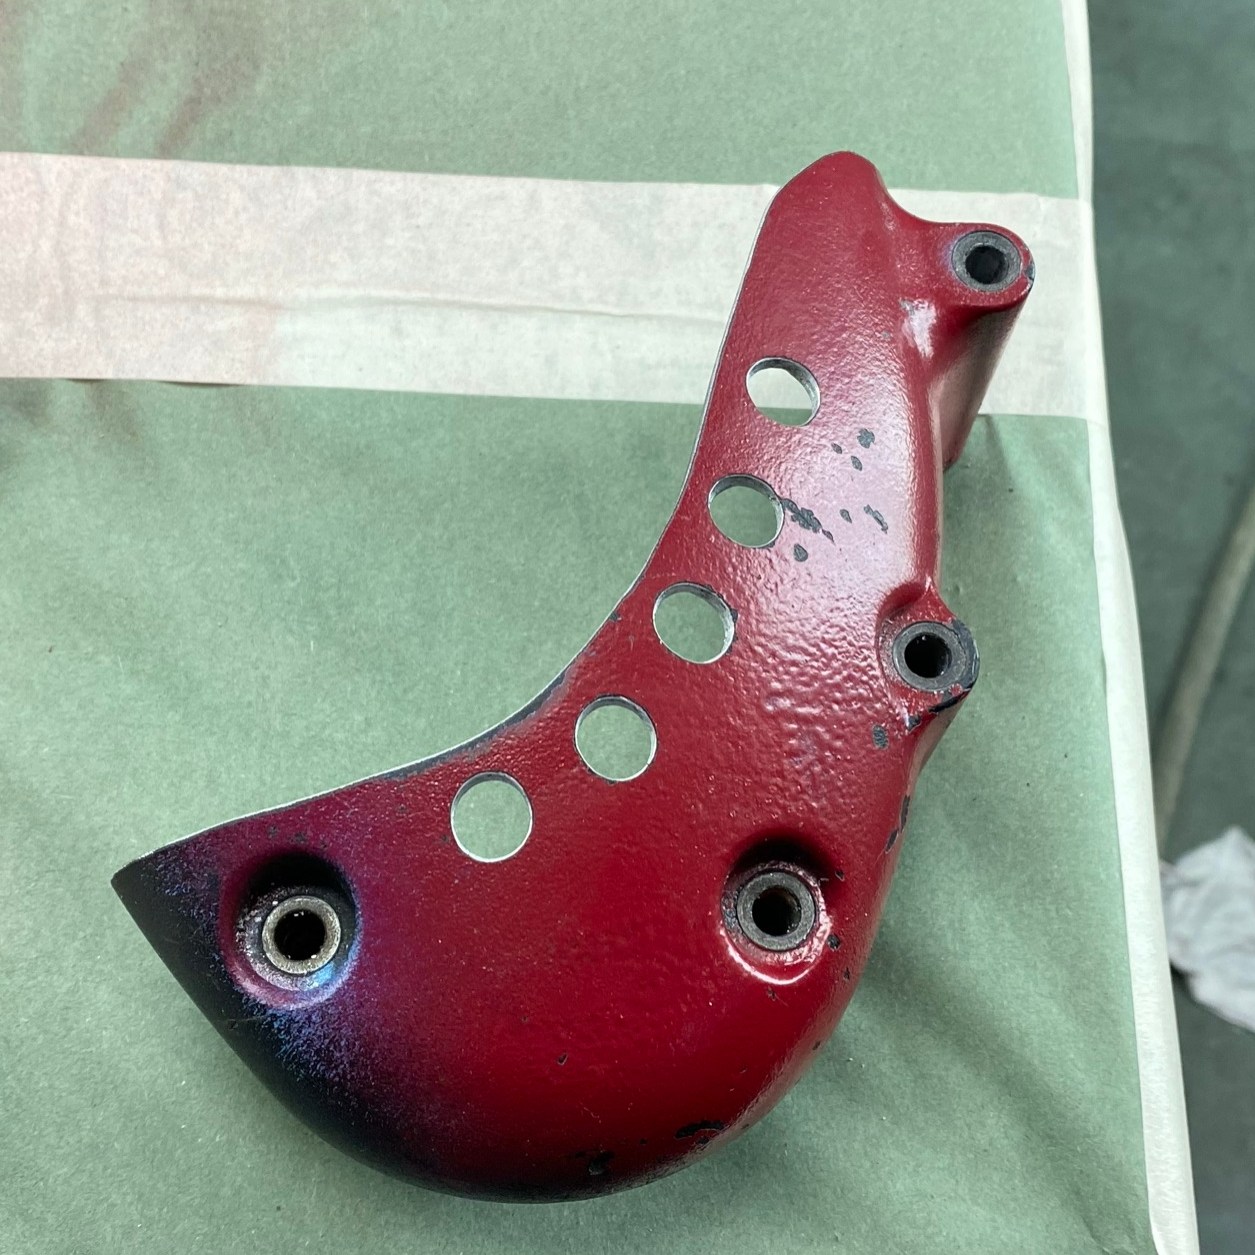
When the cover arrived, I dunked it into the solvent tank at work to get all the road grime and grease out of it. Fortunately, that also helped to remove some of the ungodly silver rattle-can paint adorned to it. Unfortunately, that revealed the ugly red rattle-can treatment it received beforehand. I took some “fine-line” tape and drew a line on the cover for where I wanted to cut loose the excess casting material and headed over to the band saw. With some patience and a lot of cutting and grinding, I got the cover down to an acceptable shape. Because I’m a stickler for originality, I decided to add a few “lightening” holes to the cover before final sand and paint. I put the cover in the blast booth to remove the ridiculous red in preparation for a fresh coat of black paint. To my surprise, some of the original black powder coat was still there. 4 coats of semi-gloss primer and it was ready for installation. I cut the cover in a manner that actually excluded the 5th mounting hole at the bottom. I wasn’t sure if that screw had any bearing on the subsequent cover, so I found a shorter bolt to take up its stead, painted it black, and plugged it in.


De-Chroming
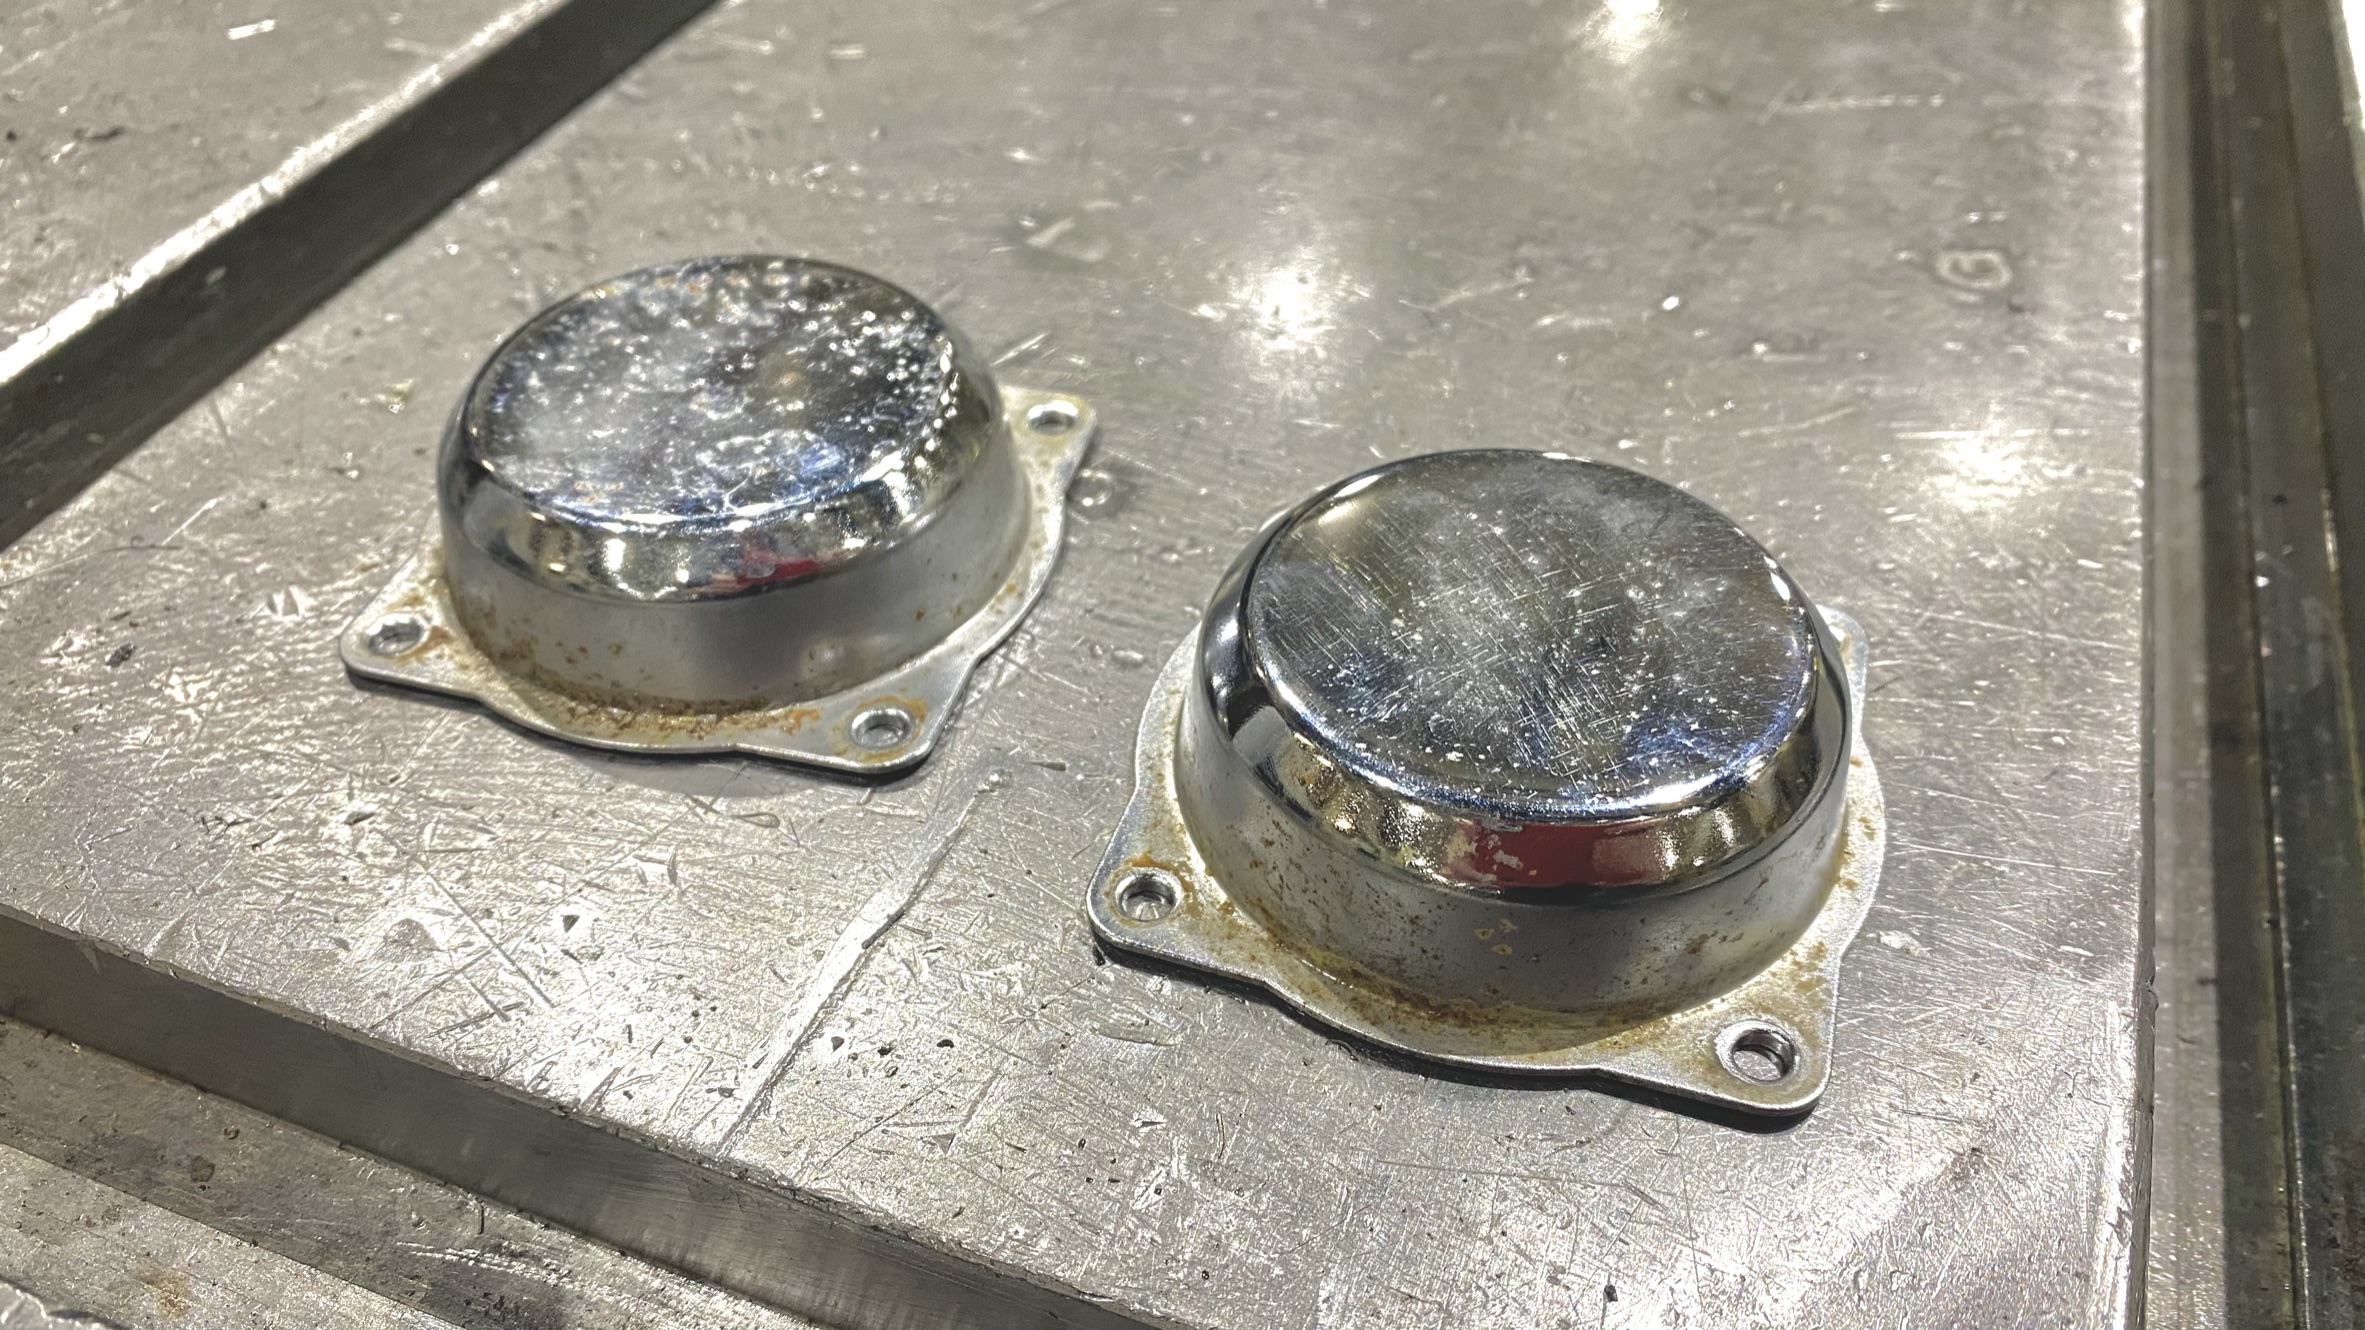
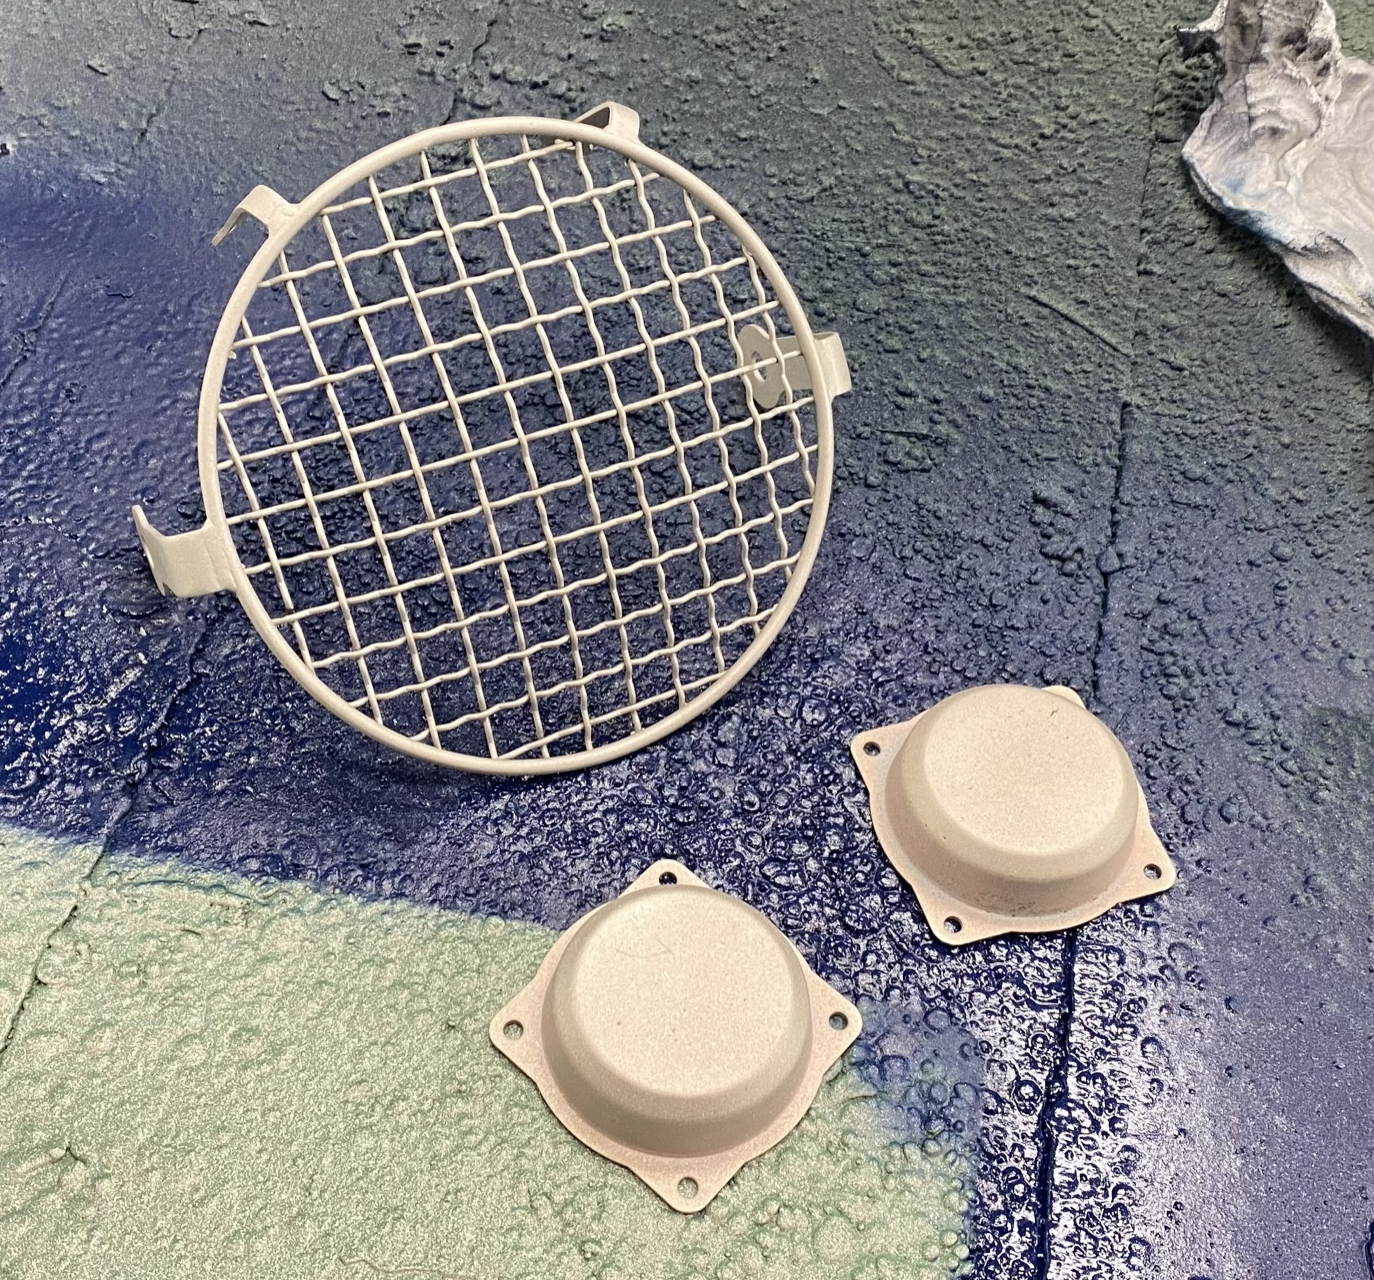
Since I was already spending my lunch break in the shop, I decided it was time to remove the rusted chrome from the throttle body covers, along with applying a permanent coat of black paint to the headlight grill. I mentioned from day one I wanted to remove as much chrome as possible from the bike, and after enduring the Ride-365 challenge, the throttle body covers looked awful. Since I was already spraying the new sprocket cover, it was easy to toss these parts in the blast booth and give them a refresh. The anodized coating on the skid plate was also fading after thousands of miles of punishment from road grit and gravel. I decided to blast the skid plate as well, and instead of painting it, I liked the look of naked aluminum so I left it. Hopefully it holds up.


Rox Risers
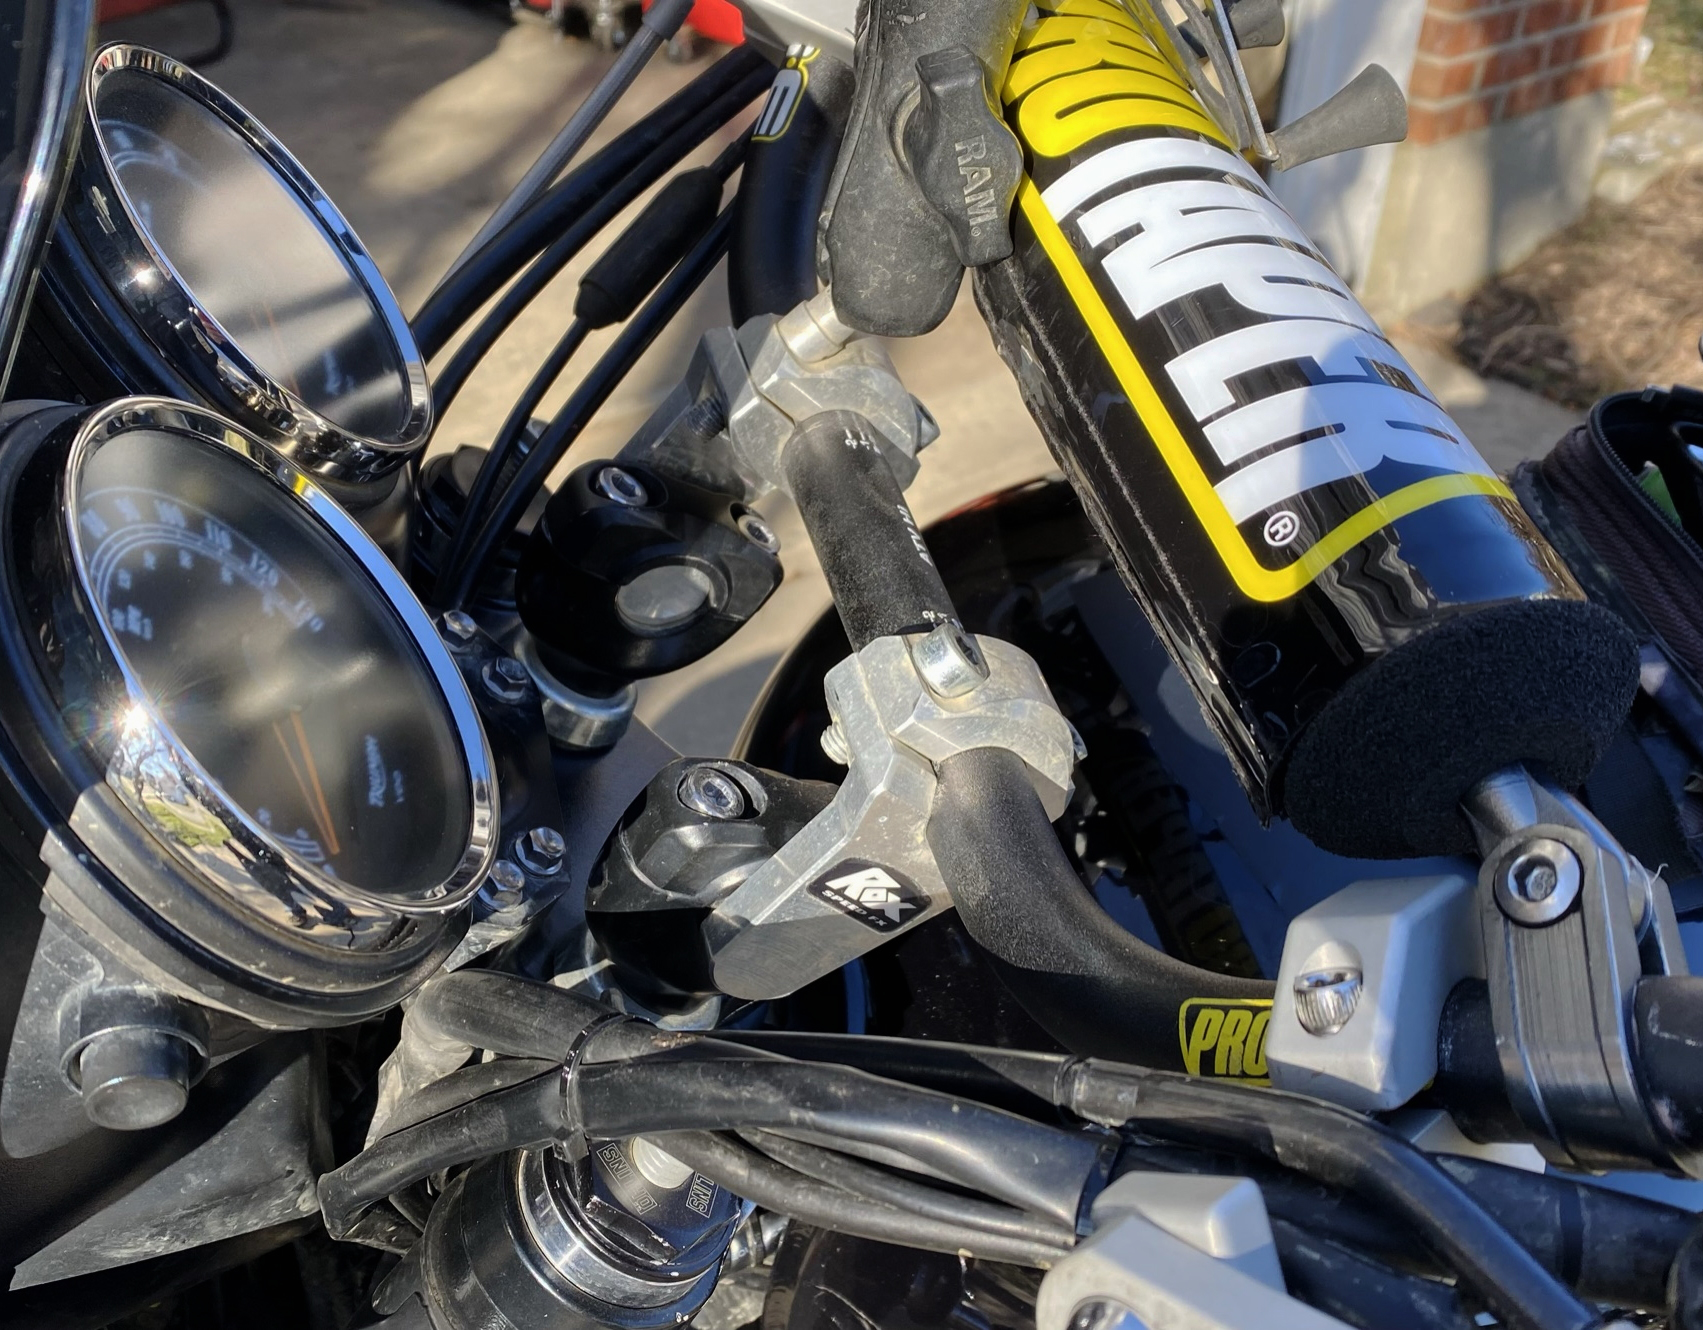
Back in stage 1, I installed a set of 30mm bar risers from SW-Motech. Those have been good risers and comfortable for many years, but after the sale of the CRF250L, I retained the +50mm Rox Risers for use on the Scrambler. Ultimately, even with risers, my hand position is too close to my feet and I find myself jammed up over the tank when things get aggressive. To open the riding space, I’ve installed the Rox risers so I can rotate the bars forward for ADV riding, but also closer to the rider when I expect to spend days in the saddle. This of course creates another problem…
Brake Lines

While I’ve yet to ascertain the exact cause, I’ve spent a great deal of time fussing with the rear brake caliper on this bike. I don’t know if it’s loaded with dirt too often, neglected, or corroded after 80,000 miles, but the rear caliper sticks from time to time in after a rushed evening of fixing it in the dark, I foolishly forgot to re-apply a critical zip-tie that held the rear brake line down to the swingarm. Said brake line was subsequently smashed in the rear shock in the ride that followed and I’ve unfortunately been riding that way every since.
Per my comments above about rox risers, after adding 30mm of travel to the front forks and another 20mm of bar rise from where it was, the front brake line was totally tapped. Since I was already replacing the back brake line, I sprung for a new set of Spiegler Brake lines with an additional 3″ of length for the front. Installation was pretty straightforward, and tips to Spiegler, the rotation clamp and a pair of channel locks makes it super convenient to remove twist from the brake lines. That was definitely a tricky part of installing the rear brake relocation with the stock line years ago.


Front Fender

After installing the “fenda extenda” years ago, I was pretty happy with the front fender. Despite internet comments about mud being caked and stuck in low fenders on ADV bikes, I’m pretty aware of the fact that if most of these fat bikes are in mud and clay of that caliber… a low fender is losing altitude in the priorities list.
However… subtlety is not exactly my strong suit. When I started entertaining the idea of racing the Scrambler in the KXCR Adventure Class, I wondered if a high fender would be prudent… and if nothing else, look cool. I looked over the front forks for a bit and grabbed one of the three extra dirt bike fenders laying around in the garage and realized bending a bracket to adapt a dirt bike fender that would mount to existing holes for the rectifier would be pretty simple.
A piece of scrap metal and a $22 fender in hand (2015 KTM 350 XCf-w), installation and look turned out almost exactly what I had in mind. Admittedly the modern fender is a bit angular from the side, but weight and function is pretty much a wash. I now need to fashion a good oil cooler guard to prevent tray rocks from being problematic, and a “fender skirt” may be required, but thus far I’m happy with the result.


Rear Fender

I don’t know if I’ve hated the rear fender from go… (I did) but I know I’ve never liked the taillight assembly. This whole modification process was kicked off mid-winter when I pulled a piece of cardboard and laser-cut polycarbonate out of the drawer. With the help of a friend, I fabricated the plastic fender delete plate years ago but never got around to finishing it. A piece of plastic and a tail light bracket would be lighter and easy to install. Unfortunately, per my previous comments, I’ve always been concerned about wearing excess mud from deleting the fender. After the dirtbike front fender idea started taking shape, I debated the purchase of a rear dirt bike fender, considering replacement plastics are nearly all cheaper than plastic replica Triumph fenders or deletion kits.

Surfing the web I liked the look of the 2004 Suzuki RM125 rear fender so I decided to take a $25 gamble and buy one. The evening it showed up I immediately tore it out of the plastic to check the fit. I was shocked to find this plastic fender fit almost identically to the stock fender, but with an outward sweep instead of following the wheel contour. I drilled some holes in the fender to hold it in place with the stock fasteners and started bending a cardboard bracket to hold the taillight and indicators. The dirtbike fender had some excess plastic intended for rigidity and to be hidden behind the rest of the dirtbike plastics and airbox. I took a razor blade and trimmed the excess plastic and sanded the contour ever so slightly to make it smooth. Some metric fasteners and some blue Loctite and it was time to figure out how to make a tail light…
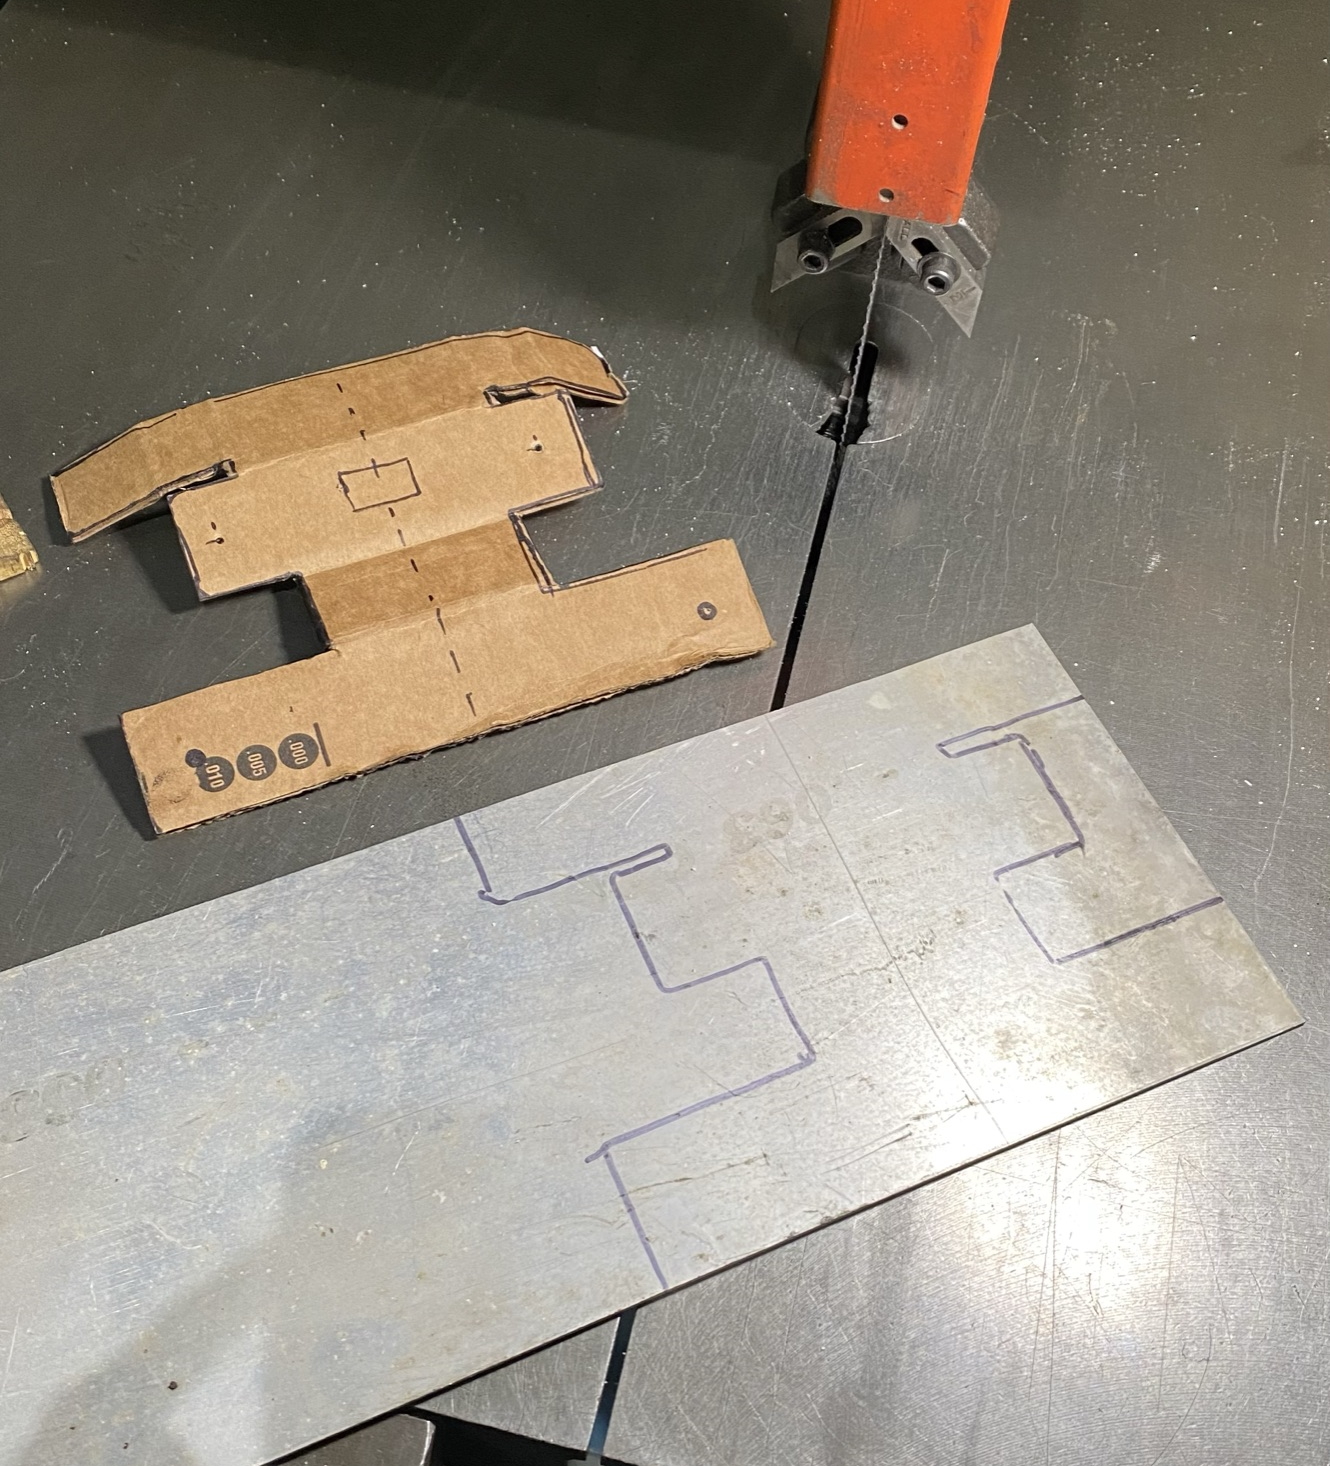
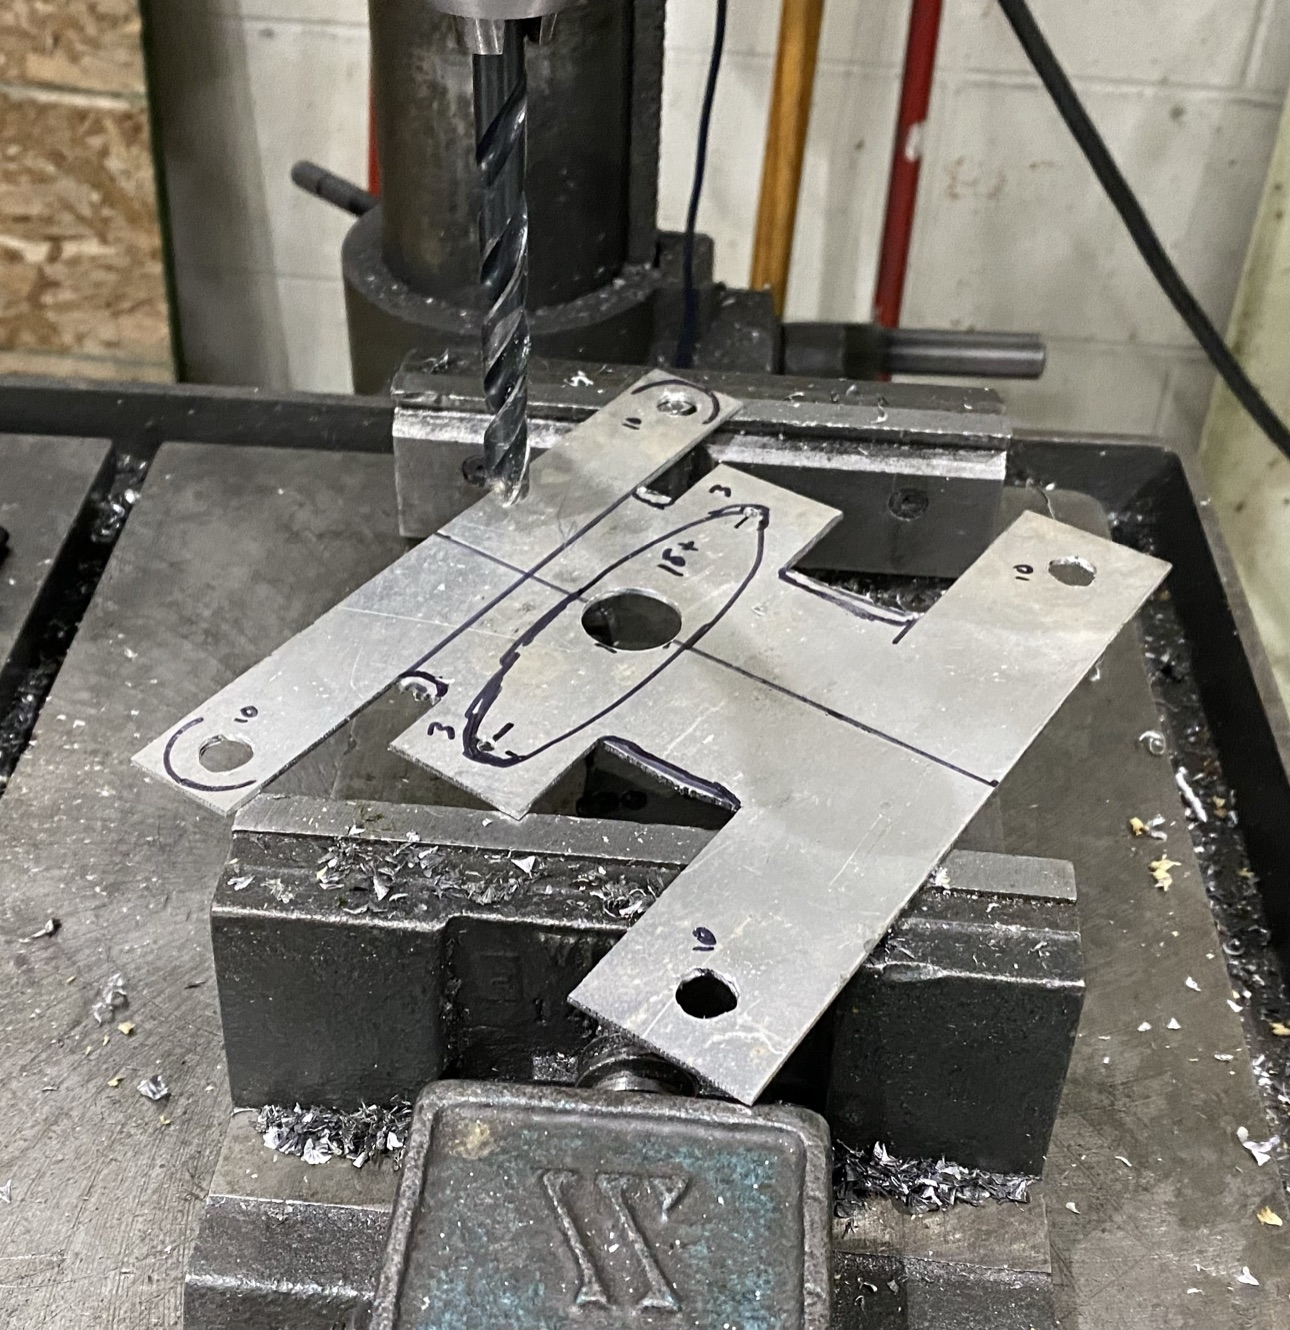
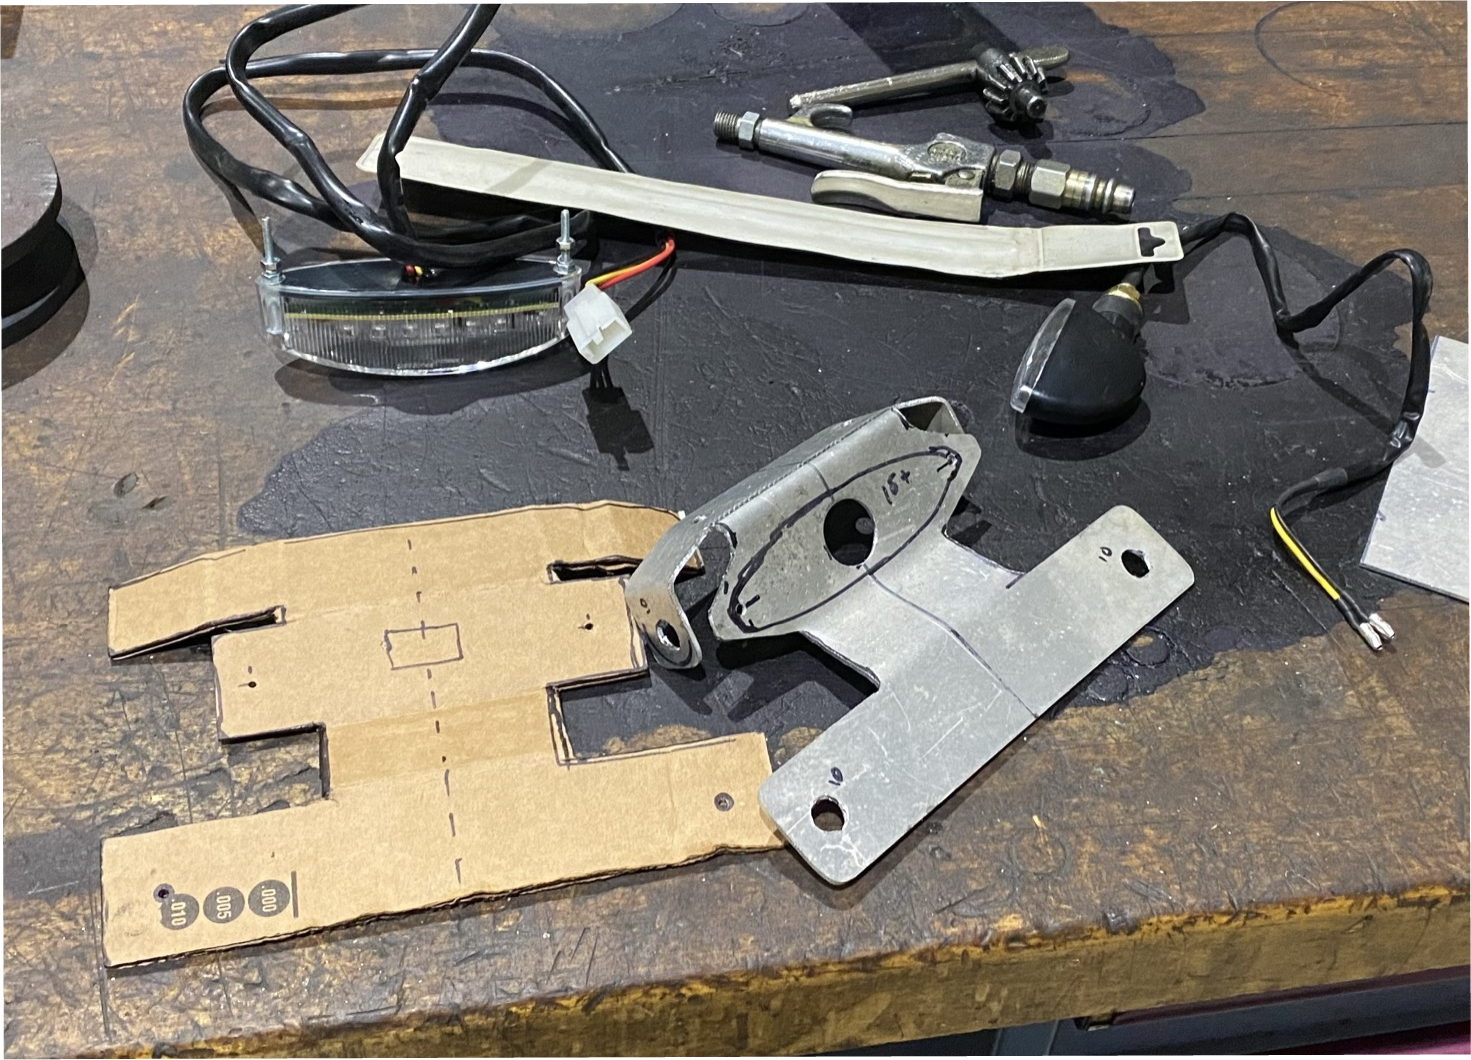
Light Emitting Diodes
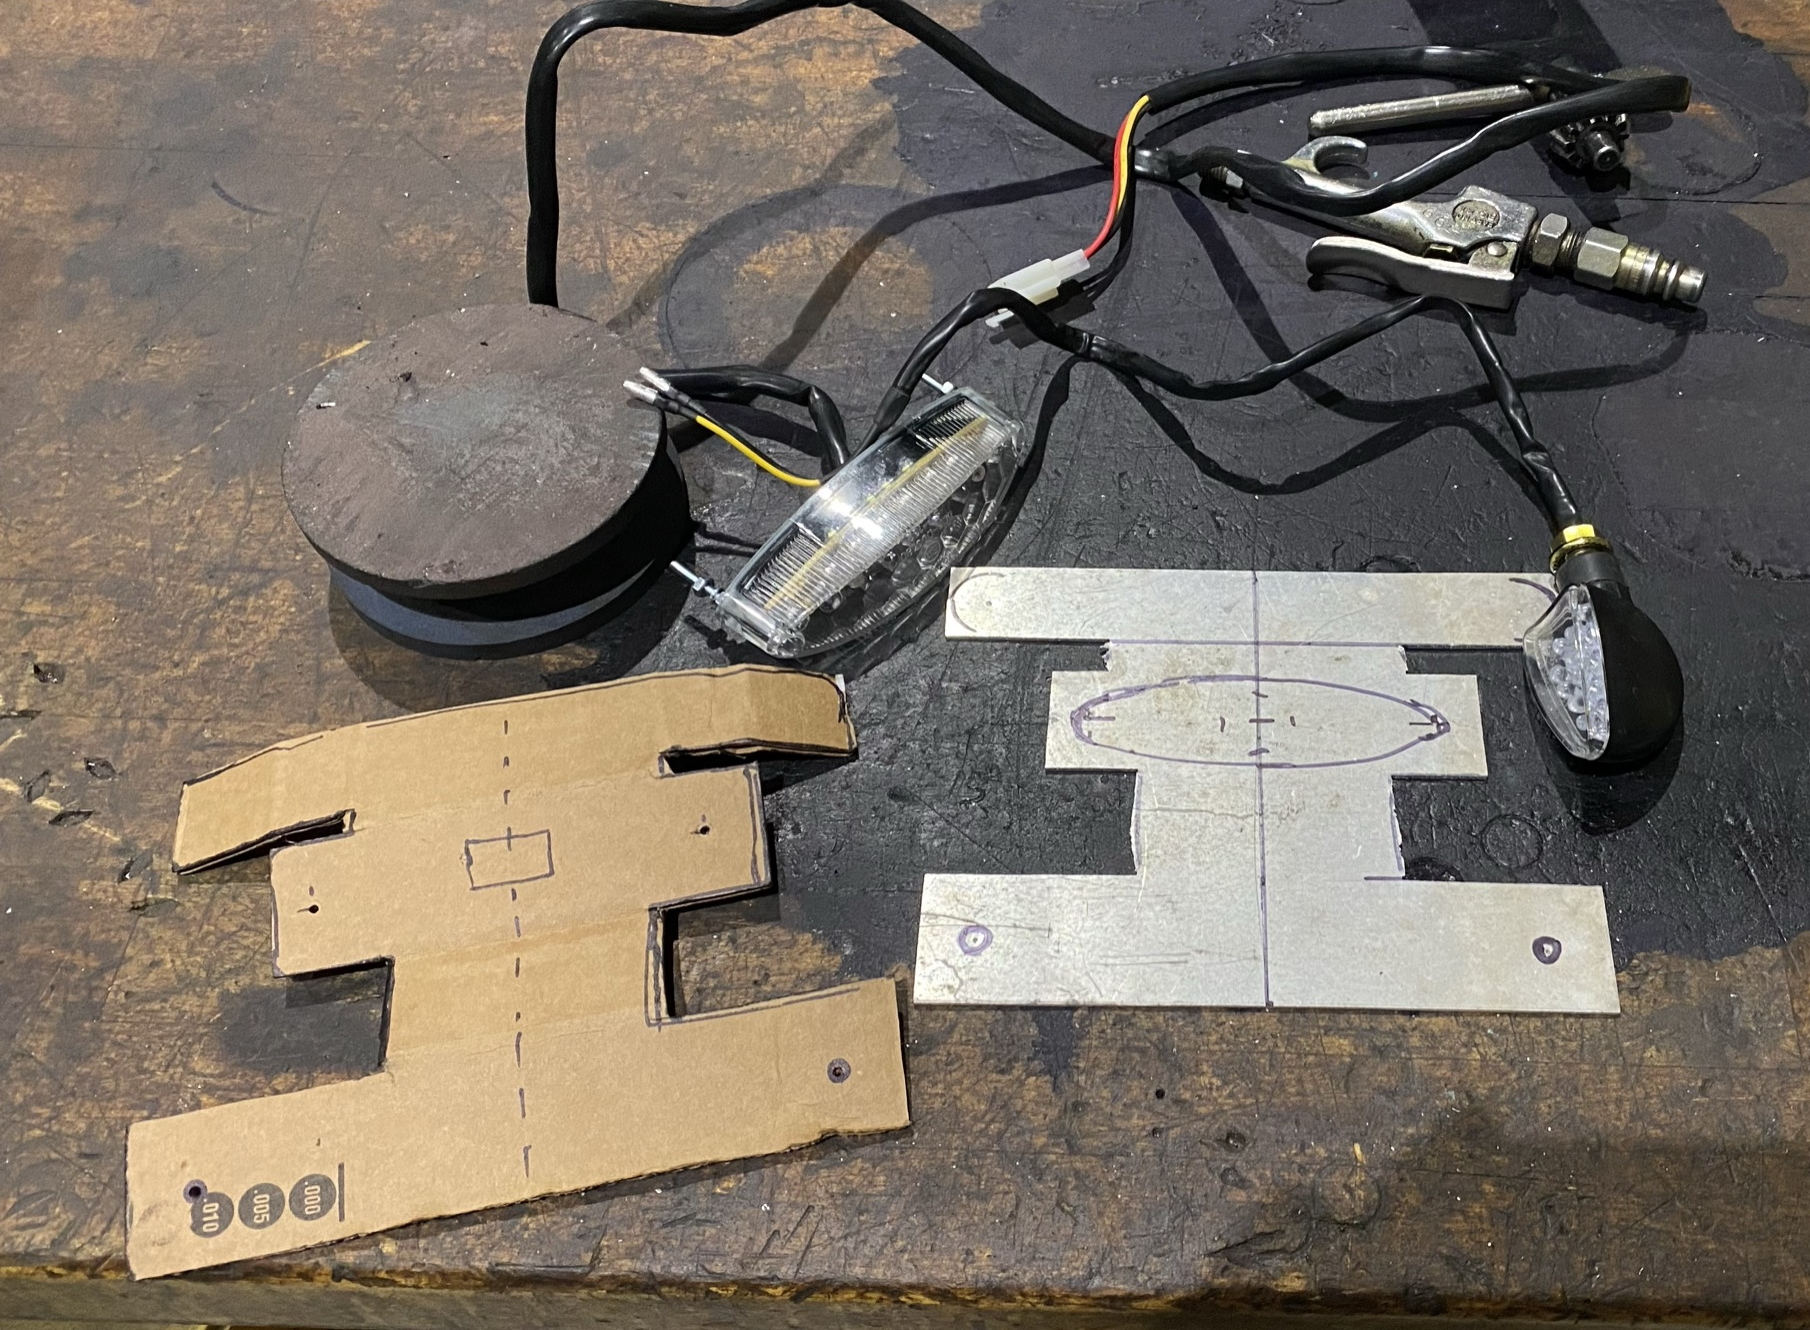
Per my comments about the taillights, I’ve never liked any of the lights on this bike. The stock signals are stupid big, the ones the first owner mounted were subtle but riddled with Chinesium and aluminum oxide. The headlight sucks, but more on that later… So it was finally time to spend a few bucks and get this mess under control. Per my comments about the new tail fender, I bought a low-profile brake light and cheap LED indicators to replace the stockers (still Chinese… but plastic). A co-worker hooked me up with a piece of aircraft aluminum and I went to work with the bandsaw, a vice, and a hammer and made a bracket based on my cardboard template. Some black paint and a few more bolts and the lights fit as intended.
Wiring the new lights was naturally the next problem. The stock tail light assembly had specific connectors that didn’t match the equipment I bought. I debated with myself for a while, trying to decide if I wanted to cut the factory loom or not. As “old” as this bike is on the odometer, I took out a pair of dikes and cut the spaceship taillight loose, and got to work with my soldering iron.
The new tail section isn’t show quality by any means, but it’s functional and dramatically “better looking” in my eyes than the factory fender and adornments. With the new high fender, the straight rear “tail” matches the lines nicely and some marginal weight reduction to boot.
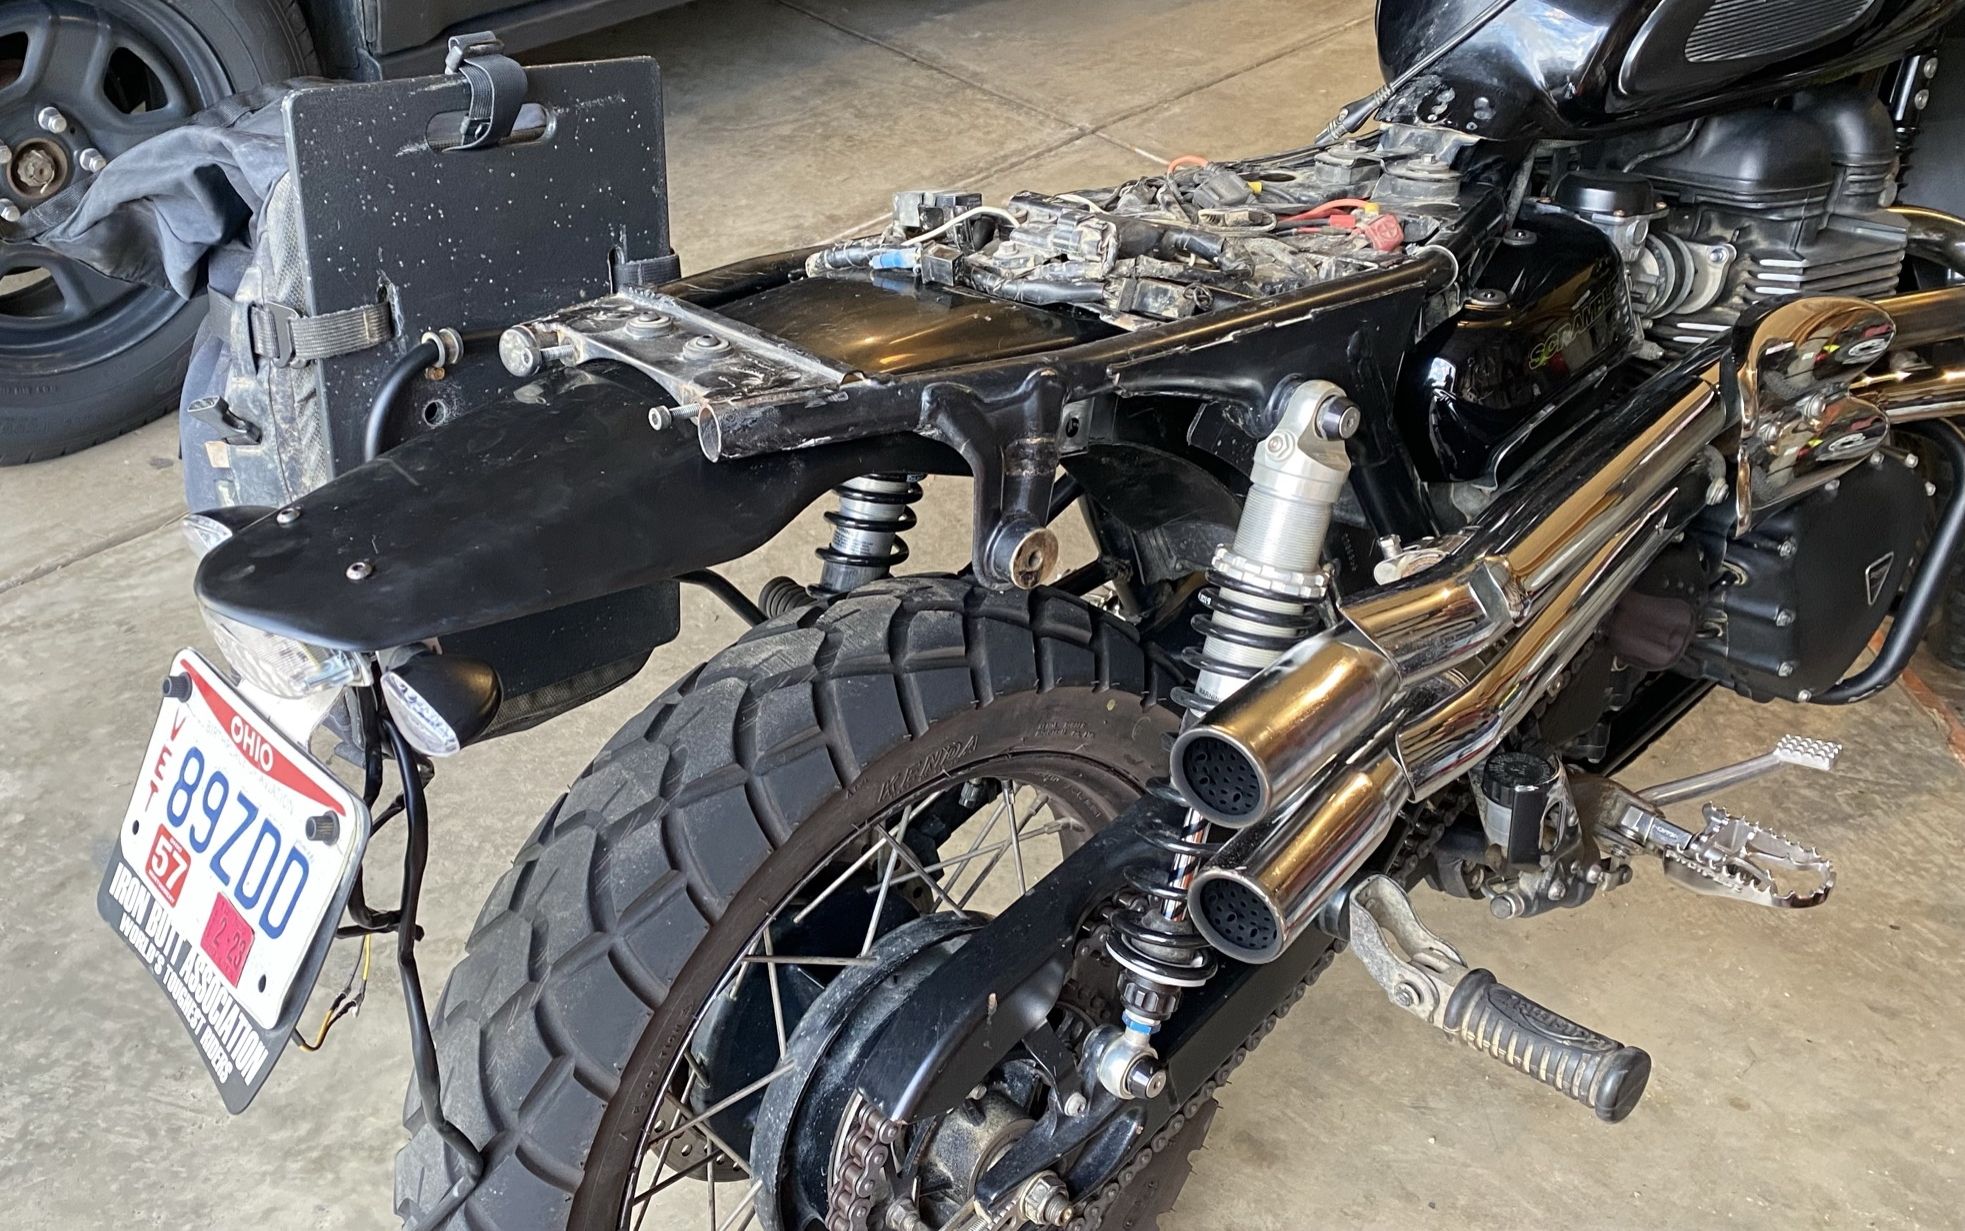


Exhaust

This is actually a Tarantino entry, at some point in 2018, I saw a friend install a set of Volkswagen Beetle exhaust tips on his Scrambler. I asked him about the make and model and ordered a set from Amazon myself. It was like a $35 investment but shaves like 14 pounds off the rear end of the bike. The weight loss is obviously a huge perk, especially after I had to have a co-worker tig weld the exhaust hanger a while back. On the flip side, the VW tips make the Scrambler extremely, arguably obnoxiously, loud. If you’re into loud pipes, it’s a solid choice considering the money. That said, I may bomb around town with the lighter exhaust for a while, but I typically go back to the TORs when I know I’m spending long days in the saddle.

What’s Next?
At this stage, I’ve accomplished nearly everything I had in my head about building an ADV bike out of a Scrambler. I admit I’m not 100% satisfied with the exhaust since the stock pipes are still a bit heavy and the VW pipes, while saving 14-pounds, are exceptionally loud. I hate the stock headlight, but I’m still a bit hesitant to shell out $500 for the LED unit I want, compounded by the fact I’m afraid all the wires won’t fit well in the tiny 5-3/4-inch headlight bowl. And lastly, I would really like to ditch the heavy, chrome, dented wheels for some purpose-built aluminum hoops, but that’s an $800 inventment, minimum. With 80,000 miles on the clock, another $2000-3000 in parts seems a little excessive… but can you put a price on your dream bike? Considering everything this bike has done and has still yet to do… it’s a perplexing question indeed.


Putting more Adventure into Moto Adventurer
Triumph Scrambler Project: Planning
Triumph Scrambler Project: Stage 1
Triumph Scrambler Project: Stage 2
Triumph Scrambler Project: Stage 3
Triumph Scrambler Project: Rally Planning
Ride 365 Challenge: Aftermath

Goodness well done, great work and great story too thanks!!!
LikeLike
Pingback: Harley Sportster Project: Adventure Tourer Planning | Moto Adventurer
Im doing a similar layout on my 09 Scrambler.. Im trying to figure out how to extend the belly pan / sump guard to come around and cover at least the Oil line on the right….. Have you found anything that either bolts on or can replace the simple skid plate on the market.. Im thinking of welding a couple wings on the front of mine… Also.. What front fender brand did you buy? Its the look and protection Im looking for.
LikeLike
Hey Seth! I’ve debated fabbing up a cardboard skid plate and then having one welded in aluminum. I still have the engine bars installed, I might need to remove them and see how it fits but I’ve not done it yet.
As far as the fender that’s a 2015 KTM 350 xcfw front fender. Anything 2015 and newer from KTM or Husqvarna will fit. Something like 2020 and newer GasGas will also fit. You obviously have to make a bracket like I did.
LikeLike