2017 Ural Gear Up: Touring Seattle with a Sidehack

DCIM100GOPROG0042933.Forget everything you know about riding and focus on one thing: what it felt like to ride a motorcycle for the very first time. The world is zipping past you in a blur; meanwhile you’re trying to keep your eyes on the road, desperately scanning for the next obstacle while simultaneously trying to tame the machine with each of your appendages. I nearly forgot what that felt like, but after commuting through downtown Seattle astride a Russian rig, I have a renewed sense of appreciation for “first timers”. Take my word for it, riding a sidecar is an experience like no other.

Way back in February, I wrote about a late winter excursion down to the Bluegrass State. Beyond detailing my twisty adventure, that post was also part of my entry for the Rever #WinterBeDamned Challenge. As it turns out, based on my blog and social media effort, I was ultimately selected as the winner of the contest’s grand prize. For folks unfamiliar, the grand prize was round trip airfare to Seattle and an afternoon of riding a Ural sidecar accompanied by a Ural factory rider. Long time readers of the blog are already familiar with my affinity for the Ural. Beyond winning a “weekend vacation”, I was finally going to get the opportunity to ride a sidecar (or is that “drive”?), and see if it truly is the “365 day solution” that I think it is.


Ural Headquarters

Flying over Seattle MotoADVRTouching down in Seattle is was like 55° F and raining; seemed like stereotypical fall weather in the Pacific Northwest from what I’d heard. The next morning, Vice President of Operations, Jason Rae, picked me up from the hotel and gave me a short tour of the national headquarters in Redmond. Needless to say I had a lot of questions, and throughout the day I picked up a lot of history, not just about the bikes, but also about the company. Prior to my visit I was under the impression that the company was based in Russia and imported into the United States; in reality, IMZ-Ural is now owned in the U.S., while the motorcycle factory still operates in Siberia.Ural Lineup at Seattle HQ MotoADVR I had an inkling that the staff in Seattle was pretty small, in fact there are only about a dozen employees at the U.S. headquarters, steering the business worldwide. I also had no idea that Ural only builds about 1,400 units each year, with about half of those being sold in the U.S. annually. From the moment I shook hands with Jason and David George (head of Ural Sales and Product Support), my tour guides for the afternoon, I realized that Ural is like a family, and that family extends to its customers.

After the tour, and spending a few moments meeting the other folks around the office, David gave me a crash course on sidecar basics. I had a vague familiarity, considering my previous visits to the local Dayton dealer, Heindle Engineering, but it’s completely different when you’re moments away from getting the keys to a brand new Gear Up sidecar for the day. Ural Gear Up MotoADVRDavid pointed out what little effort it takes to pick up the chair, as he effortlessly lifted the sidecar into the air despite me sitting in the saddle. With the slightest lean over the hack, the weight shift is enough to force the chair back down, but it served as a good lesson for what I was about to experience. After a few more moments of getting acquainted with the controls and just as it started to rain, we headed out to the parking lot so I could practice my steering skills.

For folks unfamiliar, unlike a traditional motorcycle, sidecars steer more like a car; if you want to go right, you turn the front wheel to the right, and vice versa. Left-hand turns, while they still require a little leaning, are relatively simple as the sidecar wheel pushes against the centrifugal force of the turn, keeping the bike upright. Right-hand turns however are the tricky ones that tend to pick up the “tub”, or “fly the chair” as they say. DCIM100GOPROG0283764.The sidecar lifting off the ground wouldn’t in itself be such a problem, if it weren’t for the fact that the action of lifting the third-wheel instantaneously converts your “normal steering” sidecar rig into a “counter steering” motorcycle; abruptly forcing you to figure out which way to push the bars to avoid careening into oncoming traffic. Circling around parking lot islands, I rapidly became familiar with the feeling of the sidecar attempting to levitate, worsening with higher speeds or tighter corners. Accustomed to flogging road manners into Rosie the Scrambler while carving through the twisties, I’m no stranger to leaning off the seat, but take my word for it, you’ve not leaned off a motorcycle until you’ve hustled a sidecar through a few curves.


The 2017 Gear Up

Ural M70 MotoADVRUral offers several different trim levels for their sidecars, but their main staples are the M70, cT, and the Gear Up. The one-wheel drive M70 has throwback “Soviet era” styling and traditional telescopic front forks. The more “urban” cT, also equipped with one-wheel drive, has leading link front suspension and more modern styling, including a sidecar windshield. Lastly, what I consider to be Ural’s flagship motorcycle, the Gear Up; again with leading link suspension, but with selectable two wheel drive for inclement weather conditions and tailored for more “adventure” inspired buyers.

Ural Gear Up RF Rainier White MotoADVRWhile Ural has sold a traditional 2-wheeled model in the past, they currently focus on only 3-wheeled variants. Each model is powered by a 750 cc, air-cooled, flat-twin “Boxer”, with a 5-speed gearbox (4 speed plus reverse), and shaft drive. Each model also carries about 5 gallons of gas, with an estimated range of 150-185 miles, depending on “riding conditions”. Generally, a Ural weighs in around 700 pounds or so (dry), with a (recommended) cruising speed around 70 mph. Sidecar tonneau cover and power outlet are also standard on all 2017 models.

Ural Shovel MotoADVRThe Gear Up stands apart from the one-wheel drive variants with it selectable two-wheel drive and “Adventure” accessories. Beyond the extra “push”, the Gear Up comes with an additional “universal” 19 inch spare wheel; sidecar front bumper; LED sidecar fog lights; lockable gas tank “glovebox”; Jerry can; luggage rack; and my favorite “extra”, the folding entrenchment tool.


What’s new in 2017?

Ural Gear Up LF Rainier White MotoADVRI’ve been following Ural pretty closely since the big jump to EFI in 2014. Along with fuel injection, that year brought all-wheel disc brakes (did I say Brembo?), along with a hydraulic steering damper, among a myriad of other changes. Since then, Ural has made progressive upgrades to their models, including the universal spare wheel (see above), updated roller bearings for the crankshaft, and liquid paint in lieu of powder coating.

For 2017, Ural has replaced the tractor seat with a new “enduro” bench seat, upgraded to an electronic instrument cluster, relocated the parking brake to the handlebars, installed a reverse gear foot pedal in lieu of hand lever, and added a handlebar switch for the auxiliary light(s).


The Ride

Thumbing the starter and firing up a Ural for the first time, I noticed that it tends to “spin-up” a lot like a thumper; DCIM100GOPROG0083083.you hear the engine turn over a few times as it ticks up to idle. David asked me early on if I was familiar with vintage bikes, as the Ural boxer is somewhat similar in character; with straight cut gears, you need to operate the shift lever with authority and resolve. I concur, it does take a little extra “effort” to operate the gearbox, but in reality, it’s just like everything else, you get used to it, and eventually it’s just another facet of the experience. Interestingly enough, while the shifting experience is diametrically different than the buttery smooth “click” of the helical cut gears on my Triumph; despite its otherwise “agricultural” character, neutral seemed to be extremely easy to find on the Ural, something I seldom say about other bikes I’ve ridden.
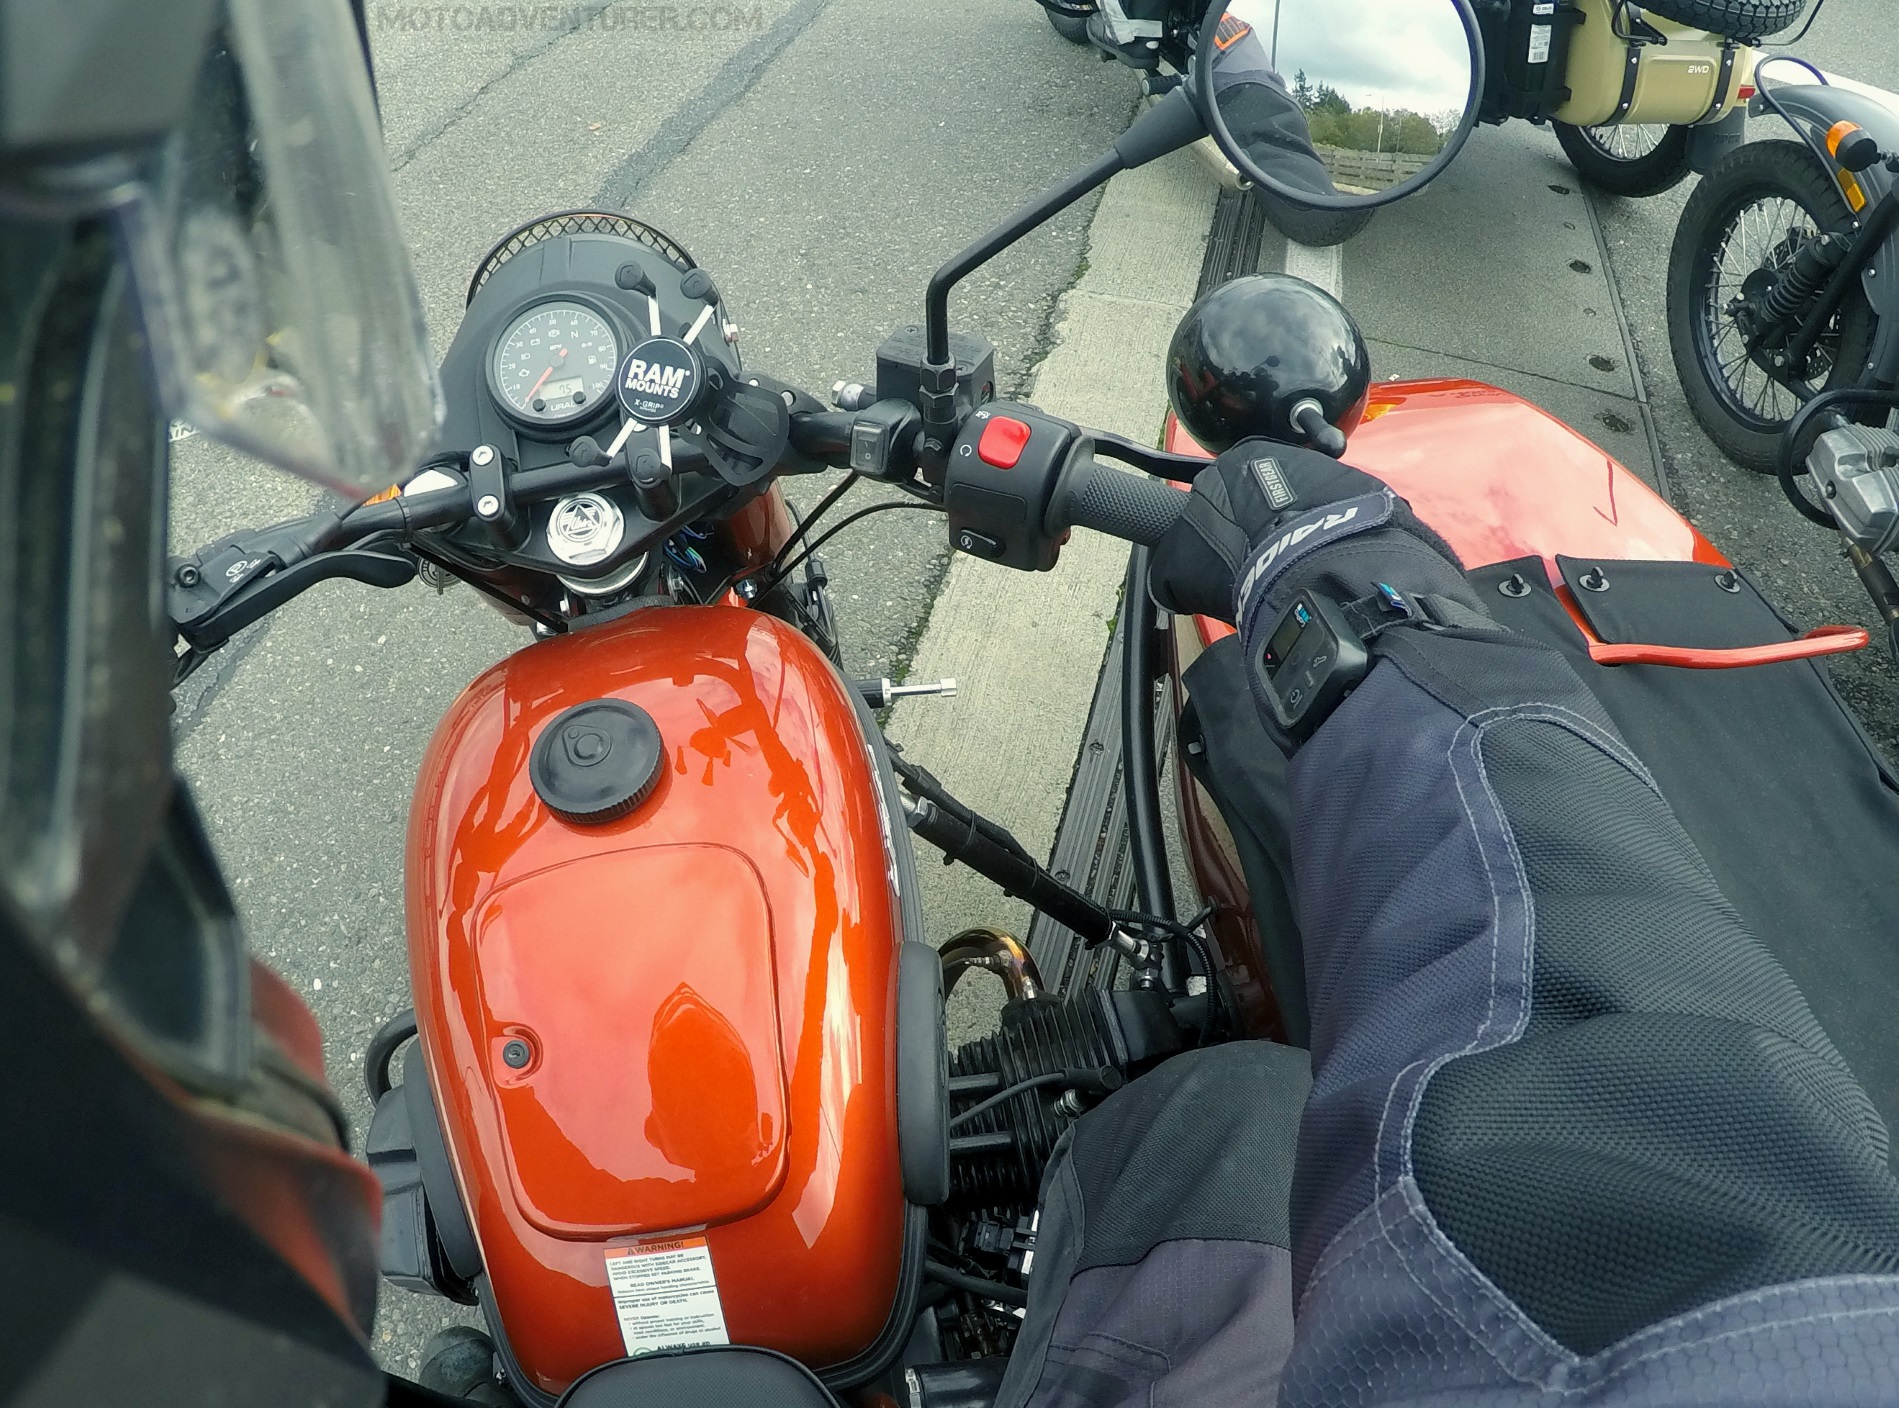
Similar to its character, looking at the engine there’s no denying it’s reminiscent of a different era. However, that’s not a dig against Ural, the technology might be “old”, but it works, and that’s part of the allure to the brand.2014 Ural Gear Up MotoADVR Ural has been making big strides in recent years; making prudent changes to their components, while still being true to the brand. “Simplicity” is unquestionably the second biggest reason I’m interested in a Ural; two-wheel drive being the first. Overall there’s no denying that fit and finish has been improved year after year since 2014. I have often found Urals sold on showrooms next to Royal Enfield; by comparison, you’ll notice poor quality casting marks and welds on the Indian built Bullet, while the Ural doesn’t have such blemishes. The bike may have an “agricultural” feel, but the machine’s details are very much modern.

In contrast to the somewhat old-fashioned gearbox, the throttle response was buttery smooth, with very linear power delivery. That smooth power delivery becomes critical when maneuvering the rig, but I’ll talk more about that in a minute. Unbeknownst to me prior to writing this, the Ural actually has a dry clutch. Somewhat of a rarity on most motorcycles these days, Ural 750 Engine MotoADVRI’ve heard several Ducati Hypermotards with dry clutches, along with custom Harleys with open primaries, but at no point throughout the entire day did I notice anything, sound or function, that indicated a dry clutch hidden inside the Russian mill. Trying to adjust to all the changes as once, I was initially worried I might be winding out the engine too far considering I didn’t have a tachometer. David reassured me that winding it out was good, “lugging” the engine was what I wanted to avoid (there’s also a rev limiter to keep you from getting too crazy). That seemed easy enough for me, as I would say that I consider that a “normal” practice for me, but I wanted to at least check considering I’d never experienced a bike like the Ural before.

With David convinced I was comfortable with leaning into the turns around the parking lot, we headed back to the office to pick up Jason and head out of the city in search of some backroads. Originally Jason had planned on an eastern route up through the mountains; unfortunately with fall weather it was actually snowing at elevation that morning so he decided it was best to stick with a ride on the far side of Puget Sound. Finally filtering into Seattle traffic, I was immediately surprised by the Ural’s gearing; slowing for traffic lights, without pulling in the clutch I could squeeze the brakes until nearly at a full stop before the engine even hinted that it might stall.DCIM100GOPROG0123196. Meanwhile, with a flat torque curve that pulls right out of the basement, pulling away from a stoplight pretty effortless; aside from a little dose of “sidecar physics”. Related to the previous comment about vintage bikes, this was my first (motorcycle) experience with a 4-speed transmission. First and second gear were impressively tall, David mentioned you could feasibly start the bike in second; I found myself typically cruising the service streets in second, and only clicking into third in the higher speed limits.
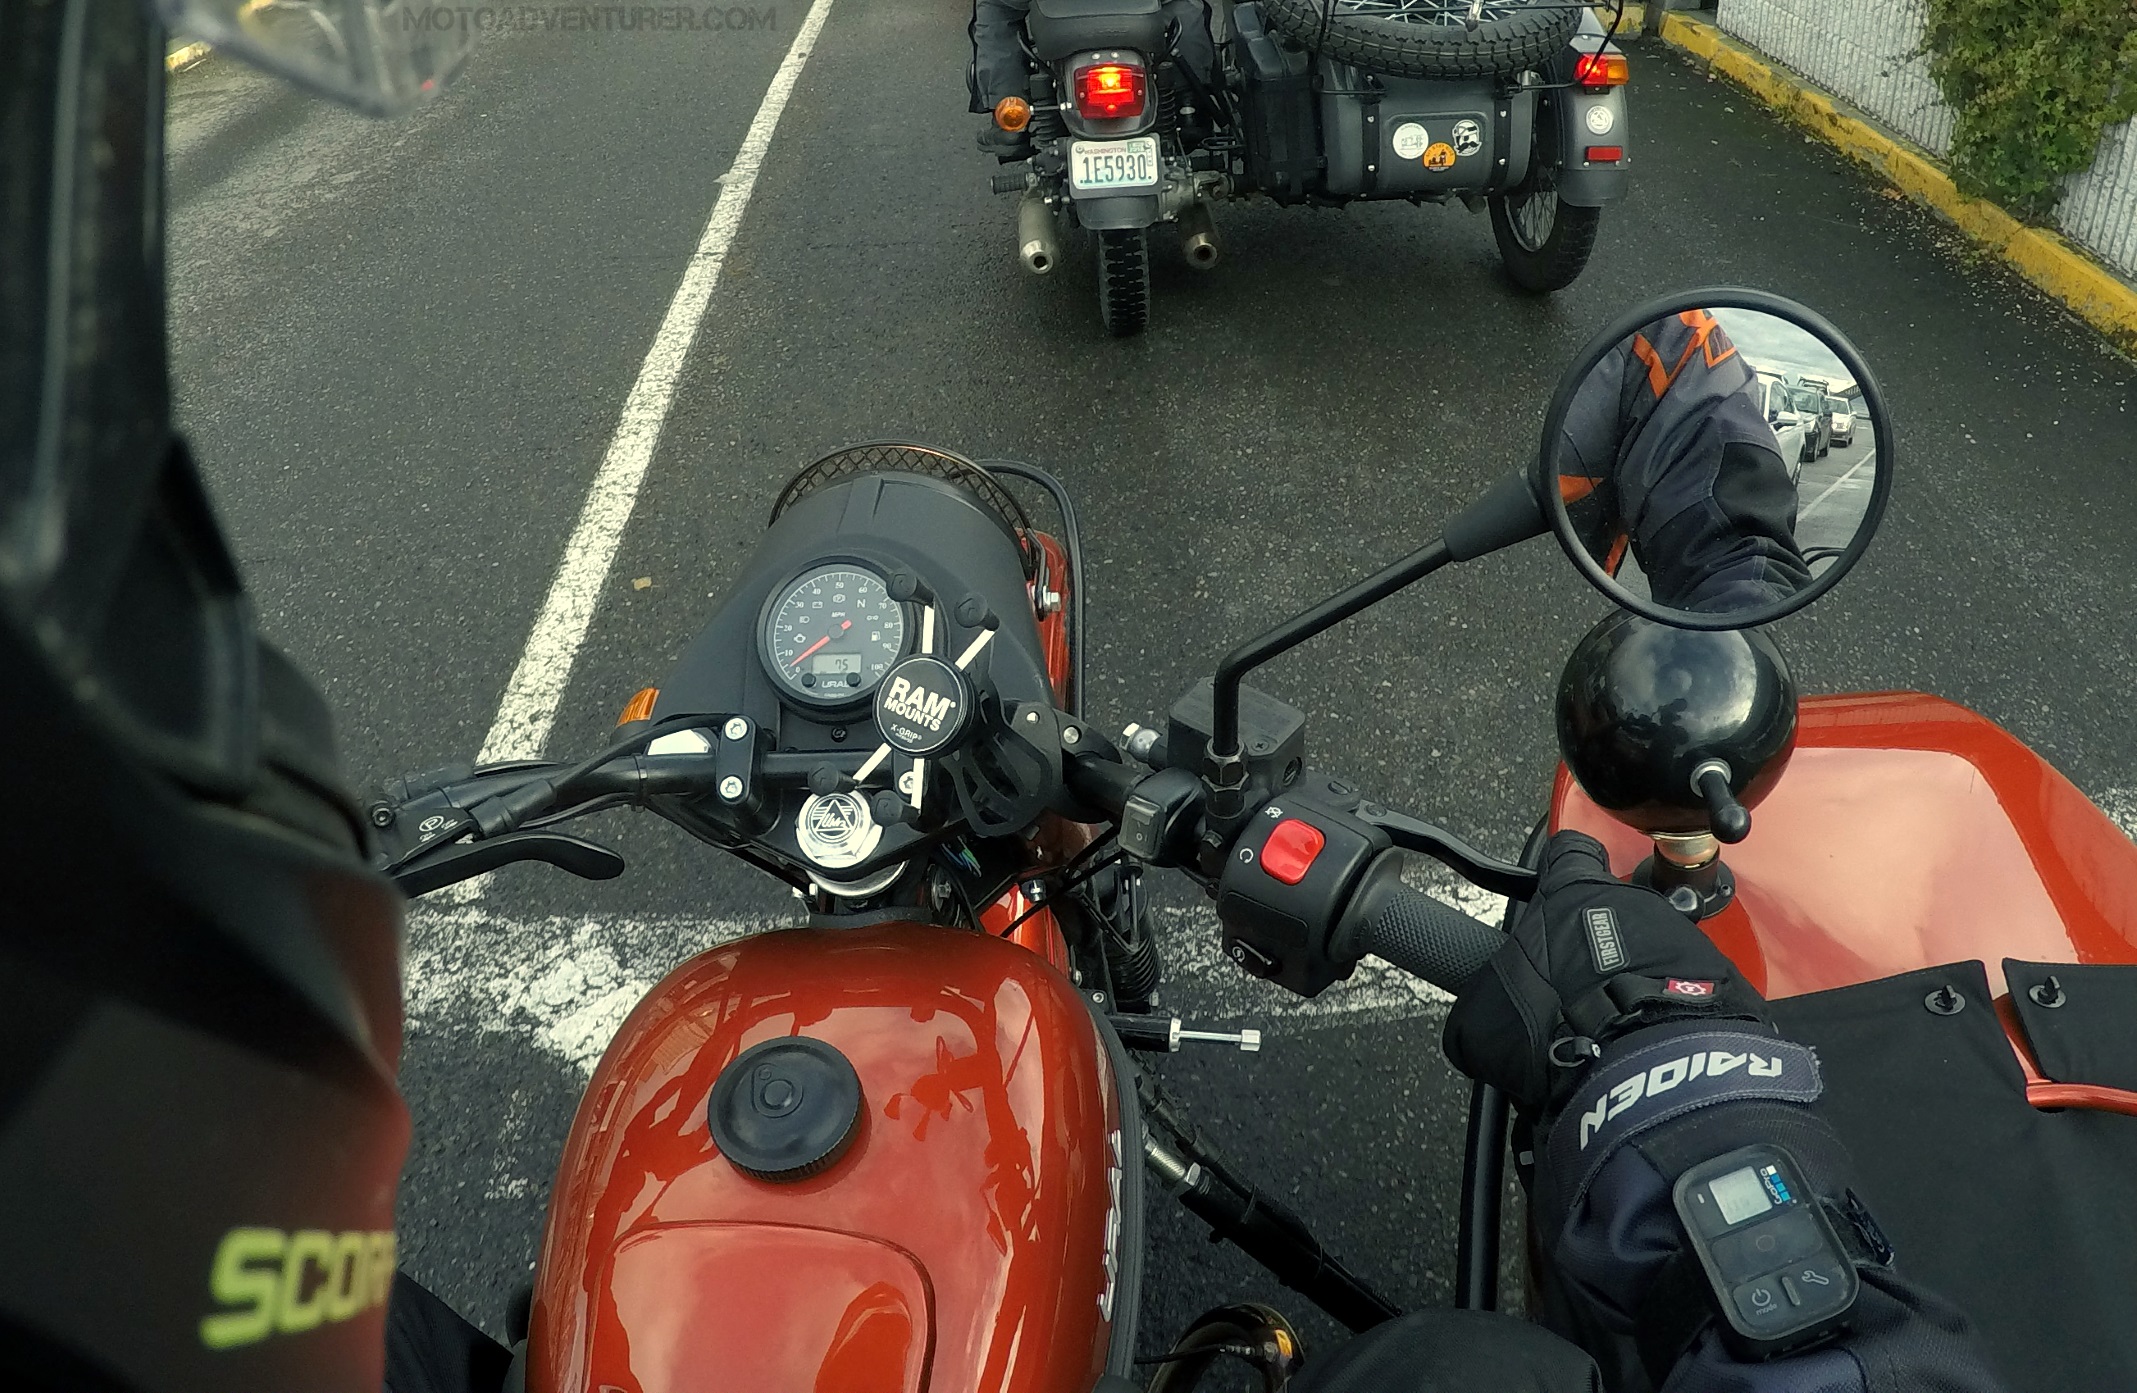
As we started to find our way onto secondary streets my attention shifted from avoiding traffic to noticing the character of the rig. ural-gear-up-twisties-motoadvrCruising down the roadway I began to notice the bike “do the worm” with bends in the road and changes in steering. Needless to say that’s a really odd feeling as you pull the bars to follow the curve in the road and then literally feel the tub “react” to the inputs. I didn’t understand this strange sensation at first, and then it occurred to me: the sidecar wheel is in a unique position, not in line with the other two, while there’s also an asymmetrical weight distribution, putting the center of gravity somewhere between the bike and the hack; a sidecar simply “moves” in a way like no other vehicle I’ve ridden in or on. As the day went on I noticed the sensation less and less as I began to acclimate with the “flow” of the bike.

I’ve read about the characteristics of sidecar “piloting” in quite a few other Ural reviews. Most writers mention that you feel the sidecar lag with acceleration and surge forward when under braking. Contrary to that statement, I actually found those acts to be relatively uneventful compared to what I’d expected; I found that it was only prevalent with poorly executed shifts; as long as I managed to shift smoothly, the ride was (generally) linear. With regard to braking,DCIM100GOPROG0073043. there’s no denying that the rig has a tendency to push left when exclusively using the front brake. The rear and sidecar brakes are actually linked with the right foot pedal; so inversely, when only using the “rear” brakes, the sidecar has a tendency to track to the right. Using a balanced application of both brakes, I found that the Gear Up slowed in a perfectly straight line. David reassured me that that’s how a properly set up sidecar should behave; there’s actually a rear brake “bias” that can be adjusted to fine-tune the braking if needed. On the other hand, what really surprised me was the amount of effort needed to “steer” the rig around the corners. It makes sense though, the weight difference of a sidecar versus a motorcycle, and all of that asymmetrical weight being hinged on the front wheel. This effort is compounded by the fact you are leaning into the turn, yet pulling on the bars. On a standard two-wheeled motorcycle you lean into the curve, and the act of doing so actually helps you push the bars, counter-steering the motorcycle into the desired direction. Extra effort aside, the entire act takes a bit of getting used to as you initially feel “crossed-up” trying to maneuver the machine.

Before we had left the parking lot David made a very conscious effort to remind me to be aware of the far right wheel position. DCIM100GOPROG0283740.He said they deal with more dents and dings on the sidecar fender than any other issue with their demo bikes; he mentioned that non-sidecar riders are unaccustomed to how wide the Ural really is and accidentally bump the hack into fixed objects around corners. Following Jason, I Initially found it easy to stay “left adjusted” in the lane as we worked our way out of the city. As we finally found ourselves on more of the twisty bits, I realized how habitual that “outside-inside-outside” motorcycle line through the curves is ingrained in your muscle memory. I did fortunately avoid dropping the sidecar wheel off the roadway for the entirety of the afternoon, but there were still a few times that needed to adjust my line and tell myself “no” when going around the bends; even more so in tight parking lots as it turns out.

Settling into a groove, I began enjoying the scenery and taking more mental notes about the Ural. The seating position is neutral, with your feet slightly forward and the bars easily within reach; it’s actually very similar to my Triumph. DCIM100GOPROG0283737.I admit, when you first mount the saddle, you think your toes will be mashed right up against the jugs, but after spending all day on the bike, that’s really not the case. I was impressed to find that the seat was indeed “all-day” comfortable; it seemed a bit “firm” after riding all afternoon, however having experienced some painful lessons from the Scrambler’s stock bench, I agree that starting out firm is a good thing. From some of David’s comments, I suspect that the new enduro seat will “form to the owner” with time and make it that much more comfortable. That extra space provided by the two-up bench was also welcome; when things got sporty I found myself hugging the tank and leaning off the seat, but when touring on the lazy roads it was convenient to scoot back on the seat, spread out, and relax.

DCIM100GOPROG0032926.

After a ferry ride across Puget Sound, we stopped for lunch in Port Gamble, where I parked the Gear Up in a spot pointing downhill. At 730 pounds, without gas or my own heft, the Ural is obviously not light for a 750; fortunately it comes with reverse. This probably doesn’t sound strange, as reverse is becoming more and more popular on the big baggers like the Gold Wing, and even the new BMW K1600 GTL. The Ural however is different, while many motorcycles utilize the starter motor to actuate a reverse function, Port Gamble General Store MotoaDVRthe Ural’s reverse gear is actually a part of the transmission, so you still use the clutch and throttle. From Neutral, there is a foot pedal you actuate for reverse gear, after that, look behind you, let out the clutch and give it a little gas; just a seamless as a backing out a car. Press the right foot lever back into neutral, and you’re ready to head out.

After a platter of fish ‘n chips and warming up a bit, we set back out to find a few more twisty roads. By that point I was feeling pretty comfortable with my sidecar piloting skills and looking forward to challenging myself with some tighter curves. Headed south toward Bainbridge Island, the sun finally came out and the roads dried off a bit. Pulling on the bars and leaning over the sidecar with a little extra effort, I hustled the Gear Up through the bends of the forest lined streets.DCIM100GOPROG0052968. Several times I noted the profuse amounts of pine needles and grass clippings covering the roadway in the shade, exposing only a pair of narrow wheel tracks where a few cars had recently passed through. At that moment I realized, this road would’ve been absolutely treacherous on a two-wheeled motorcycle, but the Ural was right at home; confidence inspiring by comparison.

From Bainbridge Island it was another ferry ride, this time right into the heart of Seattle. Ural Seattle Skyline MotoADVRAs the ferry “turned the corner” around a point, I could see the Seattle skyline emerge from behind a line of pine trees; I regret that a photo simply doesn’t do it justice. Pulling into port with the sun shining, we passed a number of motorcyclists waiting to get across the sound as the weather was breaking and the work day was ending. Merging into the city I was suddenly reminded of Cincinnati; while Amazon and Microsoft call Seattle home, I still felt a blue-collar vibe downtown, but the pub district and side-by-side sports stadiums really framed that comparison for me.

Headed south toward I-90, we took the freeway east of the city to pick up a few more backroads before it was time to call it a day. DCIM100GOPROG0223448.I was honestly shocked by how easy it was to ride the Ural on the highway. Things that I had read made it sound like you would never want to take a Ural on the interstate, but I can assure you, that’s not the case with a modern Ural. DCIM100GOPROG0233524.No, you’re not going to set any speed records; yes, you need to have plans to pass people and be prepared to be relegated to the right two lanes at times. That said, I found the Ural to be surprisingly comfortable at speed, and at no point did I feel like the Siberian 750 was strung out. I will say that I can see an argument for a windscreen; longtime readers know that I really don’t subscribe to that kind of thinking, so I was reasonably comfortable despite the wind blast, but I can see the appeal for some folks.
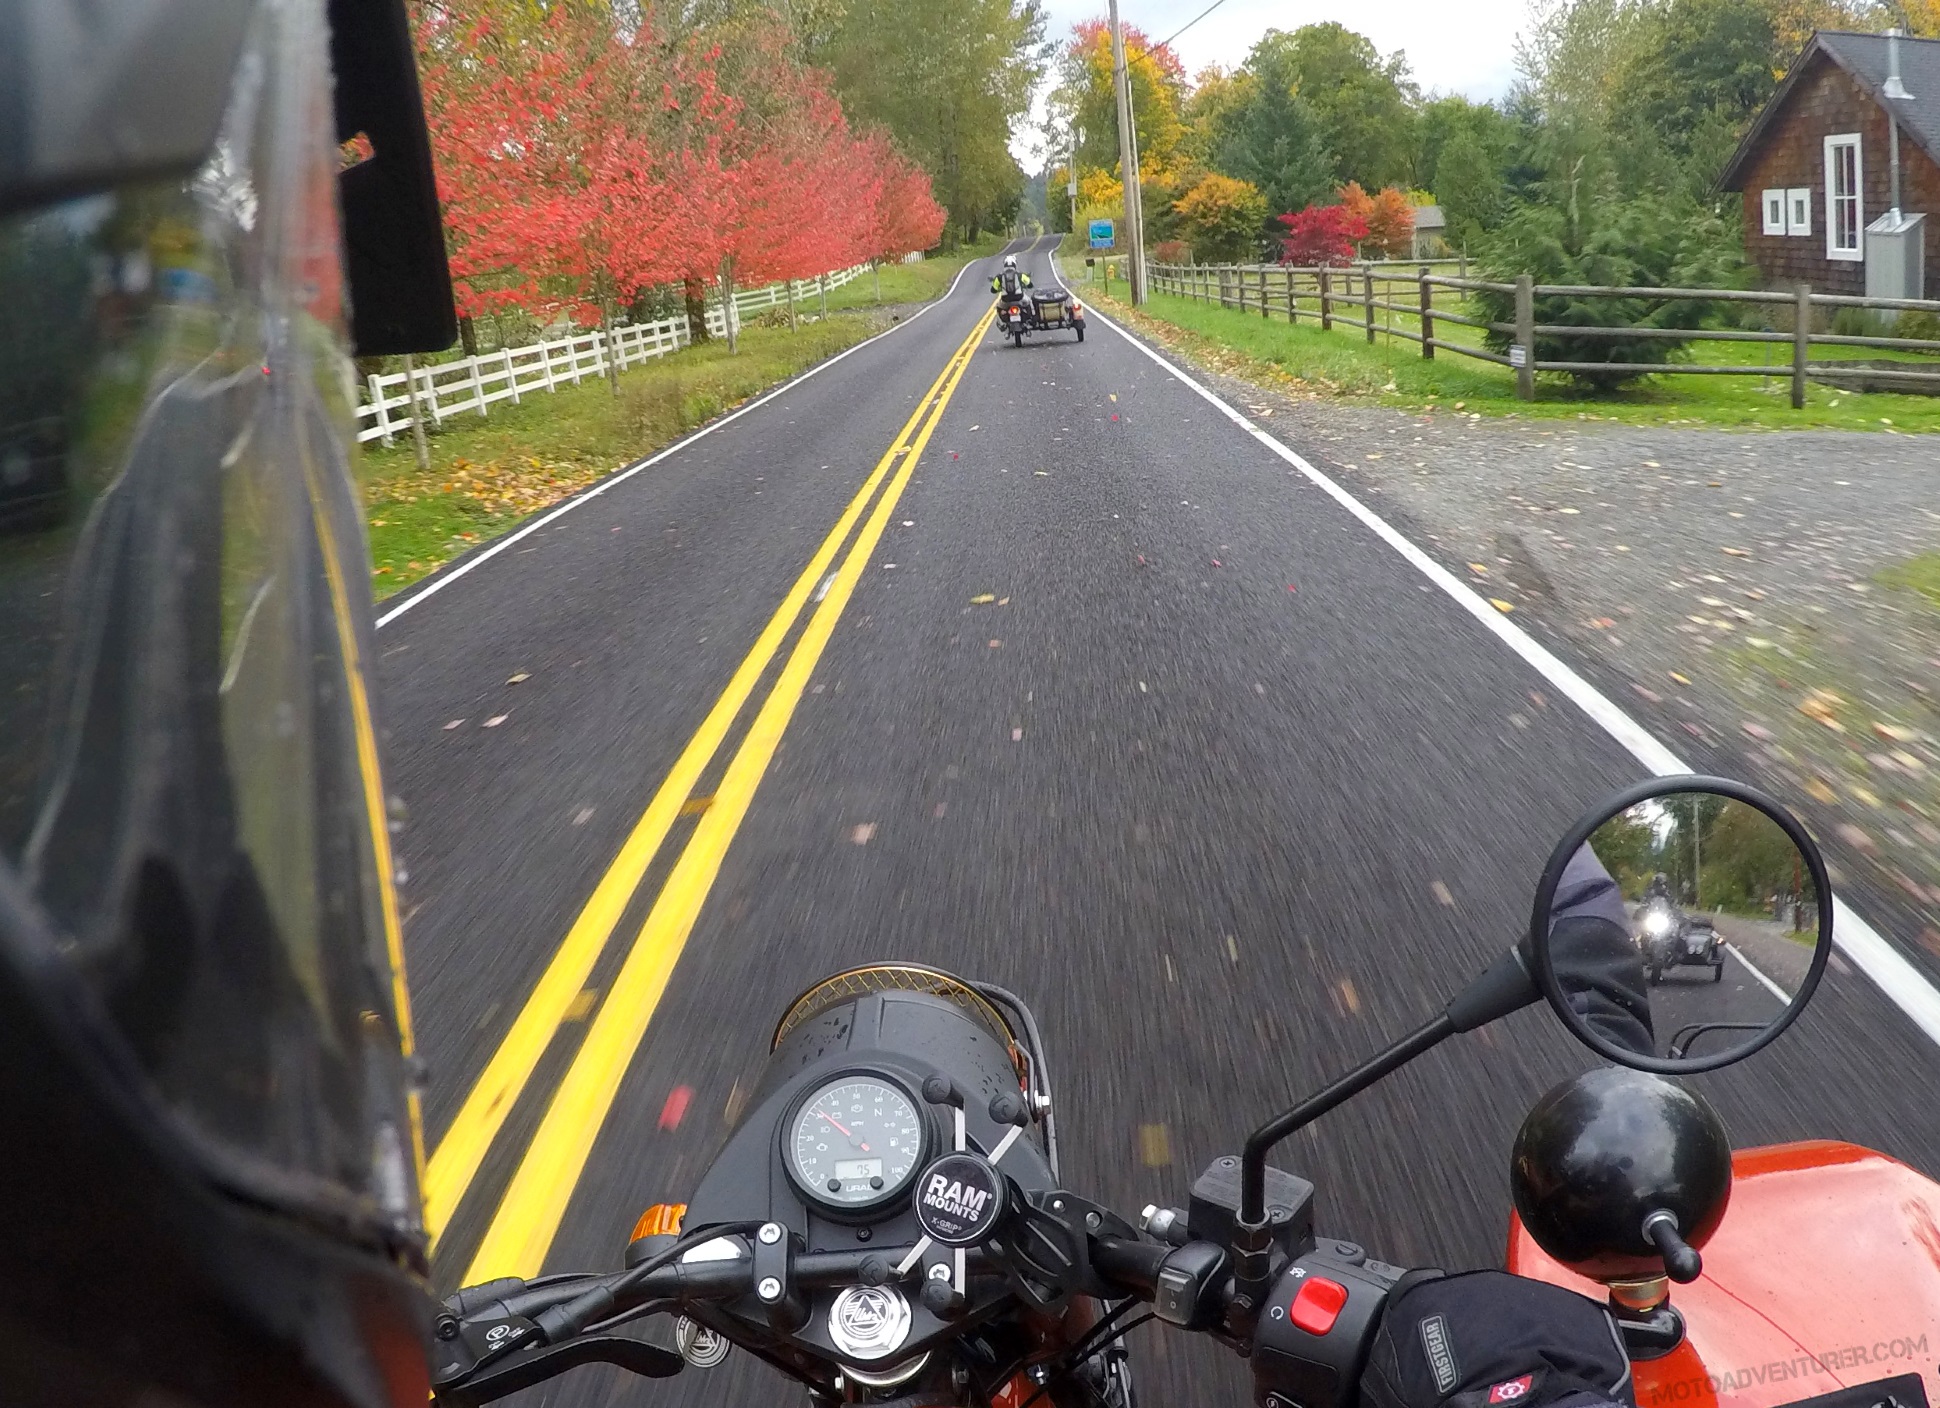
DCIM100GOPROG0283694.Somewhere around Fall City we found a good long set of twisty backroads. Littered with quaint cottages, pine trees, and a spattering of fall color, the bends along Issaquah-Fall City Road were the best of the whole trip. DCIM100GOPROG0283874.I had finally started to feel confident with my skill at keeping the chair on the ground while hustling through the curves and I was begging for more; right about that time, we were descending on Redmond to hang it up for the day. Pulling back into the shop I had a million questions and was still trying to digest everything that had happened in such a short period of time.


The Pacific Northwest

DCIM100GOPROG0042935.

Seattle is a gorgeous city; riding a Ural in the Pacific Northwest really makes the experience that much better. Beyond the Ural staff, folks in Seattle were very outgoing and extremely friendly; much different than what I have experienced in Chicago, San Diego, and even parts of Ohio for that matter. You can watch movies about the Pacific Northwest, but there’s nothing like seeing it in person; everything is green, from the pine trees to the moss growing on the jersey barriers, it’s very much alive. DCIM100GOPROG0073052.They don’t call it the Emerald City for nothing. My time in the city was unfortunately way too short, I was hoping to catch a good view of the mountains, but weather wasn’t exactly cooperating; what I did see was already outstanding, I can only imagine the views at elevation. I told Jason and David before I left, now that I’ve seen Washington State, it’s going to be very difficult to keep me from returning.


I want a Ural Gear Up

Ural Gear Up overhead MotoADVRSidecars are icons from a different era, I find it ironic that my initial interest in a sidecar was predominantly to avoid the mundane “comfort” of the modern automobile, and the hustle and bustle of city life; fitting I suppose as the Ural is a “time machine” in many ways. Initially I saw it as a means to an end; a utilitarian machine that lets me ride a motorcycle year-round despite Midwestern winters, while also having the ability to load it up with groceries, or to pick up a friend and go see a movie. My obsession with ditching the car for a “simpler life” never seemed that “deep” until I looked at it in that light.

Ural Gear Up Ferry MotoADVRI regret that I didn’t get an opportunity to test the two-wheel drive. David gave me a short tutorial on how it works when we were parked at the office. He explained the importance of only using two-wheel drive in inclement conditions, as one wheel will always need to be in a “slip” condition. See, the Ural doesn’t have a differential like most four-wheel drive cars; so when you throw the Gear Up into two-wheel drive, the sidecar wheel is locked in step with the main drive wheel. That may not sound like an issue at first, but ultimately that second drive wheel will overpower the steering on dry pavement; when both “rear” wheels are pushing the rig and you go to turn, the Ural just keeps going straight.

That aside, the Gear Up does indeed seem to be the utilitarian machine I hoped it would be. I’ve heard people describe the Ural as antiquated, slow, and even unreliable; but after what I’ve seen, I wouldn’t use those words to describe the Ural. Ural Gear Up Ferry 3 MotoADVRYes, the engine is small in comparison to its weight; but it is simple, and easy to maintain. The Ural mill runs on conventional 20W50 motor oil (5W40 for colder climates), and I’m told an experienced Ural owner can do a valve adjustment in a matter of minutes (there are perks to exposed heads). Yes, service intervals are short (just over 3,000 miles), however this is a 700 pound pushrod machine, running straight cut gears, conventional oil, and can haul around the weight a Gold Wing, including passenger. The bike comes with a fuel can, a shovel, mud flaps, and has over a twenty-one gallon trunk; not to mention the extra space in the tub without the passenger, and the empty pillion seat.Ural Gear Up Trunk MotoADVR Did I mention this is a 750? Urals are shipped with a tool kit that can handle 99.9% of the maintenance you do on the bike, along with a service manual that has actual photos of the before mentioned routine maintenance; neither of which can I find in any other brand’s dealership that I’m aware of. Look, in the end, the Ural is the motorcycle equivalent of a tractor, and it attracts a completely different kind of rider; it’s not about speed and modern amenities, it’s about the experience. David told me they have a motto, “Adventure Together” and “Adventure Daily”; that motto is unquestionably the spirit of the bike, and there’s no doubt that spirit is instilled in its owners. DCIM100GOPROG0283870.Having a Ural means you can go almost anywhere, sent on your journey with the tools to combat whatever obstacles you may encounter; assuming you’re the intrepid type to venture off the beaten path. The best part is, you get to share the journey with someone beside you, be it your spouse, your best friend, or even your four-legged family members. If packing up your life and wandering into the great unknown, with low technology and no deadlines, sounds like your kind of adventure, than a Ural might be for you.

I’ve heard others say it, once you’ve spent a day on a Ural, there’s something about it that simply grows on you. It’s not a performance machine,Ural Gear Up Exo-AT950 MotoADVR it’s not drenched in techno-wiz-bangery, it is simplicity at its finest, and it’s an unsuspectingly good time. Longtime readers of the blog already know, I’ve been attracted to the Ural for its utility, but I was also undeniably caught off guard by its charm. With the character of the engine, and the way it “moves” when you ride, the bike is “alive” in a way I’ve never experienced before. The bike not only grabs the attention of the rider, but also the public. What people say is true, you can’t ride a Ural anywhere without people stopping to talk to you. Ural Tank Badge MotoADVRI always makes jokes about “The Triumph Effect”, as grey-beards see my Scrambler at the gas station and stop to tell me about their old 650 Bonneville; the “Ural Delay Factor” is even more prevalent. It’s no longer just motorcyclists that stop you, it’s every passerby you can imagine, soccer moms and all; everyone is fascinated by sidecars. And they should be, it’s unquestionably the most fun I’ve ever had at 35 miles an hour.


Now there’s only one question, can the Gear Up handle eastern Kentucky adventure trails?


Posted in Bikes | Tagged , , , , , , , , | 43 Comments

VUZ LED Reflective Safety Vest: Be Seen

DCIM142GOPRO

The first weekend in November came and went, and Daylight Savings Time went along with it; and now the dark times are upon us… This is that time of the year that I’m commuting to work in the dark, only to leave work and ride home in the dark. The longer I ride, the more I’ve made it a point to “be seen” as much as possible, hoping that will keep inattentive drivers from pulling out in front of me or running me over while I’m sitting at a red light. A few weeks ago I stumbled across VUZ Moto on Instagram (pronounced “Voose”); turns out they make a Hi-Viz vest including LED lights that may help me in that endeavor so I sent them a message. I’ve been testing the VUZ Reflective Safety Vest for around two months now and I’m pretty impressed with what I’ve seen.


First Impressions

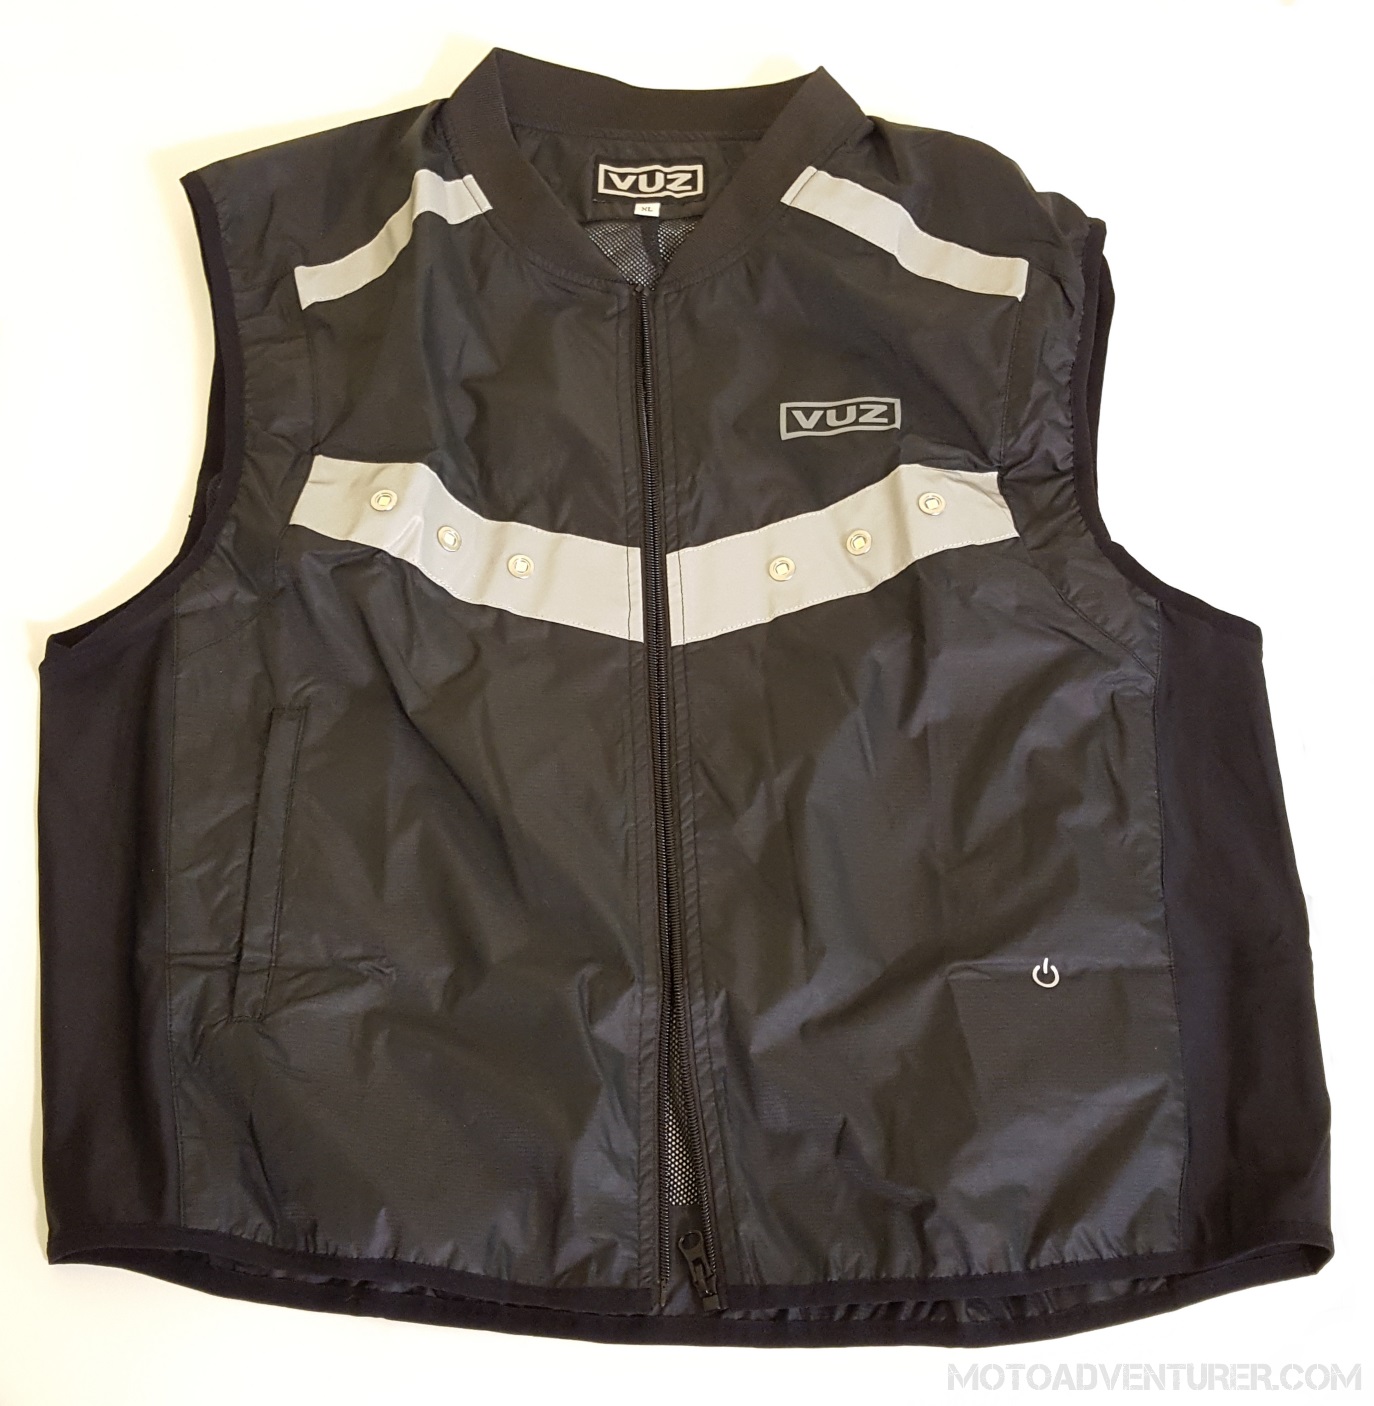
Out of the box the vest material is very light in the hand and the reflective panels are some of the most substantial I’ve seen. VUZ Vest MotoADVRThe vest has really wide reflective panels across the chest with accent panels along the shoulders. The rear of the vest has matching back and shoulder stripes along with two sizeable vertical panels that should be very visible from the flanks. Attaching the controller cable is really self-explanatory and the battery already had a little bit of a charge out of the box. I was immediately struck by how bright the LEDs were; the 6 front LEDs are an unbelievable bright white, while the back has an additional 4 LEDs in red. Per the instruction sheet, the LED controller has five settings, front-only, rear-only, front and rear, strobe, and off. Standing in my kitchen testing out the lights, I figured the strobe setting might be a little over the top during a night ride, but I’ll touch more on that in a minute. The vest dons easily, with lateral “stretch” material that helps cinch the vest over your motorcycle jacket. The front zipper is a little small when compared to a motorcycle jacket main zipper, but it operates smoothly and you can still find it with a gloved hand. I had to put the vest on a few times to realize there is also an exterior zipper pocket available on the lower right side. The inside pocket is really only meant for the LED controller, but the exterior pocket is large enough to store your cell phone.


Road Testing

DCIM142GOPRO

Unlike some of the competitor’s heavier construction, the VUZ vest doesn’t set out to offer additional crash protection, so much as to grab people’s attention. The material is actually 50D Waterproof Polyester along with an inner mesh liner; it’s thin and very light weight, and is intended to be form fitting to reduce drag. Initially I was a little concerned about the vest trapping heat in, but on an 80°F afternoon, I was pretty impressed with how well it breathed; it’s actually quite comfortable in mesh gear on a hot day, although I suspect you’ll want to make sure you keep rolling on the hottest summer days.

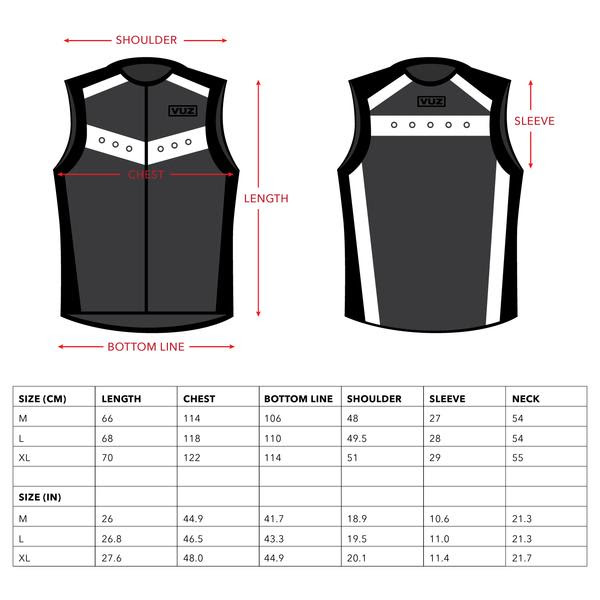
Considering it’s now very much fall, the temperatures have been falling and I’ve spent a lot more time wearing the vest over my new Icon DKR Jacket. Despite the fact the vest is a little oversized, it fits over the DKR jacket nicely as it’s a bit more bulky than my old Rainier jacket. More impressively, the material doesn’t fill up with air, flap in the wind at high speeds, nor does it take up extra room in my mirrors, something I can’t say for my rain suit most days. That said, with the expandable lateral material, you’ll want to follow the size chart and order a vest that fits a little closer to your size (I have an XL, I probably need a size smaller).

Initially I figured I would only use the red LED lights on the back of the vest when riding, just to ensure that drivers see me sitting idle in traffic. It wasn’t long before I found myself riding in the cold rain that I recognized the value of the front lights.DCIM142GOPRO Commuting around the city I figured it was a good idea to turn on the front LED lights in addition to the rear in order to attract more attention to myself in the hustle and bustle of rainy stop and go traffic. Per my previous comments, I was reluctant to engage the strobe setting at night, assuming the flash and reflection off the bike would get irritating, if not distracting while riding. That might be true on a clear day, but on my way home from the office last week the skies opened up. The temperature was somewhere in the 40’s and it seemed like everyone headed home at rush-hour had completely forgot what it was like to drive in the rain. As folks started to get “dodgey” I flipped the VUZ Vest LEDs to full strobe and merged onto the highway. Considering the bright “sheen” on all of the wet surfaces, I really didn’t notice the pulsing reflection of the strobe lights. Just moments after engaging the strobes, I noticed a car up ahead of me start to pull into my lane; just that instant I could see that they recognized the crazy Christmas lights headed right for them and dove back into their lane and refused to move until I passed by. “Bright lights save lives” apparently.


Closing Thoughts

DCIM142GOPRO

I recognize that Hi-Viz gear is not for everyone, but the first word out of someone’s mouth right after they pull out in front of a motorcycle is: “I never saw them”, I’m of the mindset that it’s worth the extra effort to be seen, especially if you want to survive this somewhat dangerous hobby. Needless to say I’m a big fan of rally orange and Hi-Viz yellow, but when the sun goes down, these big reflective panels are exactly what I’m looking for; the LED lights are an added bonus.

DCIM142GOPRO

I’ve spoken with Ryan from VUZ Moto several times in recent days; as of this moment standard black with reflective panels is the only model available, but VUZ will consider adopting other Hi-Viz colors if there is sufficient customer pressure. Personally I think they can get a leg up on the competition by adding a little modern twist on the old “construction worker” thing that you usually find in retail motorcycle stores.

VUZ Vest Front MotoADVRThe Reflective Safety Vest will run you about $70 (delivered; free shipping to the lower 48 states) and comes in sizes Medium through XL, ranging chest sizes from 45 to 48 inches (measured over the jacket). $70 might seem expensive at first glance, but looking at the other safety vests on the market, they tend to run $50 or more, most of which are bulky Mil-spec vests that don’t offer additional LED lighting. Along with the safety vest, southern California based VUZ Moto also carries a number of other motorcycle accessories from luggage to motorcycle covers; more information at www.vuzmoto.com.

Posted in Gear - Maintenance - Safety | Tagged , , , , , | 4 Comments

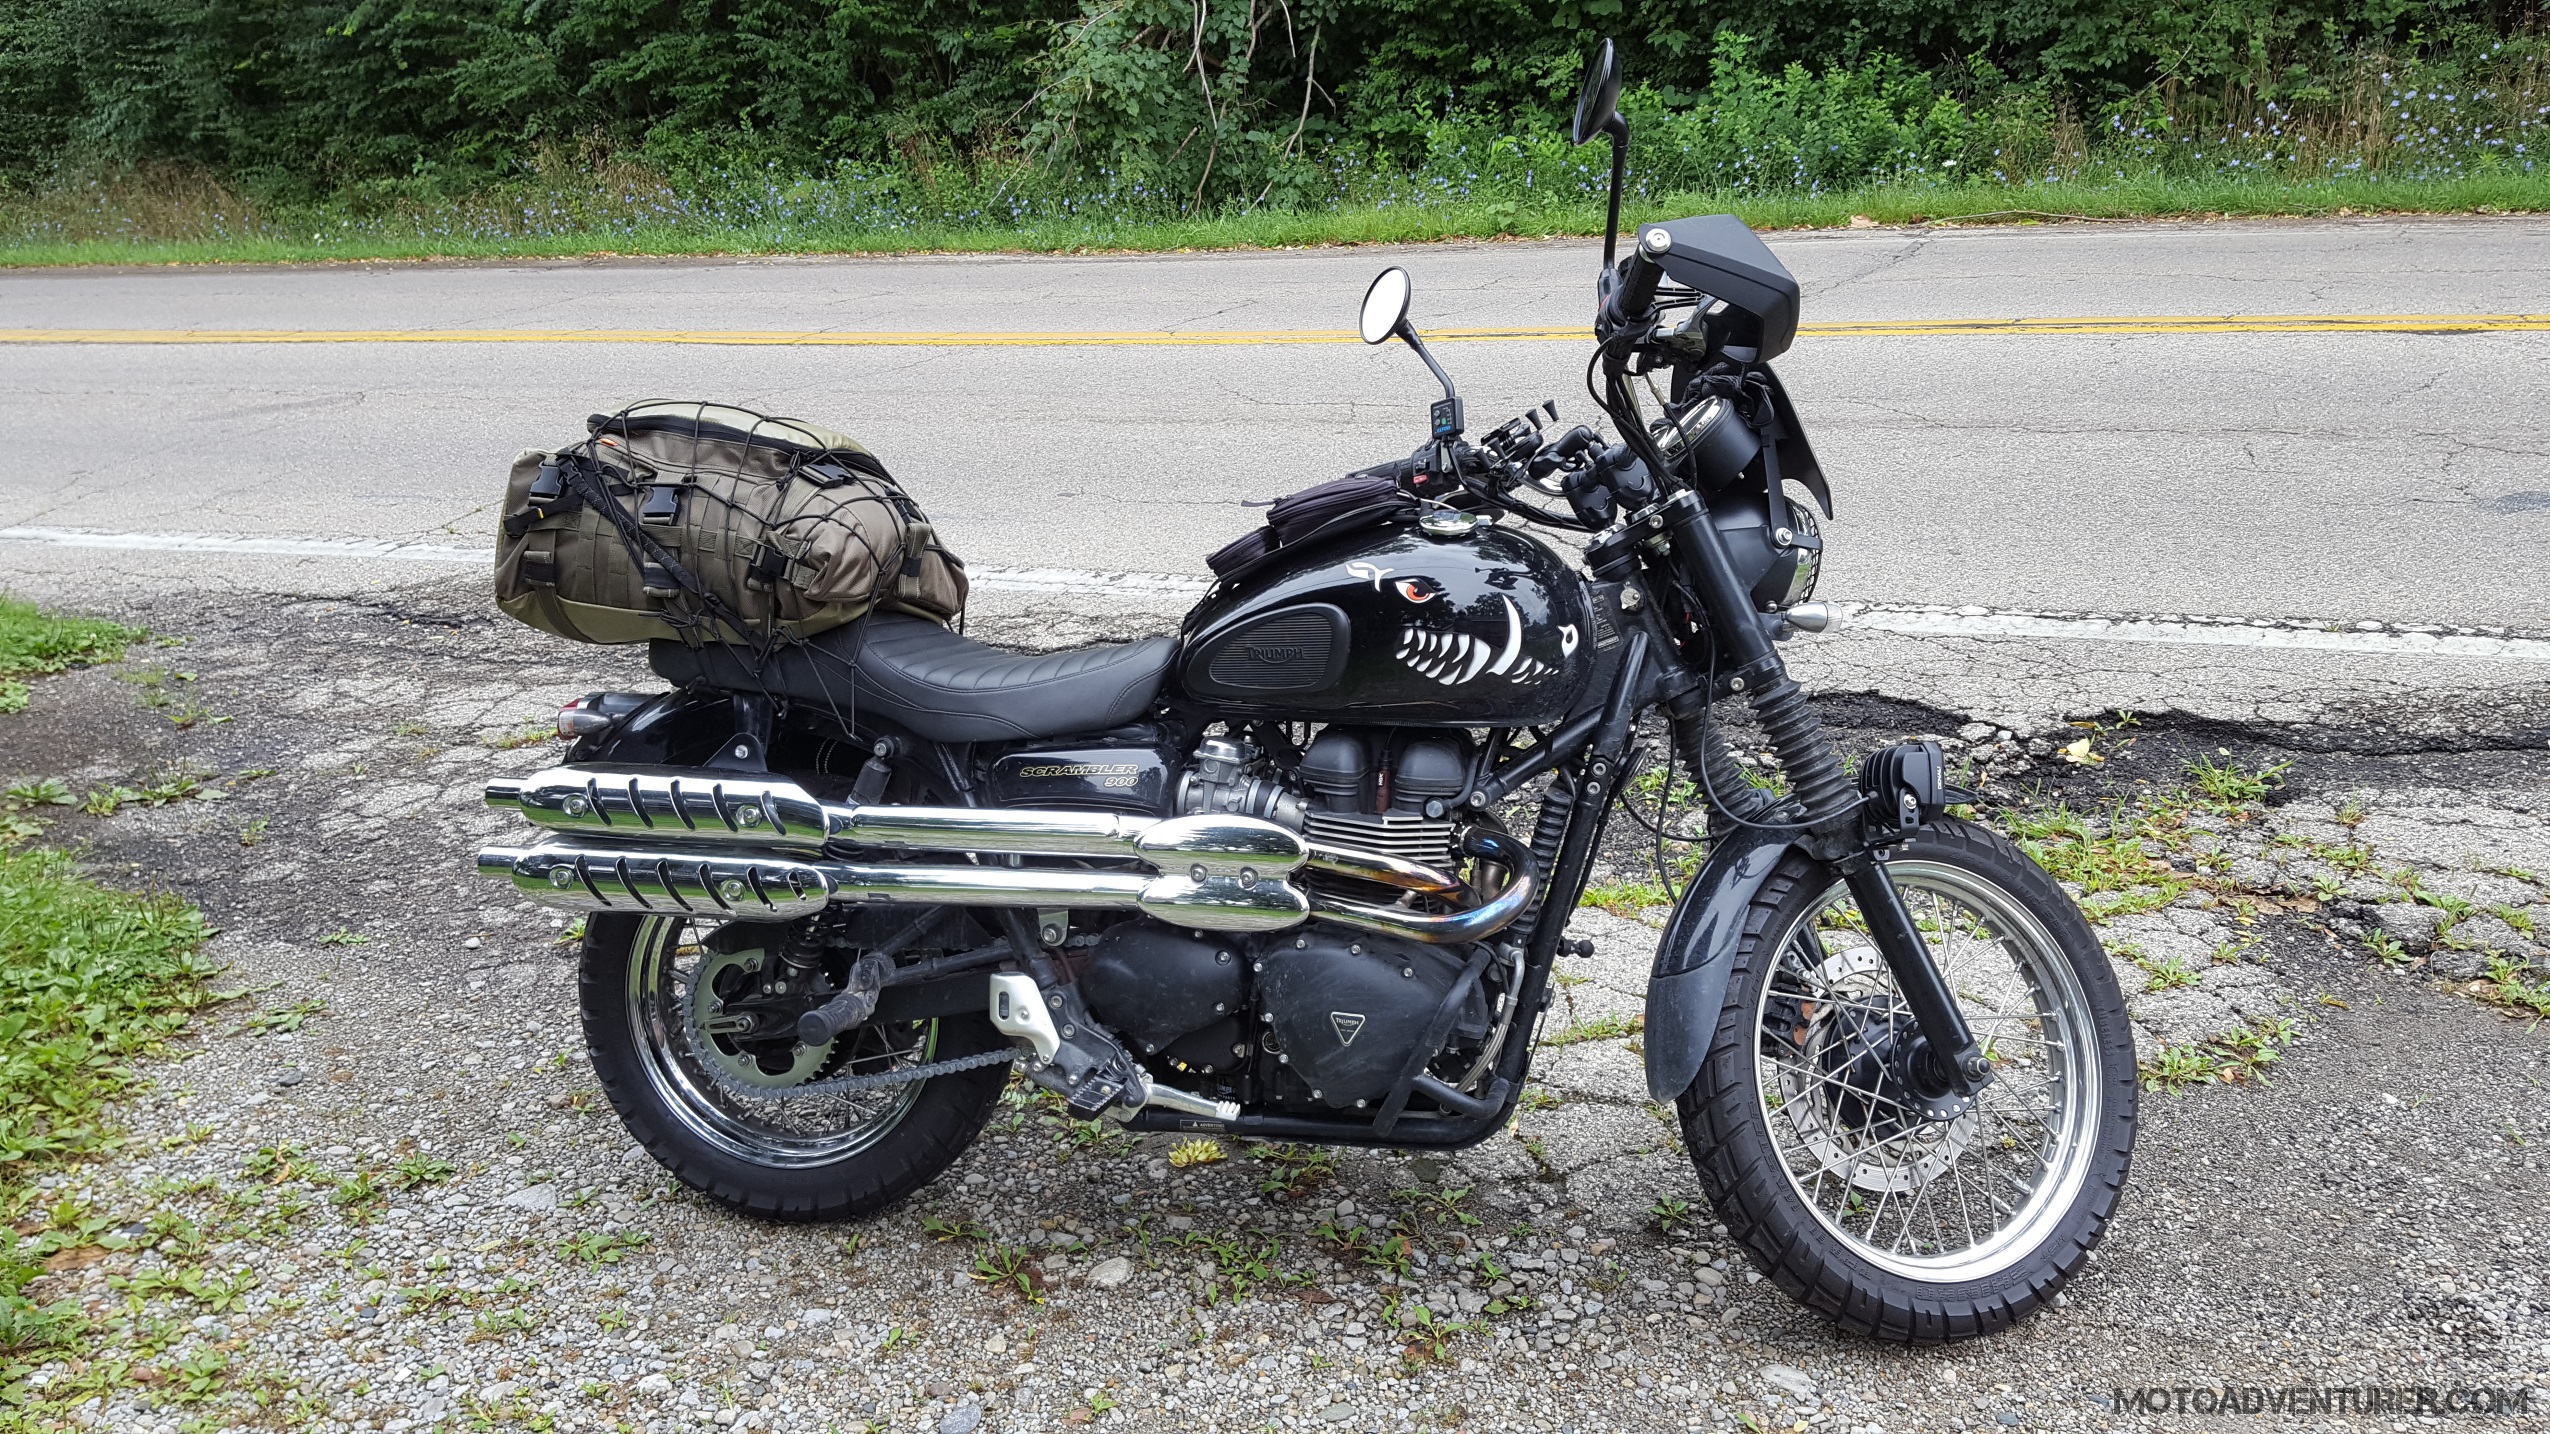
Triumph Scrambler Adventures: Day Trip to the DBBB

About two weeks ago I was suffering from some serious bluegrass withdrawal. Hurricane Irma had managed to put a pretty significant damper on most of my plans for the Triumph Dragon Raid; that combined with things being nuts at the office, I felt well overdue for a trip down to the Gorge.

Being October, the days are unquestionably getting shorter; that however, also marks the beginning of hunting season. What does that have to do with riding? As it turns out, the double-track sections of Hatton Ridge Road, that my buddy Rick and I hit last November are only open during hunting season. After consulting the Daniel Boone National Forest (DBNF) website, I figured we might have a shot at hitting an adjacent forest service road just as it was opening for the season.


June Bug Road

Triumph Scrambler DBBB Cliffline MotoADVRAbout a mile and a half south from the head of Hatton Ridge Road is a set of gates for DBNF service roads #167 and #168. I found these roads from satellite views on Google Earth last fall when I was looking for additional trails to link together with Hatton Ridge and Spas Creek. Upon arriving in Frenchburg, back again, my buddy Rick and I wound up Indian Creek road in the hopes of finding open gates, even though we were technically a day early. As luck would have it, the east gate (#167) was actually open; I knew from the trail reports I’d found that this was the shorter of the two trails, but I was going to take what I could get.

Red River Gorge Trees on Rock MotoADVRThe double-track was sparsely maintained. It looked like the forest service had recently dumped loose soil into all of the potholes in attempt to even out the road surface a little. Hoof prints in the before mentioned loose soil did however offer us early warning that we could potentially have an equestrian encounter on the trail at some point. Thus far, I’ve been pretty lucky, despite my run-ins with Amish buggies in Southern Ohio and Northern Kentucky, I’ve done well not to run into folks on horseback out on the trail.

Our adventure was a little short lived as we happened upon a significantly large tree that had recently fallen and was blocking the trail a little over a mile in. It appeared that an ad-hoc bridle trail had been forged around, but considering that I had three sections of the DBBB planned, I figured it wasn’t worth the hassle scrambling up the a poorly forged path only to get stuck, or worse.


Pumpkin Hollow Road

Pumpkin Hollow Mudpoint MotoADVRHeaded west back down Indian Creek road we turned south onto Pumpkin Hollow Road. I had elected to skip over Spas Creek Road with all of the recent rainfall, combined with the fact we still had a four-hour haul back home after all the “adventuring”. Not far into “The hollow”, we arrived at the steep elevation climb where I found myself stuck in both ruts back in April. The recent rains had turned that formerly rocky dirt into well-defined jeep ruts in the Kentucky clay. Fortunately, with the Karoo 3 on the back, Rosie’s quite the tractor, low seat height to boot, from there it was just a Scramble to the top.

Scorpion Exo-AT950 Mud MotoADVRAfter wrestling two pigs through the mud, it was time for a couple photos and sandwich. The front end of Pumpkin Hollow is unquestionably the hardest, and a completely different animal than my last encounter. I admit, paddling through the muck, I feel like the Scrambler stood up to the challenge more “gracefully” than the last go-round, albeit slower. The south slope back into the gorge however is a completely different story, once over the steep accent, it’s mostly downhill along the creek bed until you find pavement again near Slade.


Chop Chestnut Road

Triumph Scrambler Tiger800 Chop Chestnut Steps MotoADVRCrossing over Kentucky Highway 11, we headed south onto Cow Creek Road through the quarry (Natural Bridge Stone Company). As you near the quarry office, Cow Creek meets Chop Chestnut Road at a sharp right turn, hidden from view at a distance. After a long run up a well maintained gravel hill and past the cemetery, you pass several boulders blocking the old service road and finally onto rugged double track. Last time up on the ridgeline the sand hidden beneath the pine needles had a tendency to sneak up on me. This time around all that rain actually paid off, the front end didn’t get soft and “push” like it did back in April. On the other hand, the puddles proved to be some of the foulest grey water I’ve ever encountered. The “funk” baking on the pipes is a smell I won’t soon forget.


Fixer-Leeco Road

Again, considering this was a “down and back” day trip from Dayton, I elected to skip the still (partially) disputed Mountain Springs Road. I still want to tackle that section, but considering folks have mentioned various obstacles placed across the trail for thwart off-roaders, I’d just assume circumvent the fuss and spare myself the time of repairing a roadside flat. That decision led us down KY-1639 and 1036 to Fixer-Leeco Road.

Fixer-Leeco, and subsequently Fixer and Cave Fork Road, were very similar to my last experience. While the preceding two trail sections had evolved with weather and use, Fixer and Fixer-Leeco were resurfaced with fresh gravel in several spots, and were surprisingly dry considering the deep ruts we had just traversed on Pumpkin Hollow. What I found most surprising was the creek crossing from Fixer over to Cave Fork Road; back in April that was probably the deepest creek crossing I had done to date. Instead we found the water to be considerably low; I suspect as a result of a newly formed sandbar. Not sure if that was an effort made by county maintenance or just the patterns of Mother Nature.


From the last western trail on the DBBB it was time to head back north in a race against waning daylight. The dark clouds had already started to move in as we traversed the Fixer Road creek line, and the skies finally opened up as we got north of Owingsville. I’ve got big hopes of finishing the last three sections of the DBBB before year’s end, but time is running out, rapidly…


Posted in Events & Rides | Tagged , , , , , , , , | 3 Comments

2017 Triumph Street Scrambler Review: Rivaling its Predecessor

It goes without saying I’m a member of a handful of Scrambler related social media groups (among other ADV circles). A couple weeks ago I caught a thread from a guy looking to establish the differences between Triumph’s new Street Scrambler 900 and the outgoing 865 cc Scrambler. Needless to say, I shared the same interest in understanding the differences between the two models, but not only the stat sheet, but also the “character” that differentiates them from one another. Triumph Street Scrambler Joes Cycle Shop MotoADVRTo settle this issue, I stopped in to Joe’s Cycle Shop in Dayton to have a closer look at the new Street Scrambler. While I did get a once over of the Street Scrambler back in January, it’s always nice to have a knowledgeable dealer on hand to answer more direct questions about the bike (i.e. can you show me how the removable pillion seat works?). But why stop there? A few legal documents and I was all set to take the new steed for a ride; who better to compare the new bike against its precursor than an entrenched Scrambler-phile like myself?


Ergos and Instruments

Triumph Street Scrambler Instruments MotoADVRThrowing a leg over the Street Scrambler, I first thumbed through the settings on the instrument cluster to get familiar with what I was looking at, considering that I am coming from the old “dual clock” configuration from the 865 Scrambler. Beyond the typical clock, odometer, and trip odometer, the new Street Scrambler has a digital tach, fuel range and efficiency info, along with ABS and Traction control settings. I took a moment to adjust the mirrors to a position that was actually useful, taking note of the fact that they are placed wider and slightly lower than the outgoing model; I often heard complaints about the outgoing Bonneville’s “ugly” mirror stalks, it appears that Hinkley was listening. Triumph Street Scrambler Dashboard MotoADVRNormally I would say I “thumbed the starter” , but in 2017 the new Triumph switchgear has a new 3-position “Off”, “Run”, and “Start” 3-way switch, similar to the FZ-07 I rode last year. The Street Scrambler fires to life without protest; owners of the preceding generation of Triumph twins could likely offer extended commentary on cranking up a first gen Scrambler. The 865 mill is notoriously cold blooded, forcing owners to pull the “Fuel Enrichment” knob (that everyone thinks is a “choke”) to ensure a robust start on cold mornings. The morning of this test ride was no exception, albeit I have made a couple “emissions modifications”, the old Scrambler is still a bit lethargic until she warms up.

DCIM100GOPROG0041659.

Settling into the saddle, the new seat seems exceptionally comfortable. I like how the seat is sloped forward so you can easily reach the ground at a stop or tuck in tight and hug the tank through the twisties; on the other hand, pushing back in the saddle the seat is higher and wider for cruising, again, somewhat reminiscent of the FZ-07. It usually took about an hour of riding on the previous Scrambler’s stock seat before you decided you’d suffered enough punishment; unfortunately, a short 20 minute test ride of Triumph’s new furniture won’t be sufficient to call this seat a winner. That said, I admit that I have been told by a fellow Scrambler-phile and Street Scrambler owner, it is, in fact, one of the most comfortable stock seats available.

Out on the road, I kept getting the impression the bike is just…“smaller” than the preceding model. Without a doubt, the seat height is an inch lower, but I also felt much more “on” and even slightly “over” the Street Scrambler, while just “on” the 865 Scrambler, if that makes any sense. I admit, with the new Mustang seat installed on Rosie, it’s actually very difficult to tell the difference in seating position between the two bikes; my aftermarket risers being the only thing that really stands out to me. Triumph Street Scrambler FRThe new rendition of high pipes, in their gorgeous stainless steel, are tucked into the bike much tighter than the outgoing model, making it much more comfortable for the rider. It was in the upper 50’s when took the Street Scrambler for a spin, taking my 865 Scrambler along the identical route immediately afterward; I found it difficult to really notice the exhaust heat from either, but I suspect the temperature is better managed with the new Street Scrambler heat shields. The wind blast on the highway feels perhaps a shade stronger than the outgoing 865, but frankly both are in desperate need of a fly screen if you plan on spending extended time on the highway.


Engine/Transmission

Pulling out of the parking lot, the throttle response on the new Street Scrambler was absolute butter; a substantial adjustment from the 865 mill. Throttle response of the outgoing Bonnevilles was usually described as “snatchy” at low speeds. DCIM100GOPROG0101877.Many owners went to great lengths to smooth out the low speed fueling; removing the Secondary Air Injection (SAI), air box, O2 sensors, opening the exhaust, and remapping the ECU in the pursuit of smoother power delivery at low revs. Back to the Street Scrambler, from closed to about 15% open, the throttle is silky smooth, and the engine docile; once over 15% open, you start to feel the wallop of low end torque that Triumph is advertising about this new “High Torque” 900 power plant. I will also offer, I took the Street Twin for a spin a few weeks back, noticing the same trait, but per the stat sheet, the Street Twin doesn’t deliver the same thrust until perhaps 25% open throttle, so the Street Scrambler’s torque is pushing you back in the seat much sooner; much more hooligan than the outgoing Scrambler. Beyond the refined throttle response, the clutch pull on the Street Scrambler incredibly light. While I didn’t actually notice until getting back on my own Scrambler to go home, the Street Scrambler’s clutch pull is so light, it makes the outgoing model’s clutch feel like a Harley by comparison; the bullet points about the torque-assist clutch on the stat sheet should not be understated.

Winding through the gears, I admit I agree with other reviews, the new 900’s first couple gears are incredibly tall. You could feasibly run 2nd gear from 5-60 MPH with little fuss. Triumph Street Scrambler Left MotoADVROn the flipside, there’s no doubt that longtime Bonnie owners will welcome the re-tuned 5th gear on the highway. I can’t tell you how many threads I’ve read about adding teeth to the front sprocket to lower the revs for touring. I’ll admit, while riding the Saddlesore 1000 a few months ago, I was somewhat concerned about running the engine at 65% capacity for 18 consecutive hours. That said, the 900 doesn’t have quite the same grunt of the 865 mill while cruising on the expressway; while I might drop a gear to pass someone on the old Scrambler, I might need to drop two on the Street Scrambler to receive similar pull from the new engine. That aside, I found the new gearbox to be as light and  smooth as I have come to expect from any of the previous Bonnevilles I’ve ridden in the past.

I have to say, the new exhaust note is excellent, even in stock form; I’m especially anxious to hear this new mill “uncorked” (despite being partial to my own exhaust “modifications”). Triumph Street Scrambler RR MotoADVRConsidering the stringent emissions standards, manufacturers have a really tall order when it comes to stock exhaust these days. In this case, Triumph did a great job of adding tone while still meeting the requirements. It’s also worth mentioning that the engine “beat” seems to sing in harmony with the exhaust note, while the old 865 valve train ran like a sewing machine in contrast to its mostly muted exhaust. The new stainless pipes (which I much prefer over chrome), also offer a much different sound than the outgoing model. Per comments I’ve seen on Instagram, the 865 models had a more “classic” British feel (270 crank aside) while the new bike is more modern; that “feel” bleeds over into the new sound as well.


Chassis, Brakes, & Suspension

Hustling along the two lane, the Street Scrambler is much more nimble than its predecessor, at all speeds; it simply feels “planted” when dancing through the twisties. Scooting around the backroads I was impressed by how well the new suspension really soaks up the bumps. While I admit, I was really hoping for more “Scrambler” in this new “Street Scrambler”, Triumph has done a fine job refining the quality of the ride. If you recall, new rear shocks were extremely high on my to-do list when I brought my Scrambler home last year, and just to beef up the suspension further, fork springs shortly thereafter. Triumph was obviously listening to long-time Bonneville owners as these new suspenders are much more pleasant out of the box.

 
That said, I cannot deny that the Street Scrambler has a shade of front end dive under braking, more so than the outgoing Scrambler in stock form.DCIM100GOPROG0031412. I suspect that, in the interest of commuter comfort, the front forks are a bit under-sprung, at least for my taste, as I very much prefer “spirited” riding. I did, however, feel that the front end damping was about dead on. However on the back end of the bike, per my comments about the stock 865 shocks, the new Street Scrambler rear suspenders are outstanding in stock form. I bumped up the preload to about the middle setting, and had no complaints. Considering the new tires, I didn’t push the bike exceptionally hard, but I cannot deny that the bike held the line well in the curves, absolutely not a task the outgoing model would have accomplished as confidently at similar speeds. Ultimately I felt that the old Scrambler’s shocks were undersprung and underdamped, which led to wallowing in the corners, and an otherwise harsh ride; whereas the Street Scrambler rear suspenders were pretty faultless at mid pre-load.

I found the brakes on the new Street Scrambler difficult to judge. There’s no question that 865 brakes are nothing to write home about (and worse), but I guess I can say that the new brakes are… adequate. I was unable to find the front-end feel to be exceptional over the outgoing model, and I admit I was a bit miffed by the front end dive, so it was difficult to comment about the overall bite, especially considering that the tires were a bit waxy as they were “brand-spanking-new”. I did, however, test the ABS; considering I’d never had the opportunity to test a bike with ABS in the past. I’ve been told that the first time someone feels the ABS engage on a bike it’s pretty scary. I will comment that I was impressed as it seemed relatively un-intrusive, at least initially. I was able to “lock” the real wheel, at least momentarily, however I suspect that had a lot more to do with the new tires than it did the brakes.


Fit and Finish

Fit and finish of the new Street Scrambler is unquestionably better than the preceding Bonneville line; Triumph Street Scrambler Red Silver Tank MotoADVRTriumph spent a lot of time minding the details on the new modern twins. There is still a lot of plastic (which is actually lighter), but details are much finer, from the suede leather seat, refined headlight ears in lieu of the hideous stamped variety, chain adjusters that don’t look like something out of an erector set, a scattering of tasteful branding, and finally the placement of covers and fasteners.

Beyond the overall “look”, there are few specific items of note from an air-cooled Scrambler owner. The revised indicators are a massive improvement; while I can’t speak to their ruggedness, they are much more aesthetically pleasing, “tighter” to the frame of the bike, and simply mounted to the front forks. Black rims are standard from the get go; Triumph sold the T100 and Scrambler with chrome rims for nearly a decade, it’s nice to see an “off-road” bike with subdued parts, even if it is just a styling exercise. Triumph Street Scrambler LFS MotoADVRTriumph also brought the 7-inch headlight over from the Street Twin to the new Scrambler; certainly a welcome edition after my own personal experience with the anemic 5-inch headlight on the old model. Like the other new Bonneville twins, seat removal is also keyed, in lieu of the previous hex-key debacle; certainly my friends from Red River Scramble would have appreciated that feature a few weeks ago.

Triumph Street Scrambler Seat Removed MotoADVRAs I mentioned in my “First Impressions”, Scrambler owners will be happy to see that the passenger pegs and pillion seat are removable, and the luggage rack is even included; although some tools are required to make the switch (a hex-key is under the left side cover, so I’m told). I should also mention that I think most folks will appreciate the steeper kickstand; the preceding Scrambler tends to lean over excessively on the side stand, the Street Scrambler is “normal” by comparison. Per my comments back in February, the rear fender is no longer the monstrosity of its predecessor. Triumph Street Scrambler Pillion Seat Removed MotoADVRWhich will work just fine on dry pavement, however I’m curious if the new Street Scrambler will leave a trail of mud up the rider’s back on rainy days, something Rosie does so effortlessly, despite the unsightly “skirt”. Lastly, I’m ecstatic about the new exhaust heat shield configuration. While I’m not totally sold on the two-tone arrangement, it’s nice to have a shield that is far enough forward to prevent me from melting yet another set of motorcycle pants.


Contrast Commentary of an Obstinate Scrambler Owner

One look at the Street Scrambler, and it’s a better Scrambler in every way; “adventure” sized black spoked wheels, high pipes, serrated pegs, switchable ABS and traction control… and plastic skid plate. Triumph Scrambler Train Trestle Graffiti MotoADVRCombined with price, that’s probably my most objective complaint about the new bike. Dual clocks, black rims, and aluminum skid plate were all stock on the 2016 Scrammy. At $10,700, even when adjusted for inflation, that’s still an extra grand for the Street Scrambler; seems like a metal skid plate could be gimmie from the parts department. I guess on the bright side, maybe the aftermarket will figure out how to stuff a tool roll in that space in the frame where the Street Twin catalytic converter used to go.

Triumph Scrambler Gas Pumps MotoADVRThe new bike is lighter, but did that come at the cost of additional fuel? The Street Scrambler shares the Street Twin’s 3.2 gallon tank, while my antiquated Scrambler has 4.2 gallons. Agreed, with the new gearing, the range is about same (if not a hair better), but could it have been more? Given, I’m not about to complain about less weight, I just wish the bike was pushing more than 150 miles on a tank.

I can see some folks scoffing at liquid cooling. I admit, I like the convenience of air cooling, but considering how long motorcycles have been sold with liquid cooling, I think that’s a non-issue. That combined with the fact that the new 900 power plant is Single-Overhead-Cam, that has pushed the service intervals out to 10,000 miles. That’s a pretty significant savings from my perspective; it would save me almost two oil changes a year at this point.

Ultimately, the biggest difference between 865 and 900 Scrambler is power delivery; as you can see from the stat sheet, over-square versus under-square, these two engines couldn’t be more different.DCIM100GOPROG0142054. Way down in the basement, the new 900 mill has a massive torque burst that’s exhilarating; I could blast away from stop lights, grinning ear-to-ear, roll-off, and do it all over again. That said, hustling on the highway at higher speeds, the new water-cooled mill struggles to excite; meanwhile, the 865 air-cooled predecessor has torque pretty much everywhere and it’s in the heart of its power band even at interstate speeds. Triumph Street Scrambler LF MotoADVRLike most discussions regarding motorcycles, it is unquestionably a matter of taste and utility; the 865 mill is cranky when cold, “snatchy” off-idle, yet begs flogged and banged off the rev-limiter; meanwhile, the new 900 power plant acts gracefully in traffic but still entices you to hoon around the roadways; begging you to pour on the torque as you burst out of the corners or dump the clutch when the light turns green.


The Verdict

In a word, “Refined”; from details to throttle response, the entire bike has been polished into a much more modern riding machine.


Triumph Street Scrambler vs Scrambler MotoADVRThe Street Scrambler frame geometry is far superior to the outgoing model. Steering on the 865 Scrambler was crisp and flick-able at low speeds, reasonable, but sometimes lethargic between 40-55, and “skittish” if not worse (think tank slappper) above 75 mph while the Street Scrambler is absolutely solid just about everywhere. Suspension is pretty much a wash. I will go as far to say that the new suspension is absolutely on par with this bike’s target audience; the new Street Scrambler has impeccable road manners and unabashedly roams over the urban landscape. That said, if you’re an aggressive canyon carver, you’ll probably want to spend a few bucks and drop a set of stiffer springs in the front end. Triumph Scrambler Grass MotoADVRThe air-cooled Scrambler was never innocent by any means, but the front end was a hair more firm, on the back end however, the story was the complete opposite. The preceding Scrambler shocks were rubbish, sadly better than those on the Speedmaster, but that doesn’t say much; The Street Scrambler’s stock units are quite agreeable, the bike didn’t wallow in the curves and didn’t punish my spine when I hit imperfections in the road; in all likelihood I would need to drag them down a few gravel roads to really offer any criticism. I could re-iterate my lengthy commentary on fit and finish, but it goes without saying, the bike is simply more “tidy” than its predecessor, and most of the longtime owner gripes (save the brake reservoir) have been addressed.

Triumph Street Scrambler Restaurant MotoADVRThe same sentiment continues with regard to throttle response, engine character and exhaust note. Cruising around town, the Street Scrambler is composed and playful, without protest or hiccup like the old fuel injected air-cooled model. Meanwhile, the exhaust note is not overly muzzled and impressively, the engine hums in sync with its snore, not overly “mechanical” like its predecessor. The power delivery is vastly different from the outgoing power plant, but I suspect the copious amounts of low end torque will deliver a lot of “smiles per mile”, especially for the target audience of the bike.

In the end, it’s a more elegant Scrambler… with a hooligan streak.


Specifications

Triumph Street Scrambler vs Scrambler Stats MotoADVR

Posted in Bikes | Tagged , , , , , | 3 Comments

The Distinguished Gentleman’s Ride Cincinnati 2017: Ride Dapper

Devore DGR2017 42017 marks the fourth year I’ve attended the Distinguished Gentleman’s Ride (DGR). What is the DGR you ask? Way back in 2012, Mark Hawwa started The Distinguished Gentleman’s Ride in Sydney, Australia. According to the DGR Website, Hawwa was inspired by a photo of Mad Men’s Don Draper astride a classic bike and wearing his finest suit. Mark suspected a themed ride could potentially reverse the often negative stereotype of men on motorcycles, meanwhile offering a networking opportunity for the retro-café racer-bobber-vintage motorcycle community. That first year they estimate that 11,000 riders attended the DGR in 64 cities around the globe; last year the number was up to 56,000 riders across 505 cities in 90 countries. In 2013 the event organizers adopted “a cause” for the event, choosing to support prostate cancer research; while in 2016 the DGR grew to support not only prostate cancer research and male suicide prevention through the Movember Foundation.


Distinguished Gentlemans Ride MotoADVRBut what is the DGR? Mostly an excuse to dress up and ride my motorcycle… In reality, and per my previous comments, the DGR is a fundraising event based on a motorcycle ride. The “spirit” of the event is to dress up in your finest attire, and ride your “classic” motorcycle around urban areas in the hopes of attracting attention to “the cause”; essentially men’s health. Through the DGR Website, attendees are encouraged to solicit for donations from their friends and family. No actual donations are collected on the day of the event, “The Ride” is essentially a celebration of the event, which typically draws the attention of bystanders who subsequently ask why we’re all dressed up (“y’all come from a wedding or something?”). That said, while fundraising is encouraged, there is actually no charge for attending the event.


DGR2014 MotoADVRIn 2014 I caught wind of the DGR through various Triumph social media outlets. As such, as September rolled around, I dressed up in my finest threads and headed down to the Cincinnati. Needless to say, I was still a very new rider in 2014 and the event had quite the draw in downtown Cincy. The entire concept of the DGR is a pretty radical departure from my typical ATGATT mentality, the thought of the 50 mile commute to one of Ohio’s most populated cities left me a bit concerned about my lack of protection considering my dress pants and spectator wingtips… Fortunately, the mass of riders in the downtown streets typically draws a lot of attention from drivers and bystanders. I will also say that in recent years the event coordinators have put stress on keeping the ride safe; shortening the route, keeping the speeds down, and in general working with volunteers to keep the group organized while still following traffic laws (something I cannot say for many motorcycle events of this scale).


Following my first year in Cincinnati, I joined some of my Triumph RAT Pack pals in Columbus for a couple years, but this year I decided I wanted to return to the Queen City. Devore DGR2017 1This year the group met up at the North Side Yacht Club for breakfast and coffee. After a safety briefing, and a thank you to all in attendance, we filed through downtown Cincinnati streets, past Union Terminal, and on to Fountain Square for a photo opportunity. I’ve been to Fountain Square a few times in the past, but it was a really cool opportunity to park my bike on the square and get photos with our “most dapper” group; considering the looks on the faces of the bystanders, there’s not doubt they were curious what was going on. From Fountain Square it was on down to the river and along US-52 over to Lunken Airport for another photo op. After gathering the crew on the airport steps for a big group shot, it was on Ault Park, and then over to Mad Tree brewing for lunch and a beer.

Distinguished Gentlefolk DGR2017 MotoADVRAdmittedly, the ride really isn’t very long, but with each break there is an opportunity to mingle with new people, talk about bikes, and generally expand your riding circle. While “The road is the destination” is generally my mantra, the DGR is the one time of year that I’m typically looking forward to the locations, photo ops, and  new acquaintances more so than the journey. If this short description strikes your fancy, I recommend you keep you lids peeled for next years ride in your local area; and if I have it my way, it might even be in Dayton next year…

Note: Big thanks to Bill DeVore letting me post some of his photos from this years event!


Posted in Events & Rides | Tagged , , , , | 2 Comments

Triumph Dragon Raid Bound

Triumph Scrambler Dragon Raid Bound MotoADVRIt’s that time of year again; my clothes are packed, the tool kit is ready, the bike is loaded, and I won’t sleep a wink tonight with all the excitement. This year will make my fourth year at the Triumph Dragon Raid; my annual fall vacation to Deal’s Gap, North Carolina. The past two years I’ve been doing my homework while tagging along with friends. Last year that resulted in a whole lot of ad-hoc hooliganism, and unfortunately a few repetitive rides (I think I hit the Skyway 3 times). In talking with friends, we wanted to have a “plan” this year, that way we could actually wake up and head out to ride after breakfast and forgo the usual “him-haw” session. While I full well expect Hurricane Irma to put a bit of a damper on my plans, this year I’ve laid out several routes nonetheless.


Tail of the Dragon and the Cherohala Skyway: The Staple.

motoadvr_cherohalaskyway2It’s pretty much guaranteed I’m going to give The Dragon and the Skyway at least one run while I’m down that way. I admit, I still prefer North Carolina Route 28 to the Skyway, but it’s an easy loop to put together, and the pavement on the Skyway is new and at least “bedded in” this year (it was fresh and “oily” last year).
Skyway Loop GPX
Skyway Loop Rever Route


Wayah Road Loop

DCIM115GOPRO

I was introduced to Wayah Road two years ago on the Speedmaster, and it was somewhat of a hair-raising experience considering the steep downhill slopes with hairpin turns at the bottom, especially with the “spongy” front suspension on the Speedmaster. I had hopes of revisiting Wayah Road last year on the Scrambler, but it just never materialized; I have plans to make that happen this year if the rain holds off. The big bonus for the Wayah Road loop is of course another trip down “Moonshiner 28” (NC-28) from US-74 to Franklin, which I consider a “Must-Ride” if you’re staying at the Iron Horse.
Wayah Road Loop GPX
Wayah Loop Rever Route


“Gravel-Hala” Dual Sport Loop

Last year my buddy Tom suggested that I may want to tackle the “Gravel-Hala”, a gravel forest “fire road” that parallels the Cherohala Skyway. I admit, I have only heard a few rumors about the ride, but ultimately I figured it would be a decent “easy to intermediate” dual sport route for the Scrambler to tackle. The bonus would be to land a good photo of Bald River Falls on the west end of the loop near Tellico Plains. Worst case, if it’s a boring gravel road (yeah right… just ride faster), I still land Krambonz BBQ out of the deal.
Cherohala Dual Sport GPX
Cherohala Dual Sport Rever Route


Sassafras Mountain Loop

If the stars align and the weather holds, I have aspirations of riding into South Carolina this year. I get sick kicks out of “checking-off” new states that I’ve ridden in. At only 210 miles round trip from the Iron Horse, I can even nab that tallest point in the Palmetto State in the same day; while still hitting NC-107, NC-215, and even the Blue Ridge Parkway in the process. If things are going really well, I may even throw in some Bureau of Indian Affairs forest service roads on my way back to the lodge.
Sassafras Mountain GPX
Sassafras Mountain Rever Route

BIA Road Rever Route
BIA Road GPX


Brasstown Bald Loop

While I did accidentally venture into Georgia last year on NC-28, it was short lived. After a little research on South Carolina’s highest point, I was surprised to find that Georgia’s tallest point is also easily attainable on a 230 mile loop from the Iron Horse. A ride down to Brasstown Bald even means a trip across NC-28 and Wayah Road to boot.
Brasstown Bald Loop GPX
Brasstown Bald Rever Route 


The Kitchen Sink

DCIM114GOPRO

Despite my eagerness to sink a new set of knobbies into the soil, I can’t deny that I want to take another trip down Explorer Road; a road my buddy Tom affectionately refers to as “The road that tries to kill you.” Obviously I love NC-28, but NC-281 and US-276 are also some of the most challenging roads you’ll find around The Dragon. The longer I ride the more I find my preference shifting to “remote” and rural roads, Explorer Road is just that. Linking 281 to NC-215, and barely two lanes, Explorer Road coils and bends along the Appalachian mountainside like some of the most gnarly roads in the West Virginia; just watch out for those decreasing radius curves.
Kitchen Sink GPX
Kitchen Sink Rever Route


I think it’s safe to say, this is a pretty “Tall Order” considering the impending mess that Irma is likely to rain down on “The South” (never mind the unfortunate damage she’s going to do to Key West and the rest of Florida, my heart goes out to those folks!). That said, in the event things go sideways, I’m still hoping to get Rosie out on some of the trails; rain keeps the dust down right? Either way, I have these routes loaded up in Rever on my cell phone, and I’ve even put together a share folder on Google Drive for the GPX files so more of the attendees and load them onto their various GPS devices.

We’ll see how things go, hopefully I’ll find some of you down that way this week, and to the rest of you, I’ll hit you up with photos and ride reports in a few days!


Dragon Raid GPX Share Folder

Triumph Dragon Raid Rever Group


Posted in Events & Rides | Tagged , , , , , , | 8 Comments

How to Clean a Motorcycle Chain: Routine Maintenance with the Snapjack

Way back in the early days of Moto Adventurer, I did a “How-to” piece on chain maintenance. Despite my preface, “This is how I do things, not necessarily the right way to do things”, I want to revisit this topic for a couple reasons. One, while my previous method still preserved chains for about 25,000 miles or more, I’ve learned a few things since then; and two, this whole process goes a lot faster now that I have a Tirox Snapjack.

Triumph Scrambler Chain Dirty MotoADVRWhile I admit that brake cleaner does a great job of removing the gunk from your chain, while avoiding the drippy mess; brake cleaner is actually really harsh on those ever so important O-rings. Since the last iteration of chain maintenance how-to advice, I stumbled across a little moto-myth-busting video, and have therefore adopted dedicated motorcycle chain cleaner for this job, and for a really nasty chain, good ol’ WD-40. While I’ve already covered a lot of the nitty-gritty details of cleaning the chain, I want to reiterate some of the highlights, but first I want to talk about making this job a lot faster with the Snapjack.


What’s a Snapjack you ask?

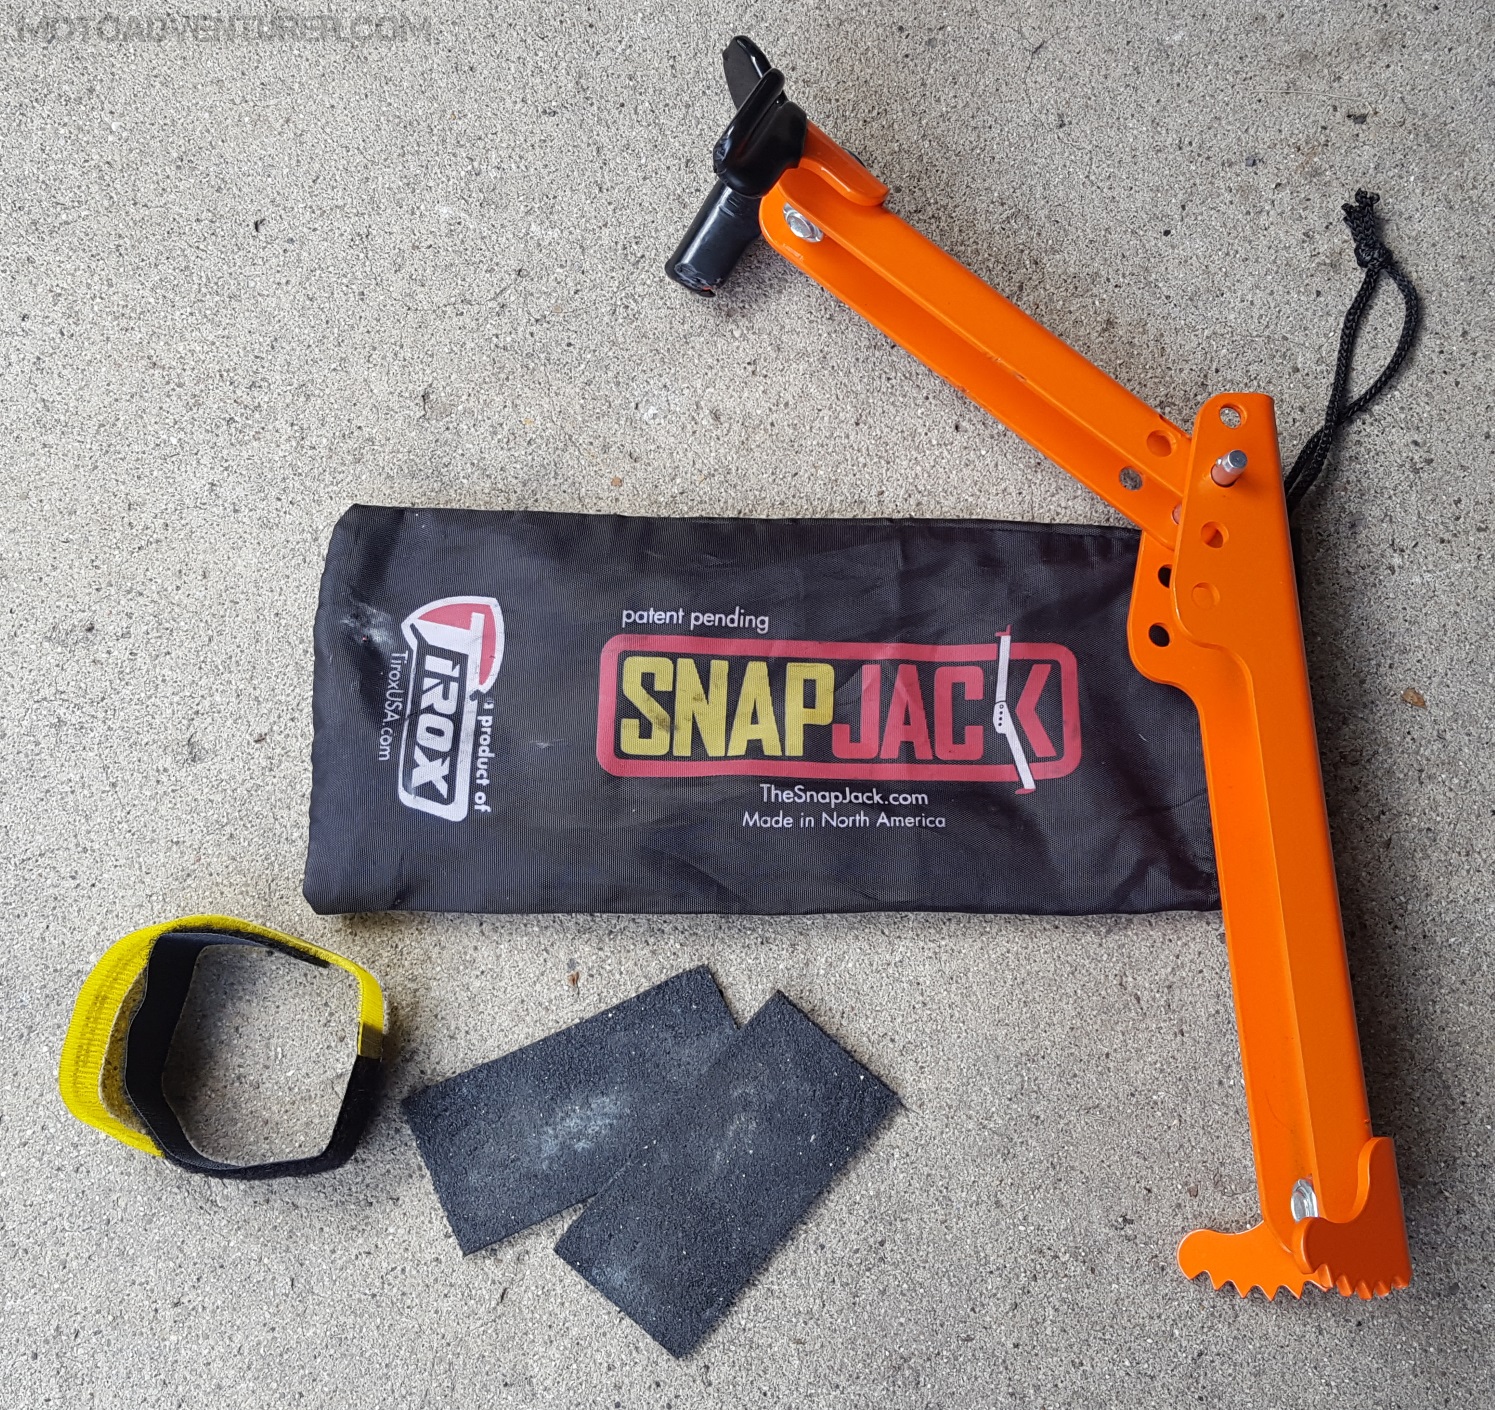
Think of it like a portable motorcycle lift that fits in your tailbag. Tirox SnapJack Chain Clean MotoADVRWay back in the days of Lola the Speedmaster, I was doing the whole “chase you bike around the driveway” maneuver as I cleaned a section of the chain, moved the bike, and then the “repeat as necessary” game until clean. That was a pain, made easier by my buddy’s paddock stand (“rear stand” if you will). While the paddock stand was super convenient for leaving the bike in one place and working over the entire chain at once, I still had to remove the exhaust to use the stand, along with carefully positioning the bike up on the stand without knocking it over. Enter the Snapjack. With the Snapjack, you can lock the front brake, position the Snapjack, and then prop the rear wheel just off the ground for chain or wheel maintenance.


What’s in the box?

Tirox SnapJack Box ContentsWhen the Snapjack arrived at the house a couple months ago, the box obviously included the Snapjack itself, along with a Velcro strap to lock the front brake in place, and couple rubber pads to place on the ground to give the serrated “foot” better grip on smooth surfaces. At less than two pounds, all of the before mentioned items cinch up in a branded carrying bag that easily packs away into a pocket in your tail-bag or backpack.


Who needs a SnapJack?

Tirox Snap Jack Package MotoADVRObviously I do… but so does anyone else that doesn’t have a center-stand or paddock stand, and anyone on a long road trip without a fixed center-stand. I will go even further to say that even if you have a paddock stand, which I do (currently on extended loan), the Snapjack is a lot less work, and it’s faster than fussing with the rear stand when you’re working alone. That said, the Snapjack isn’t necessarily meant for most cruisers. I assume this has something to do with weight and side-stand design, considering that the Snapjack relies on the side-stand to help hold up the bike while the rear wheel is lifted off the ground. However (according to their website), the Snapjack works fine on most sport and touring motorcycles.


So how does this thing work?

Tirox Snap Jack Tirox Lube Chain Cleaner MotoADVRA couple days back I decided I was overdue for the due diligence on the chain. The manual says every 500 miles, and I agree, that’s a good benchmark, “when it needs it” is probably the correct answer, but in this case, it was mostly that I knew it had been at least 500 miles and it’s not even a 20 minute job at this point. Getting started, I roll the bike to a nice sunny spot on the porch and lay out the Snapjack and accessories on the ground next to the right side of the bike. Brake Strap Installed MotoADVRThe next thing I do is to wrap the locking strap around the front brake lever,  holding it firm to the handlebar. With the front brake locked, I position the Snapjack on the right side of the swingarm, near the rear axle, using the two rubber pads to keep the Snapjack’s foot from slipping (and scarring up the concrete). Tirox Snap Jack Install MotoADVRIt takes a little “finesse” to get used to popping the Snapjack into the up position, meanwhile setting it in the correct position to lift the rear wheel off the ground just enough that that wheel spins freely. Fortunately, with several height adjustment settings, and a little practice, it’s pretty easy. Each bike is obviously different, but you’ll get the hang of it after a few tries.


This is probably a good time to mention that you need to trust your side-stand. When using the Snapjack, the bike is essentially resting on the front wheel, the side-stand, and the Snapjack. Tirox Snap Jack Installed MotoADVRIf you have a side-stand that is a little gun-shy about staying in the down, locked, position, you may want to “bungie” the side-stand to the frame or front fork to make sure it stays forward. Fortunately, the Scrambler leans way over on the kickstand, and it stays locked down pretty well, so much so it takes a little more of that “finesse” to raise the rear tire high enough to spin the wheel. I suspect that the other Bonnevilles and most sport bikes are quite easy, as the Scrambler side-stand is low enough to use off-road when the “parking” surfaces are less than level.
Chain Cleaner MotoADVRWith the rear wheel off the ground, I’m free to spray down a shop cloth with some chain cleaner and wipe the gunk off the chain. If it’s been a rainy week, or I have an excess amount of dirt and grime, I’ll resort to the trusty 360 degree chain brush (also a Tirox product as it turns out, had no idea until a few months ago). Per my previous comments about nitty-gritty, for the dirtiest chains, like after a long day of off-road riding, I find the best recourse is the liberal application of WD-40 and the chain brush, followed by a good rinse with the hose to really free up the dirt hiding between the rollers.


Once I have the chain cleaned up to my liking, I get the chain dried off well enough to apply a good lubricant (that usually means a quick ride around the block). Per my previous write-up, I really liked Maxima Chain Wax, up until I started riding off-road. After a few trips to Shawnee State Forest, it became obvious that chain wax did nothing but grab a hold of all the dirt and dust, neither of which was going to help prolong O-ring life. In recent days I’ve tried several other commercially available chain lubes. I admit, I was pretty happy with the Bel-Ray “Super Clean Chain Lube” for a while, Tirox Ultra Chain Lube MotoADVRbut I recently got my hands on Tirox “Ultra Chain Lube” and it’s rapidly winning me over. Thus far I’ve been impressed with the Ultra Chain Lube; as you can see from the photos, the chain is relatively clean, despite having not been cleaned for a couple weeks; anyone keeping up with @MotoADVR on Instagram will tell you, those are rain or shine miles. I’m still in the early stages of testing, as I still need to do a good hard day of off-road riding, so stay tuned for more details.

 
Tirox SnapJack Stored MotoADVRWith a fresh coat of lube on the chain, the hard work is done. A firm pull on the lower section of the Snapjack will put the rear wheel back on the ground, and then you can remove the brake locking strap. I use the strap to hold the rubber squares to the Snapjack, and hold the Snapjack closed so everything tucks neatly into the storage sleeve. From there the Snapjack resides in my cleaning “bucket” or my tail-bag depending on where I’m headed next.


If you want to give the Snapjack a shot, it’ll only set you back about $50; which is a pretty good deal when you start looking at the price of a center stand, a dedicated motorcycle jack, or a paddock stand. The Snapjack is available from a few different vendors and I recently found it on Revzilla. While you’re over there, checkout Lemmy’s video on chain maintenance, he really digs into the details in case I breezed over something specific you may have been looking for here.

Posted in Gear - Maintenance - Safety | Tagged , , , , , , , | Leave a comment

Trip Planning: A Rever How-To

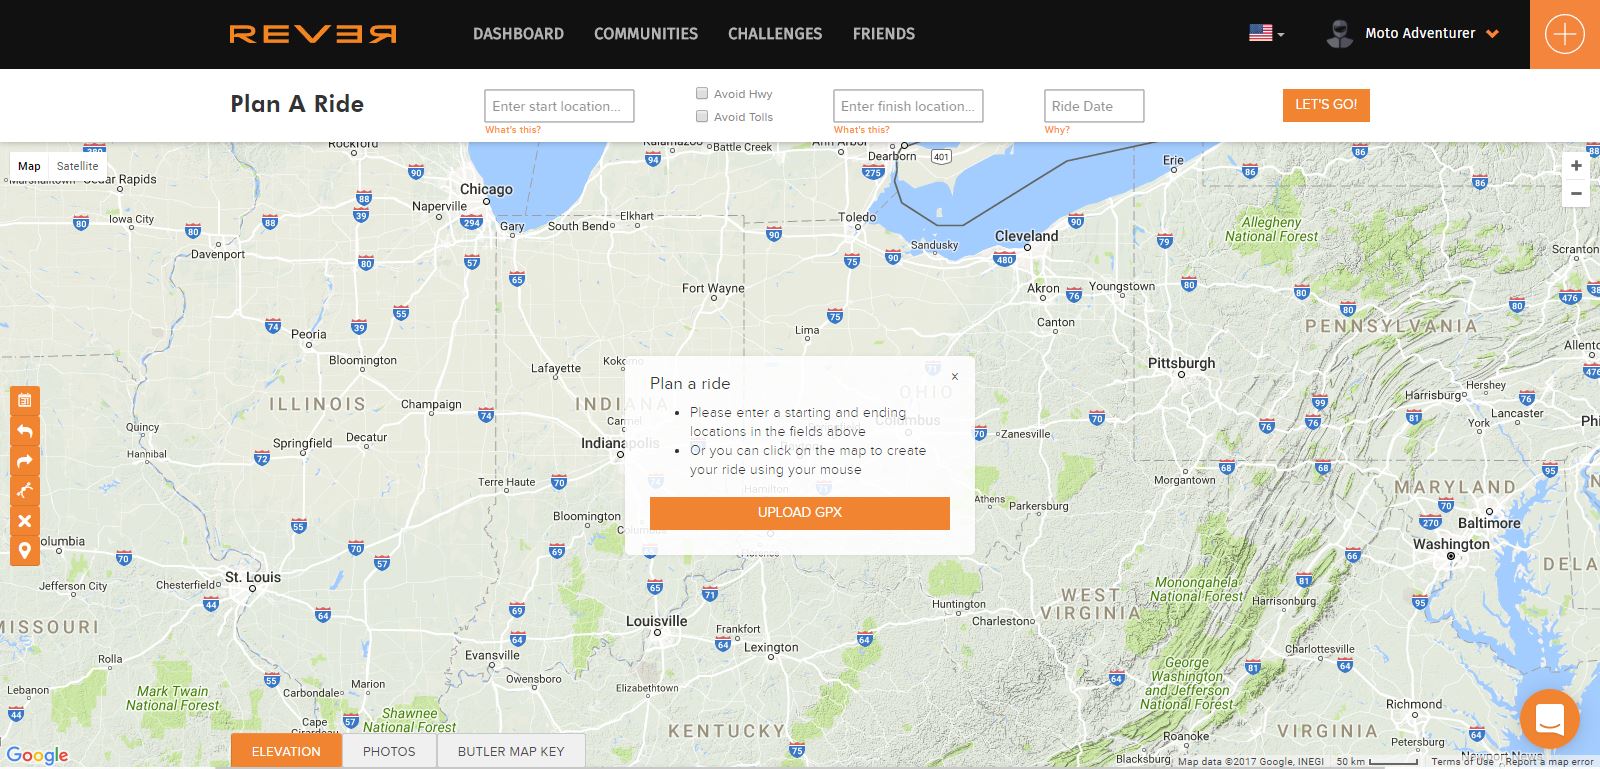
I’ve discussed my frustration with various trip planning apps and GPS products at length, including my preference for paper up until very recently. Per my comments back in February, REVER has become my go-to trip planning software. Needless to say, I’ve received quite a few questions about Rever, along with showing several friends and associates how it works. In preparation for the upcoming Triumph Dragon Raid (Triumph Rally near Deal’s Gap, North Carolina), I have built about a dozen local routes around the area for attendees to utilize during their stay at the rally this year, if they decide they don’t want to join up with another group. After chatting with the event organizers, they suggested that I could type up a “how-to” for Rever so newcomers would have a step-by-step guide on how to get started.


Who Needs a Route Planner?

I’m sorry, I’m a planner, I try not to… but it keeps happening; I don’t know how to stop it. If you like to ride your bike, get lost on purpose, and “follow your front wheel around” as some say, a route planner is not for you. DCIM135GOPROIn my case, I have about 100 miles of fun and then the bike starts barking at me about needing fuel. In the city that’s no problem, but I find that on the Appalachian backroads, gas stations can be few and far between; getting lost while evading banjos and running out of gas can make for a long day. I also find that I’m typically of the mindset that I tend to jam as much sight-seeing as possible into a given vacation or motorcycle weekend. Not to say that it’s one destination to the next and I don’t stop to appreciate the view, but simply that I like to have a plan, and see how long it actually takes to ride roads “A” and “B” while still seeing landmark “X”. A route planner is still useful even if you want to have a “loose” plan for the afternoon; you have a starting point and then you can start ad-libbing as the ride progresses. I’ve also been known to do that, I’ve planned a route to a given destination, and then just made things up on the way back home; I’ve also changed routes mid ride after I realized that two planned routes overlap at a given point and I just felt like switching gears.

Short answer: Anyone that doesn’t want the fastest route, the shortest route, and has any sort of time/distance constraint, that’s who needs a route planner.


What is REVER?

Rever (“rev-er” like revving a motorcycle) is a mapping, route planning, and recording application that is both web based and a mobile application. From the rever.co website, you can login to create rides on their mapping software, network with other riders, join riding communities (similar to Facebook groups, but with maps), share planned and recorded rides, join riding challenges (win free stuff!), and track your mileage. From your phone you have the ability to record your rides at any time, monitor your position on the map just like a traditional GPS device, check your status in ride challenges, load routes from your riding communities, or load pre-planned routes from your own personal “planned rides”.

All of the before mentioned features are included with the standard, free membership to Rever. When you upgrade to a premium membership ($6 a month or $60 a year) you get access to Butler Maps best road recommendations, access for off-line maps (recommended for backroads riders…), the ability to export routes as GPX (so you can upload them to your Garmin for turn-by-turn directions), and the ability to create riding groups in the Rever “Communities”.


Why Would I Choose REVER?

Route planning software is obviously not new, I suspect Garmin’s Basecamp has been around for some time now (along with Mapsource and Roadtrip before that). I also suspect that those familiar with Basecamp (et al) are not likely to stray far from it unless there are significant features or time savings to be had elsewhere. If you have an existing GPS unit and are familiar with various trip planning software, Rever is probably not for you; you might find it to be a convenient solution in a pinch, but you have probably used your GPS long enough that you have well established habits.

On the other hand, if you’ve been looking at dedicated motorcycle GPS units, you’ve likely discovered that a good functioning GPS unit is going to set you back upwards of $250 used, and easily $400 new. Most of us have a cell phone by now, and most of them are also smart phones, including an embedded GPS unit (which is actually pretty accurate these days). I find quite a few riders already have a cell phone mount on their bike, and like myself, many riders are already using Google Maps and Waze depending on where they’re headed. If you’re already using your phone for maps and are looking to avoid the expense of a dedicated GPS unit, Rever is a reasonable option if you’re looking to put together rides that are more complex than “fastest” or “shortest distance”.

There is also one last caveat, Rever does a great job placing the magical “blue line” on a map for you to follow, however they have not yet launched “turn-by-turn” directions. I have been running paper, and watching GPS tracks with no audio for some time now, so the lack of turn-by-turn is an inconvenience, but it’s not a deal breaker, if you absolutely need that feature, Rever may not be for you; however, considering it’s free, it’s worth it to at least give it a shot.


Getting Started with Rever

REVER 1From Rever’s homepage (http://rever.co), you’ll find a brief video, and several links that explain more about the features of the app and additional features available to premium members, along with the background about the founders, help, and FAQs. REVER 2To get started, click on the “Sign Up For Free” button to open an account. The button links to the login page where existing members only need an email address and password, but new members should hit the “Click Here to Register” button by the “Not a member yet?” text. While I’ve never tried it, you can also login with Facebook. Several folks in a hurry used the Facebook option at a rally I attended back in April, so it does work if that’s easier for you.REVER 3 Once you’ve clicked “here” to register as a new member, the login page changes to include first and last name, e-mail address, location, and password with confirmation. Choose your name carefully, that will ultimately become your “handle” on Rever and that’s how your friends can find you under the friend search.

Once you’ve successfully logged in, Rever will take you to your “Dashboard”. From the Dashboard, users will find their ride statistics, tracked and planned rides, challenges, ride feeds from your Rever friends, communities, and obviously the ride planner.

REVER Dashboard

How to “Plan a Ride”

From the Dashboard, Rever offers you at least two ways to get to the ride planning feature, the “Plan Ride Now” feature dead in the center of the screen, along with the orange crosshair in the upper right hand corner of your browser window; when you hover the mouse over the cross hair it expands to “Plan A Ride”. Clicking on either of those links will launch the ride planner.

REVER 5Once on the Ride Planner screen, you’ll notice a dialogue box in the center of the screen prompting you to upload a GPX file. This is a very convenient feature when you have a friend that wants to share a GPX track with you, or in my case, I have downloaded the GPX files from TheDragonRaid.com so I can upload pre-planned Dragon Raid routes at this year’s rally without having to make them manually. GPX files are convenient when routes are complete, but there are limitations; you cannot make changes to an uploaded GPX track. You can however, use it as reference for a new route by using a separate browser tab. In this case, we want to make a new route from scratch, so go ahead and click the “x” to close the GPX upload prompt.

REVER 6Rever can be used in a similar fashion as Google Maps, if you know the addresses for your start and end points, you can type them into the “Start Location” and “End Location” boxes and Rever will provide you with the fastest route between those points. We’re talking about riding a motorcycle here, so needless to say I’m not interested in the fastest route, so similar to Google maps, you can drag the route “line” around on the map to modify the ride to suite your taste. Unlike Google Maps, Rever provides you with up to 24 waypoints.


The Rever route planner also starts with the “Terrain” map overlay enabled as the default view. I like the ability to look at the terrain when I’m getting into the specific details of the ride, but I typically turn terrain “off” when laying out the initial route (un-check the “terrain” box under the “Map” tab in the upper left hand corner). I will also admit, I seldom know the exact address for my ride destinations. Fortunately Rever offers an alternate method for route planning, you can also click on the map to insert additional waypoints. You can click the orange “X” on the left hand side of the screen to end the active route and start over fresh. You’ll have to close the GPX upload prompt box again and you can get started. REVER 11Wherever you first click on the map will be your ride start point; from there you can click additional places along roads or intersections and add additional waypoints to the ride, the last click being the end location. You may also find that your waypoint “pins” are not quite in the locations you want them in. You can hover you mouse over those pins, click, and drag those pins to the desired locations to adjust the route as needed. REVER 10There’s also a waypoint “pin” icon on the left side of the screen, clicking on the icon will open a list of all of the waypoints on the map. You can drag those waypoints up and down the list to reorder your ride as necessary; you can also delete unwanted waypoints from that list. Similar to the before mentioned “Terrain” map overlay, Rever also offers Google Satellite views, which I often use to fine tune waypoints or end locations.

Once you’re happy with the route you have laid out, you’ll want to save it for later use. REVER 12You’ll want to click the “Save” button in the upper right corner, which will drop down additional options. Rever will want you to provide a name for your route in the “Title” box. You can also change the ride from “public” to “private” in a drop down box if you don’t want anyone to have access to your route. You can also dictate the type of ride the route is, such as “Street”, “Singletrack”, or “Adventure”. I typically mark “Adventure” for dual sport rides I put together, that way my friends don’t unsuspectingly end up riding down a gravel road. While not required, you can also add comments to the route; I will occasionally add details about the breaks, highlight specific roads, or include notes about difficulty in that field. Once finished, hit the “Save” button a second time to upload the route on to the Rever server. Once saved, Rever will take you to a ride overview screen where you can review the map, see the route statistics (elevation, time, distance), along with “Share”, “Copy”, and “Delete” buttons. The “Share” feature will let you send the route to Rever friends, e-mail addresses, or offer you a link to your ride to share on your website or social media. Once you’ve reviewed the ride, you can plan another route or go back to the Dashboard.


Adding Rides from Rever Groups

Before I talk about riding your planned routes, I want to show you a second option for adding routes to your “planned” rides. REVER 4From the dashboard, there’s a section called “Communities” where you can find Rever groups, including “Red River Scramble” and the “Triumph Dragon Raid”. Scrolling down your dashboard to the communities section, click the “Go To Communities” button. On the Groups page, REVER Triumph Dragon Raid Groupyou can scroll down the list and look at all the Rever groups or you can type keywords into the search box, like “Dragon Raid”. Rever will take a moment to search the groups list and eventually return results for your search criteria. When you find the desired group, you’ll see a “Join” button on the right side of the group stats. If the group is listed as private, you see a “Send Request” button instead of “Join” (an Admin will have to approve you to see the group details). By clicking on the link in the group name, Rever will take you to the group page where you can see additional details about the group and its members.REVER Skyway Group Ride On the group page you’ll find a brief description of the group, statistics about the group’s riders, announcements, and featured group rides. Under the “Community Featured Rides” you can browse pre-planned routes available to group members. By clicking on one of the ride names it will take you to a ride overview screen; from that screen you can click “Copy Ride” button to place that ride into your “Planned Rides” queue.


REVER 13Back on your dashboard, you can scroll down to the “Rides” section and click on the “Planned” tab to review the rides that are listed in your planned route queue. You can click on the route names to look closer at the route details, copy, delete, or share those rides.


How to Load a Planned Ride on your Phone

Once you’ve finished planning or copying a ride to your Planned Rides you’ll need to download the Rever mobile app from Google Play or the App store. Once the application is installed on your phone, you’ll need to “Log In” to Rever with the same credentials you used from your website profile. Once logged in, and assuming your GPS is turned on, Rever will show your current location on the map. Rever Mobile 4From this screen you can “Start Tracking” a ride immediately if you don’t want to ride a pre-planned route. On the other hand, if you want to bring up a pre-planned route, you’ll want to hit avatar icon on the lower right hand corner to bring up your rider profile stats and rides. Rever Mobile 6From the profile screen, you’ll see a button called “Rides”; clicking on the “Rides” button will take you to your “tracked” rides by default, you’ll want to click the “Planned” tab to switch to pre-planned routes. From the Planned tab, scroll through your list of pre-planned routes and click on the name of the desired route. Depending on the complexity of the route, it may take a moment for Rever to download the route information to your mobile. Rever Mobile 7Once the ride has loaded, you’ll see the map on your screen along with ride statistics (estimated time and distance) and a button at the top that says “Ride it”. When you click “Ride it” Rever will automatically start recording your ride and switch to the “Tracking” home screen. You’ll see your position on the map, along with the highlighted blue line that shows you the pre-planned route.  From here, all you have to do is follow the blue line and enjoy the ride.


Caveats about using the Rever App on your Phone

It’s important to note, if you’re in a location with no cell service, you will not be able to pull up a pre-planned routes from your “Planned Rides”. You can continue a ride if you lose cell service, however data service is necessary for uploading or downloading rides. If you’re using the free version of Rever, you may also lose map data in the event you lose cell service. The blue line will remain on the screen, but the roads may disappear until you return to cell service. I forgot to download the West Virginia maps a few weeks ago and actually experienced this problem. It’s a little frustrating, but when you see the blue line make a hard left, it’s obvious what you need to do. It also goes without saying that your phone battery will be heavily taxed when you leave the screen on while running a route. I highly recommend you get a USB port or SAE 12V adapter to charge your phone if you plan on using Rever.

As I mentioned earlier, Rever does not currently offer turn-by-turn directions. In the event you stray from the pre-planned route path, Rever will not tell you that you have missed a turn, and there are no signals on the screen that you need to turn around. There have been a few instances where I have been so engaged in the road that I have missed a turn. Most of the time it has happened in the first few feet and I have been able to do a U-turn and continue the ride, but on a couple occasions I had to pull over and consult the map to determine where to backtrack. Fortunately, Rever leaves a “trail” on the map where you have been, so it’s not too tough to find the fork in the road you missed.


As I mentioned in the beginning, Rever is not necessarily the best solution for many of the technophiles out there. However, from what I’ve found, Rever is one of the most user friendly options available for route planning, and has an impressive user interface for a company that’s building a motorcycle GPS solution from the ground up; not to mention that the Rever team has been ultra-responsive to questions and issues in my experience. Rever is now on version 3 for the Android platform; during some of the previous releases, I experienced a few minor issues with my Rever app, both of which have been addressed by the team with their updates.


I’ve tried to cover the basic user skills for the Rever website and mobile app in this write up, for folks that are looking for more step-by-step instruction, you can also catch some Rever how-to videos in the links below and also on their blog.


Planning a Ride Video


Tracking a Ride video

Posted in Gear - Maintenance - Safety, Reviews | Tagged , , , , , , , | 2 Comments

What is the Perfect Motorcycle Ride?

Last weekend I rolled up to Ada, Ohio (think cornfields… lots of cornfields…), for the Run 4 Your Life (R4YL) ride. That event took me from Ada, over to Coshocton County (OH) and then on to Fayetteville, West Virginia. I knew from the get-go that the trip home from West Virginia was going to be a long one, and there was no way I was going to punish myself with a lengthy trip up US-35 so I laid out a series of nice rural Appalachian roads from Fayetteville, on to Morehead, Kentucky, and on home.

Tent Triumph Scrambler MotoADVR

Sunday morning I rolled up my single-man tent and stuffed it along with my sleeping bag into the tail bag and got loaded up for the long trip home. I topped off the tank at the local Sheetz on the south end of Fayetteville, and after a couple breakfast burritos it was nine hours of backroad touring; all by my lonesome.


I was immediately treated by steep elevation changes, switchbacks, and blind curvesDCIM134GOPRO along West Virginia Highway 16 and even parts of US-60 before settling into wide sweepers and scenic views through the mountain valleys along the Kanawha River. I had just said that I was looking forward to getting back to West Virginia, and this was unquestionably why. The pavement around the New River Gorge area has been all but immaculate in my experience, and the curves rival those I have encountered around Deal’s Gap.

DCIM134GOPRO

From the more docile river bends of US-60 I moved on to a spirited section of West Virginia Highway 3 before moving on to US-119. Highway 3 was another splendid taste of bendy West Virginia two-lane, unfortunately short lived as I soon found myself on the four-lane stretch of US-119 for many miles. 119 is very reminiscent of US-25E through Tennessee, also posted with a 65 mph speed limit but lined with wall to wall Smoky Mountains for as far as the eye can see. What it doesn’t have in technicality, it makes up for with a majestic vista.

Zipping down US-119, Snapping a few photos with my GoPro and watching the mountains pass by in the distance I was hit with the thought, if there was such a thing as a perfect ride… what would it be?

That thought stuck with me for quite a while. After a gas stop in Chapmanville (WV), I soon found myself on US-52. I’m obviously familiar with 52 as it runs along the Ohio River near Cincinnati; while not as challenging as I’d like, 52 in the Mountaineer State is head and shoulders above the gentle bends south of the Queen City. Leaving West Virginia behind, I crossed the Big Sandy River into Louisa, Kentucky. While I was excited to revisit the luscious curves of the West Virginia mountain roads, I admit that I was equally excited about leaving civilization behind and exploring some of the most rural Kentucky two-lane I’ve seen on the map to date.

DCIM135GOPRO

Back in “The Motherland”, Kentucky Highway 3 twisted along Appalachian foothills as it delivered me to Kentucky Highway 1. While not the most remote Kentucky backroad I’ve traversed, I did find the highway numbering scheme a bit dubious considering how deep in the backwoods the “1st” highway seemed to feel. From the 1 it was a series of three digit highways (KY-486 & KY-409) and even a named road before I found myself at the junction of KY-32 in Newfoundland (KY).DCIM135GOPRO 32 seemed familiar to me, but I couldn’t quite place where I had seen that road sign before. Headed west toward Morehead (KY), 32 obviously received routine maintenance as the pavement was in (nearly) spotless condition. Splitting two creek valleys, and heavily reminiscent of KY-77 in Red River Gorge, KY-32 followed the crooked foothill ridgelines for thirteen miles as it wound like a vintage wooden rollercoaster into downtown Morehead.

After another gas stop I found myself headed northwest toward Flemingsburg, Kentucky. That’s when the light bulb went off, two fold. One, I finally recalled that KY-32 breaks off from KY-11 in Flemingsburg, meaning that the “adventure” was unfortunately drawing to a close. Two, noticing the unmistakable scratches on the asphalt from Amish horse and buggies, the “perfect ride” started to form in my mind.

KY-32 east of Morehead is one of the best roads I’ve ever ridden in Kentucky, I might go as far as to say I would rate it above KY-77 (aside from getting stuck behind that pickup truck…). WV-16 and 60 along the New River was also some of the best riding I’ve done since the Dragon Raid last year. Alas, I still don’t think this ride was the perfect ride.


DCIM134GOPRO

Nailing down perfection is tough business. Some folks prefer serene mountain vistas along the byways, while others enjoy desert highways with nothing but spectating cactus. I’m sure I’ve said it before, I find the best roads are those loaded with mile after mile of unsuspecting curves, with no cars anywhere in sight. Obviously this is the “real world”, but such roads aren’t completely out of the question; I’ve gone miles without seeing another soul before, it can happen again. If I had it my way, the perfect ride would, in all likelihood, find itself hidden under the Appalachian canopy somewhere. Mountainous, unquestionably, but not developed so much that the view overrides the technical contours of the road. That’s the key right there, technicality; I like the finest blend of asphalt, erratic curves, and irregular changes in elevation. I’ll also admit that while I enjoy speed, I find my preference for well-maintained asphalt fading in favor of remoteness; I’ll gladly endure more cracks in the pavement if that means the experience is more isolated.

Needless to say, there are as many flavors of preference and “perfection” as there are motorcyclists. So, what does your “perfect ride” look like?


Rever Route

Posted in Opinion | Tagged , , , , , , , | 12 Comments

Red River Scramble: 160 Days in the Saddle

“How long are you going to keep this streak going Drew?”

“Until the bike fails, or I do…”

Saturday, July 22nd, Approximately 2:30 PM

I pulled up to the intersection of Chimney Top Rock Road and KY-715. I gently pressed down on the rear brake to avoid skidding in the gravel. Chimney Top Rock Road Triumph Scrambler MotoADVRA couple of the guys pulled over into the shade to get their gear settled how they wanted it while one of the guys went through the menus on his Street Scrambler to re-enable the ABS and traction control as we were getting back on to pavement for the rest of the day. I shut the bike off for a moment while everyone got settled. A couple minutes went by and everyone was finally ready to head out for an afternoon of twisty Kentucky two-lane. I turned the key, pulled in the clutch, and thumbed the starter.
“Click”
I thumbed the starter again.
“Click”

That’s weird, maybe I left the LED lights on for a bit while the guys were getting settled; I pushed the bike down the hill, popped the clutch and Rosie fired to life. I guess it was a really hot summer day…

27 Hours Earlier

I finished the last e-mail, shut down all my CAD software, and booked it home to get the bike packed for the big weekend.Triumph Scrambler Loaded Up MotoADVR I “pre-packed” all the stuff I needed for the big “Red River Scramble” weekend the night before, including a few “dry run” packing configurations, but wouldn’t you know it, nothing seemed to fit on the bike as planned. I fussed with stuffing my sleeping bag and the last odds and ends into my Biltwell EXFIL-80 tail bag and finally got the bike loaded to my liking.
After just a few short miles on the freeway, I peeled off onto a state route and just after passing through Lebanon I was finally blessed with the bliss of empty rural two-lane as I headed for the Ohio River. It had been a trying week, so I was looking forward to the solitude of long stretches of country roads, dotted with nothing but cattle and cornfields for as far as the eye could see.
That plan was going pretty well until I discovered yet another road closure on US-68 just north of Aberdeen (I swear half the bridges in Ohio are currently under construction…). Not long after turning onto the detour, I noticed I’d received a text from my buddy Jeff who left just a couple hours ahead of me; apparently he got a flat just north of Maysville. I tossed out my (complicated) plan for a new rural adventure through northern Kentucky and burned down to Maysville as fast as I could.
KTM 990 Adventure Flat Tire MotoADVRJeff is no stranger to wrenching and riding solo, so I wasn’t concerned about him handling the situation, but I figured a second set of hands wouldn’t hurt. Just as I was pulling up to the intersection in Flemingsburg, my phone rang. Jeff waved from the Taxi “cab” in front of me and let me know he was headed back to Maysville to swap a tube at a shop there. No problem, I could at least babysit his (almost) fully loaded bike on the roadside until he got back.
Two hours into “the weekend” and desperately clinging to what little shade I could find, I had a couple thoughts. One, when the plan goes awry, that’s when the “Adventure” begins (It’s all about attitude right?); and two, it’s absolutely sweltering out here… it’s going to be an interesting weekend.

Chimney Top Rock Sunset MotoADVR

Saturday Morning

Rose the Scrambler Miguels Pizza MotoADVRWith a new inner tube installed, Jeff and I got to the campground without a hitch, and even scored an upgrade to a “cabin” for the weekend (air conditioning in July… it matters…). We rolled up to Miguel’s Pizza a little before 9 AM to get ready for inbound guests to the gorge. This was the first time I’d ever had breakfast at Miguel’s so I was a bit confused about how to properly fill out my order sheet. The girl behind the counter was like “You want three standard breakfasts?” I told her, “Sorry, I thought that was three eggs.” At any rate, the standard breakfast is stellar, two eggs, a generous pile of home fries, along with thick, juicy, bacon served exactly how I like it for $7. A little Texas Pete sauce and I was in hog heaven.
Just before 10 AM the first few guys starting rolling in. It was a really interesting exchange, finally getting to meet people in person you’ve only chatted with via Instagram for months. Red River Scramble Motorcycle MotoADVRBefore long we had a Street Scrambler from Nashville, a Scrambler from North Carolina, a CB500x from Louisville, a couple Beemers and a KLR from Cincinnati, a Versys650 and DR650 from Maryland, and of course my buddy Jeff and his KTM 990 Adventure. We got a little bit of a late start, but considering this plan was hatched just a few weeks prior, I think folks were still good with shaking hands and mixing it up a bit before we finally headed out onto the “road”.

Two groups parted ways from Miguel’s to tackle their respective interests; I “led” the guys more interested in sticking to more manicured surfaces while the second group shed their camping gear and headed up to tackle the Daniel Boone Backcountry Byway. Considering this was the first time most of these guys had been to the gorge, I felt it only proper they “scramble” up to Chimney Top and take in the sights.

Sometime After 3:00 PM Saturday

After taking in the gorgeous vista at Chimney Top Rock, and making the mandatory stop at Sky Bridge, we twisted down the rest of KY-715 and through Nada Tunnel headed toward a fuel stop. I let the car in front of me have a little extra space but I noticed it seemed a little darker in the tunnel than I remembered. I reached up to my helmet and confirmed, my inner sun visor was indeed up (everyone accidentally leaves their sunglasses on at least once in Nada Tunnel). I hit the switch for my auxiliary lights and they went off; I guess it wasn’t that. I hit the switch a second time, nothing happened. Pressed it again. Nothing. Auxiliary lights not working; that’s odd. Less than a mile down the road, the gas light came on, the engine lost power, and Rosie coasted to a stop.

5:58 PM

I’m that guy…

Have you ever been on one of those motorcycle rides where someone just can’t keep their bike running, and you have to keep stopping to fix something, scorching in the heat, shuffling through all your gear and tools. @Sub1Bros WalmartYeah… it was apparently my turn.
Fortunately, on the advice of my new buddy Tim, we parked in the shade behind the Jackson (Kentucky) Wal-Mart and swapped out the battery. After a few jump starts and skipping “the tour” down KY-1812, we booked it for Wally-World hoping a new battery would do the trick. I unhooked the myriad of electrical trinkets I had connected to the old battery (maybe that was the problem?), and dropped in the fresh cell; Rosie cranked right to life.

Fresh battery installed, we headed back into the much needed breeze for a “spirited” ride down KY-52 and up to “Big Andy Ridge Road”, KY-2016. As our group of five started to carve up the unmarked twisties, I complimented the guys on the intercom. I was exceptionally impressed with how well a group of otherwise strangers really “gelled” on what I view as respectably “technical” Kentucky backroads.

Not long after passing a wild turkey darting off the roadway, I noticed the fuel light come on again. That awkward feeling started to settle into my stomach. There was undoubtedly plenty of gas in the tank, but like clockwork, I started losing power, and the Scrambler coasted to a stop, about three-quarters the way up KY-2016.

8:00 PM

Another Jump start and we made it back to Miguel’s for dinner without incident. As everyone rolled in for Pizza and a healthy session of “lie swapping”, I learned I wasn’t the only victim of calamity. Versys 650 Oil Pan Damage MotoADVRApparently the Versys suffered a nearly deadly blow to the oil pan, courtesy of a sandstone “staircase” on Chop Chestnut Road; meanwhile, the 990 decided to shed a few pounds by dropping a piece of a clutch lever somewhere on the trail. Trying to find the source of my electrical gremlins, I spent a few minutes searching for a shorted or smashed wire under the seat of the Scrambler; all the while thankful that my issues were minor compared to patching an oil pan with JB Weld on the side of the trail.
From the sounds of it, everyone’s experience that day was “exciting” and unplanned, I couldn’t wait to see more of the photos as they appeared on Instagram in the coming days. It seemed to me that the sentiment was that everyone took it in stride and was looking forward to the more adventure in eastern Kentucky again next year.

Sunday Morning

Natural Bridge Campground Cabin MotoADVRRosie cranked right up for the short trip back over to Miguel’s for breakfast. Jeff and I joined my new buddy from North Carolina for another helping of Miguel’s breakfast before we all parted ways for the “long” ride home. Back at the campground, I loaded all my gear on the bike, put on my camelbak and donned my helmet for the ride home. I turned the key, pulled in the clutch, and thumbed that starter.

“Click.”

Jeff and I push started the bike twice; after firing and idling for a few brief moments, she sputtered and died both times. At that point, I called a buddy with a truck and waited.

Triumph Scrambler in Pickup MotoADVR

9:30 PM, Sunday Evening

After letting the battery sit on the tender for about an hour, I backed Rosie out of my driveway and pushed her a few feet up the hill. A good shove and several frantic “paddles”, I popped the bike into second gear and let out the clutch; the rear tire skidded for second, then the bike turned over, but never fired. Undaunted, I pushed Rosie back up the hill one more time. Once up to speed, I again let out the clutch, she chugged but never fired. I pushed her back onto the porch.

Day 161 and 7 miles short. I apparently outlasted the bike…

Reflections on 160 Days in the Saddle

Obviously I covered the first 90 days at length. It was hard admitting defeat that Sunday evening. Rosie The Scrambler MotoADVRA really good buddy (who also rescued me from Kentucky) even offered to let me ride his bike to keep the streak going. I regret that I waited until almost 10 PM to wave the white flag; sometimes that’s just how the chips fall. In the beginning, I admitted that I didn’t think 365 consecutive days was possible with just one bike (if at all). About two weeks ago I started to back off from that opinion as I had made it until almost August and things were getting easier. Lesson learned, one motorcycle is simply not enough…

MotoADVR_ScramblerTrailer

Looking back at the Calendar, I found it ironic that July 22nd was day 160, the same day I brought Rosie home from Louisville last year. In a 160 days of non-stop riding, Rosie, “The Bluegrass Belle”, covered over 15,000 miles, including over 13 trips to “The Motherland”; last weekend she apparently didn’t want to leave.

In that same time frame we checked off 3 rides from the Moto Bucket List, including an Iron Butt certification, completed an entire valve adjustment in one afternoon, and finally hosted “our” first “rally”. I can only hope the next 12 months are as exciting and she is equally reliable (considering the conditions).

Getting Rosie Back Into “Fighting” Shape

As soon as I found a second the following Monday, I planned on swapping out the Wal-Mart special with a hardy Duracell battery. I let the new battery charge up while I used the $60 Chinese battery to troubleshoot. I got the bike up and running long enough to put a good meter on the various connections. From what I could tell, I had 14 volts of power coming out of the Regulator/Rectifier, but I was still only getting 12 volts across the battery terminals.

Once I pulled the headlight bowl on Tuesday, I found a faulty connector between the main wiring harness and the rectifier. Per some advice from a very experienced friend (coincidentally the local RAT Pack “President”), I spliced the failed connection and found 13.8 volts at the battery while the bike was running. As of this writing, I still need to do a good, long, test run, but I’m fairly confident I have this situation sorted.

More of the Ride 365 Challenge

Tuesday, July 25th, 10:46 PM

Day 1… again…

DCIM134GOPRO

Planning for the Next Red River Scramble

Despite all of the headaches, I do hope that those in attendance will return again next year. Cliff Edge Sunset MotoADVRIt was ungodly hot this July, so much so, I was glad we landed the air conditioned “studio” versus the shiny new tent I actually bought for the event. Next year I’m thinking late spring to avoid the boiling temperatures. Right now I kind of have my mind set on the weekend before Memorial Day, but I need to look at a few calendars to make sure that doesn’t coincide with other major “adventure” events. Fall would be a spectacular time to go down and ride the gorge, but that is unfortunately the “busy” season and the lodging rates are the highest. I will also say that the traffic coincides with the increased rates; you probably won’t find that traffic off-road or even on the outskirt “loops” but if you’re hiking or riding through the gorge you’ll be fighting the crowds.

My plan for next year is to make Red River Scramble a Friday through Sunday event with a Thursday night meet and greet. I will probably design a T-shirt, and hopefully give away some door prizes and maybe some giveaways for “Best Scrambler”, “Dirtiest Bike”, and “Longest Distance Traveled”. I’m also going to try to nail down accommodations at a single location, whether it be a campground, motel, a lodge, or a mashup of cabins and camping. For those that attended, please leave some comments with ideas for next year, preference for lodging, and any other feedback you can think of (bring a multi-meter, good idea!). For folks that couldn’t attend this year, please feel free to comment below on when would be best for you next year, or any info on other events that I may want to avoid (scheduling conflicts are somewhat inevitable I guess).

Posted in Bikes | Tagged , , , , , , , , , , , , , , , | 10 Comments