Now that the first snow is starting to fall in Dayton… I’m finally circling back to the rest of my photos and video from “The Raid”:
Three days of hooliganism (albeit “cruiser” hooliganism) had taken a heavy toll on the stock Bridgestone Trail Wing that came stock on Rosie. Chasing my buddy Jerry on the Skyway on Tuesday, I noticed the front end was developing an unnerving vibration at speed. Based on the heavy scalloping I could see in the tread pattern, I realized that tire’s days were numbered if I was going to keep up that aggressive riding for the rest of the week. Knowing I still had a 500 mile ride home on Sunday, Thursday morning, (9/15/16) , I decided to bite the bullet and rush over to Wheeler’s Performance in Robbinsville as soon as they opened.
While Deal’s Gap isn’t “remote” by my standards, it’s not like you can just run down the road to a shop and have a tire mounted, it was a 30 minutes ride, and the only shop I’m aware of that’s even that close to the Iron Horse. Despite my “lack of options”, Wheeler’s came highly recommended by repeat offenders to the Raid.
Pulling into a motorcycle shop on a hillside in Appalachia was undoubtedly going to be an experience. Putting the side stand down and stepping toward the garage I passed several dusty old Japanese street bikes and the obligatory dual sport parked just outside the door. Walking up to the counter I noticed what I assume was a cockatiel (or perhaps a breed of parrot?) perched on a parts display. Ringing the bell, I was greeted by a discreet young man who was attempting to manage the flood of incoming phone calls meanwhile trying to get the shop open for the day’s work. We perused over the available tires in the size needed for the Scrambler, a list that was quite short considering I needed something right then and there. Fortunately, they did have a Michelin Anakee 3 on hand (the display in fact). I had heard really good things about the Anakee from a fellow “inmate” on ADVrider, but I admit I was a bit concerned about the quality of the tire considering how long it may have been sitting around the shop waiting for someone like myself.
Shortly after the Scram found its way up on the lift, Mr. Wheeler himself arrived. We shot the breeze a bit while I waited; noticing several wrecked bikes parked next to the garage, we exchanged a few anecdotes about the unsuspecting moto-tourists and the decreasing radius turns in the local area. As I’ve already covered, “The Dragon” is quite the destination, as such that brings Wheeler’s quite a bit of business, unfortunately for some, at times that business is the result of someone’s poor judgement. During this exchange he said something that really struck me, “On the Dragon… Horse Power IS NOT your friend”; very true. Letting him move on to more pressing things (more phone calls), I browsed through sale parts and whatnot around the shop.
In less than an hour (in and out), the young man (whose name is unfortunately escaping me ), had the new tire mounted, balanced, aligned the front forks, re-mounted the wheel, and even lubed throttle cables. I admit that the price was a little north of what I would have paid locally in Dayton, but when you’re over the barrel and supporting a local economy that may not see as much business, it’s the way things have to go. Despite any misgivings I may have had about “shelf life”, the Anakee stuck like glue after scrubbing it in over just a few short miles up US-129 and back to the Iron Horse. Moreover that Anakee is still going strong almost 7,000 miles later, something I couldn’t say for the Bridgestone.
For frequenters to the blog, it goes without saying that I venture into the Bluegrass State on a regular basis, Red River Gorge more specifically. On an “Off-Friday” (18 NOV), a buddy joined me on what was his first trip down to the gorge. This is the same buddy that showed me around Shawnee a few weeks back, so scouting out some local dirt roads around Menifee and Powell County was undoubtedly on the docket along with the usual highlights.
After accolades of my “scrambler adventures” reached the secure confines of Facebook, my uncle sent me a text, suggesting that I go take peek at a nearby road from Grandma’s house. Not to be threatened with a good time, that took top priority after stopping in Frenchburg to top off the tank. Hatton Ridge Road spurs off from Kentucky Route 713 (KY-713) at the most dangerous curve, hands-down, I’ve ever seen anywhere (blind, off-camber, 90-degree curve; did I mention there’s gravel?). This time around, instead of negotiating said curve, I was actually intentionally headed into the gravel to see this nearly forgotten un-improved road. Hatton Ridge Road takes a hard left at Spas Creek (more on that in a minute), and heads south on maintained gravel to a local cemetery, before turning into double track down to the end of the ridge spur. Unfortunately photos can’t do it justice, as most of the local roads carve along creek-beds (which isn’t a bad thing), from the top of the ridge you get great views through the trees of the gorge below.
After a down and back across Hatton Ridge it was time to do a little sightseeing at my favorite Red River Gorge destinations, KY-77, Nada Tunnel, KY-15, KY-715, and Sky Bridge.
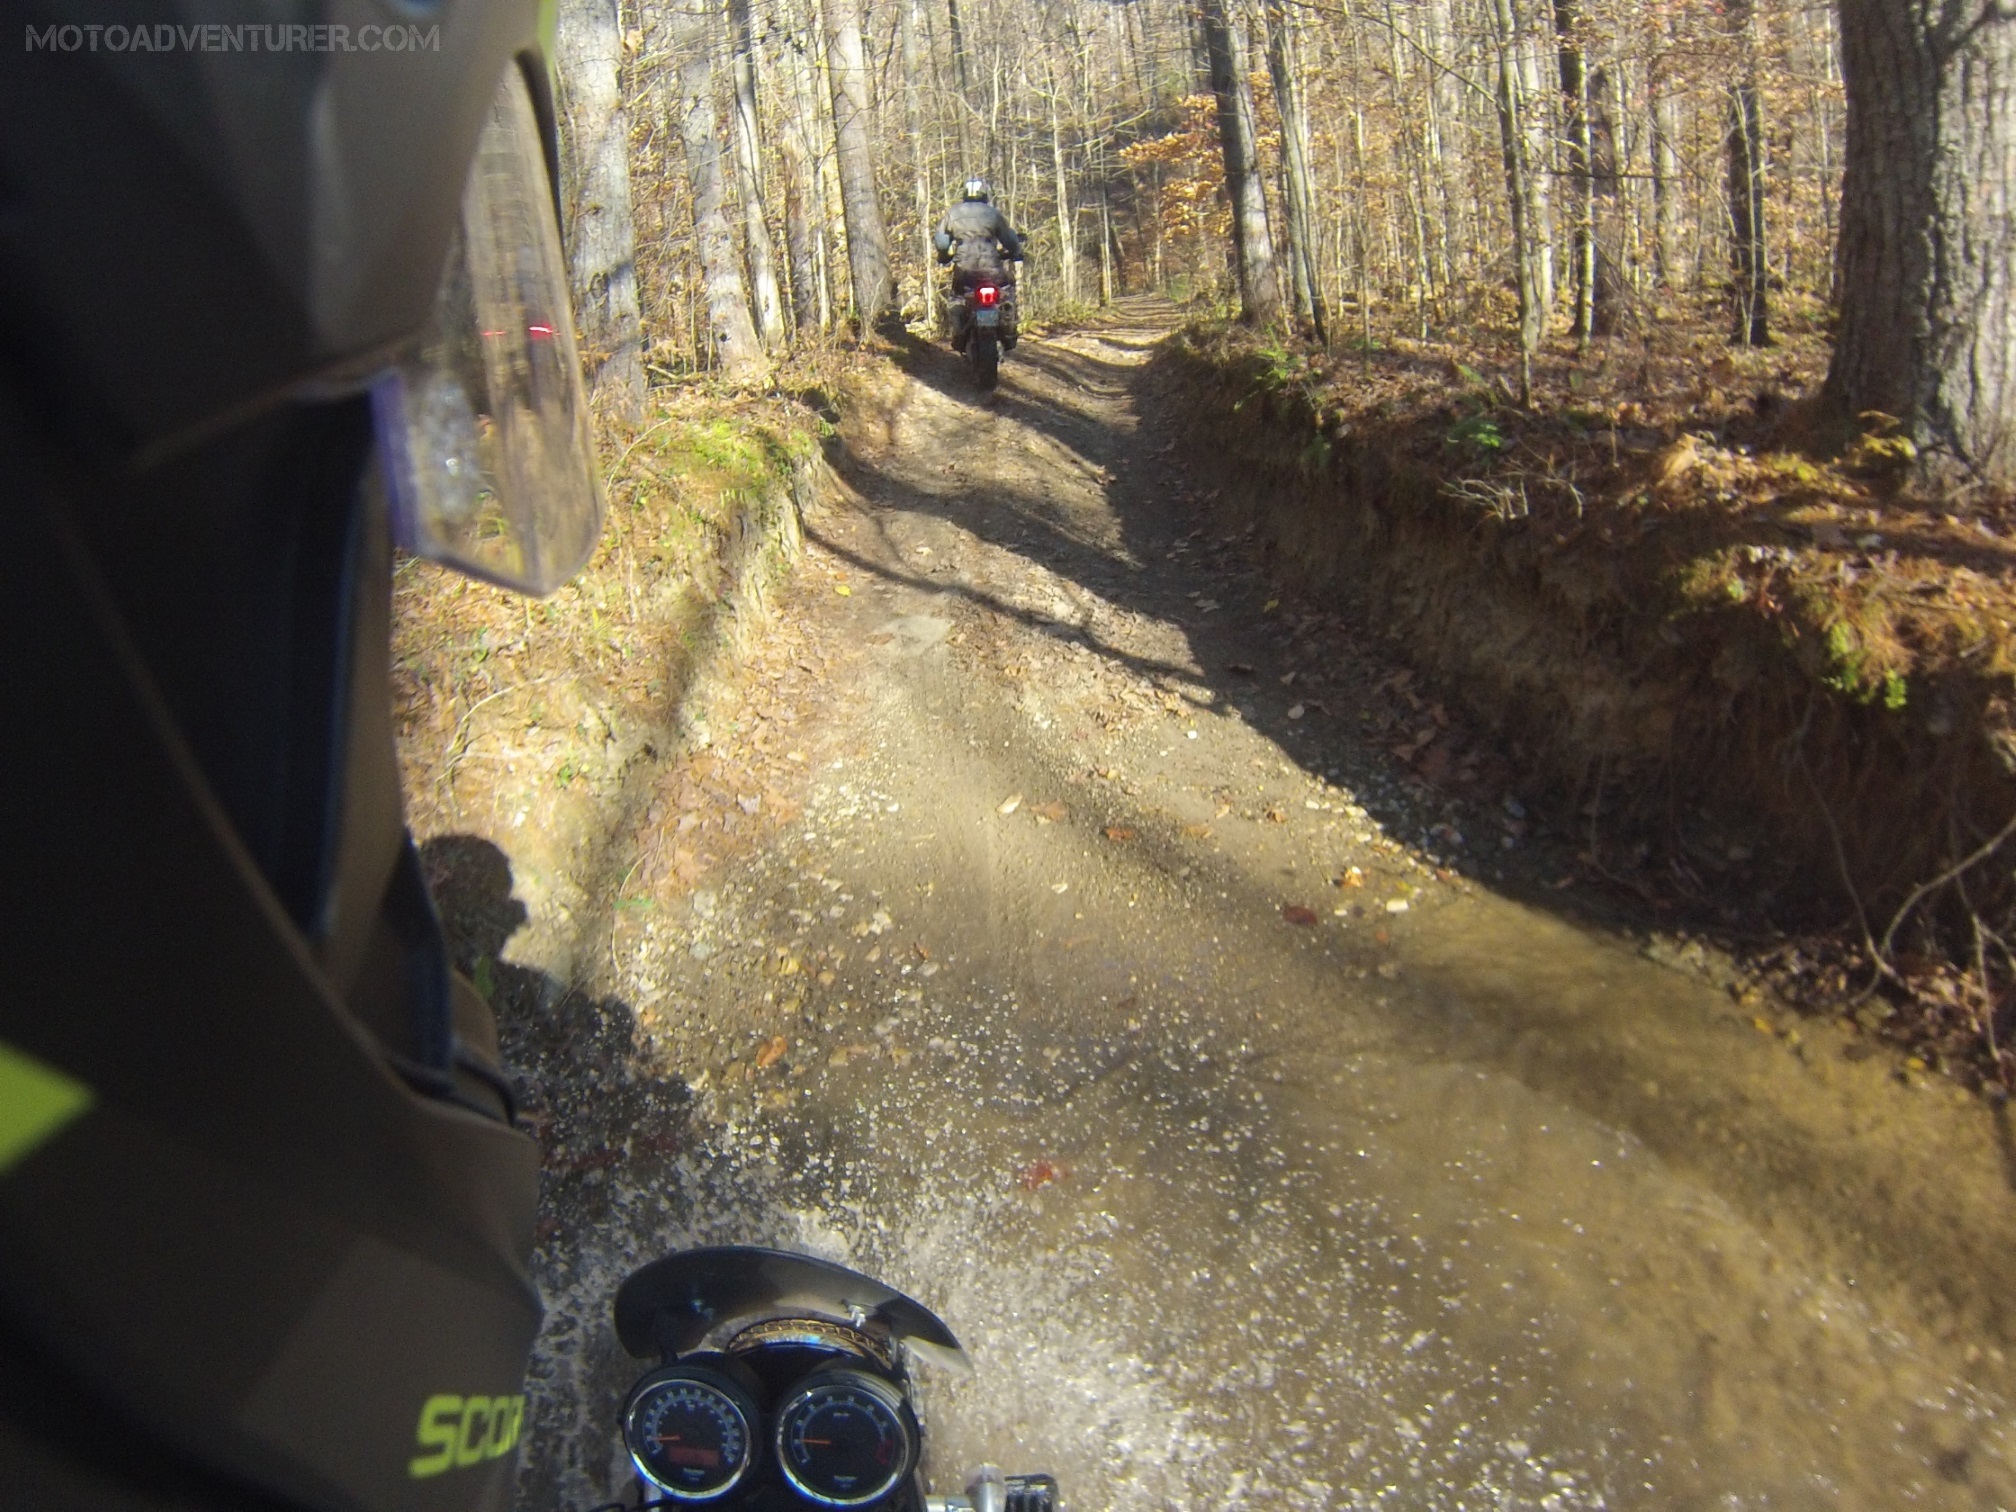
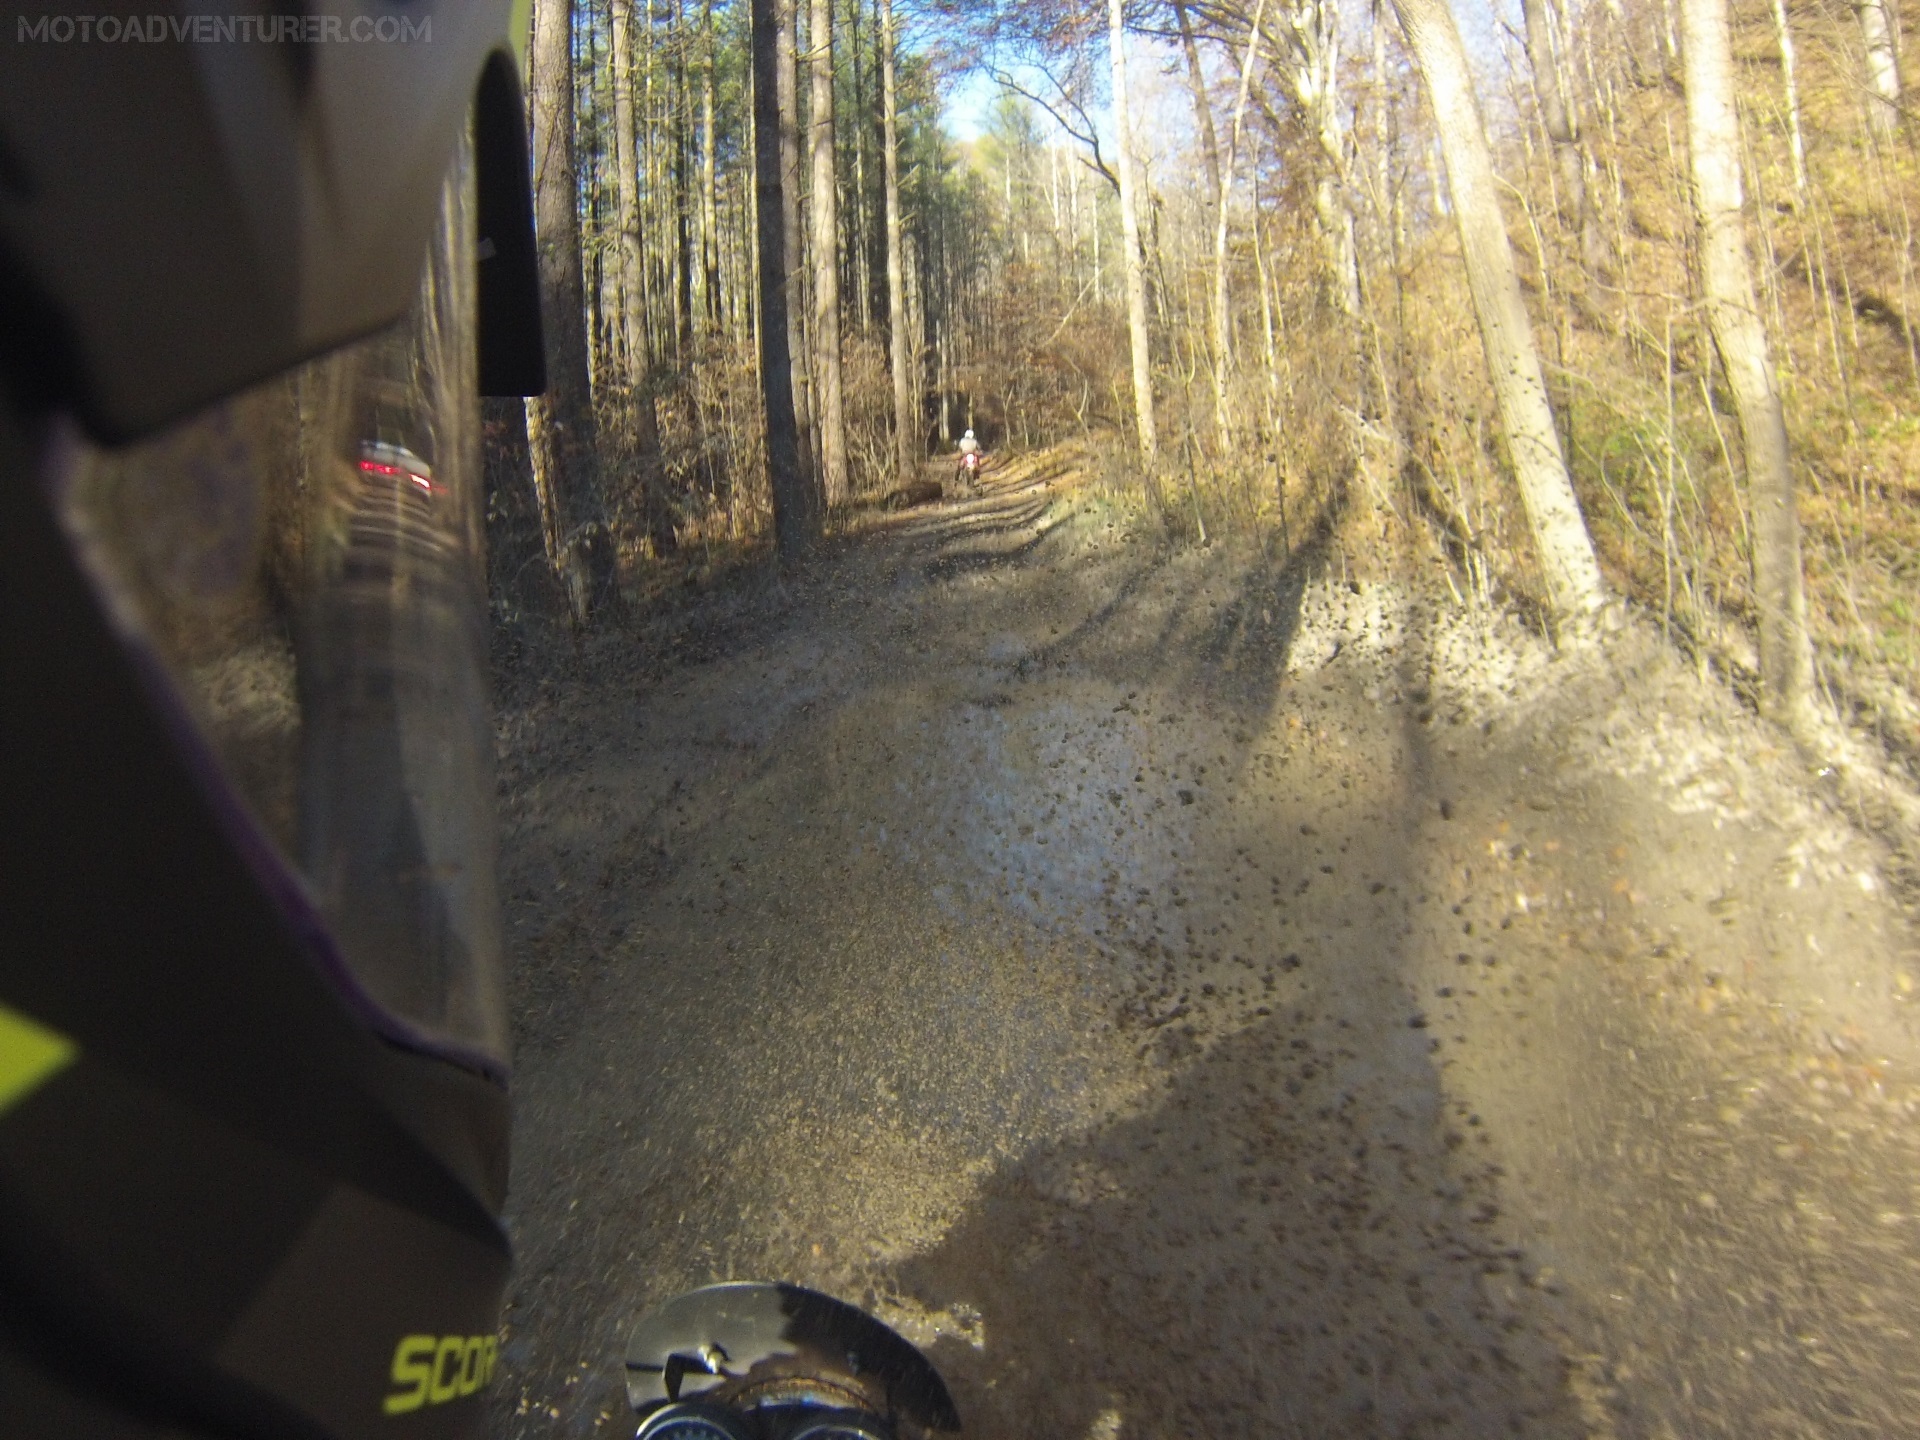
After grabbing a sandwich and catching the lofty views of the gorge from Skybridge, we went back to exploring more roads I’d not seen before. The night prior I scanned over a short thread on ADVrider about local dirt, after which I figured we should go take a peek at the south end of Spas Creek Road. Based on what I could see on Google maps, and from the little bit I caught on ADVrider, I assumed that at some point we would come across an impassible section and be forced to turn back. Like Hatton Ridge, Spas Creek started out as dusty but well maintained gravel. After about two miles that gravel rapidly deteriorated into sloppy double track littered with deep puddles and several creek crossings. After a series of obstacles, getting off the bike to make a plan, mounting back up to negotiate another obstacle, only to find a more challenging hurdle immediately thereafter. This turned out to be the toughest test of the Scrambler, and certainly myself, thus far. Street tires and excess weight became extremely evident when the mud got sloshy and the ruts just got deeper. At some point we decided to call it, not knowing if the road was passable to the top, considering two fat street bikes and my amateur off-road skills, at some point we figured we were pushing our luck in attempting to go back through a series of nasty ruts twice.
From Spas Creek, we decided to take a short (desolate) section of KY-615 over to Indian Creek Road. True to what I read on ADVrider, Indian Creek turned out to be a bit tamer than Spas Creek, albeit a bit more maintained than I prefer. We road down to another creek crossing, where, for whatever reason, the park service had the road closed. After taking a short break, tossing water on my mud caked oil cooler, the sun started to dip behind the hills and it was time to call it a day.
Despite being one the verge of dumping my “shiny new” bike in some precarious mud puddles, that mile stretch of nastiness was probably the best ride of the whole day; truly adventure I’ve never encountered anywhere else. I have a strange feeling that one of these photos may find its way up onto the Moto Bucket List now that I have confirmed that Spas Creek does in fact connect to Hatton Ridge (big thanks to an avid 4×4 off-roader @maynard032 on Instagram).
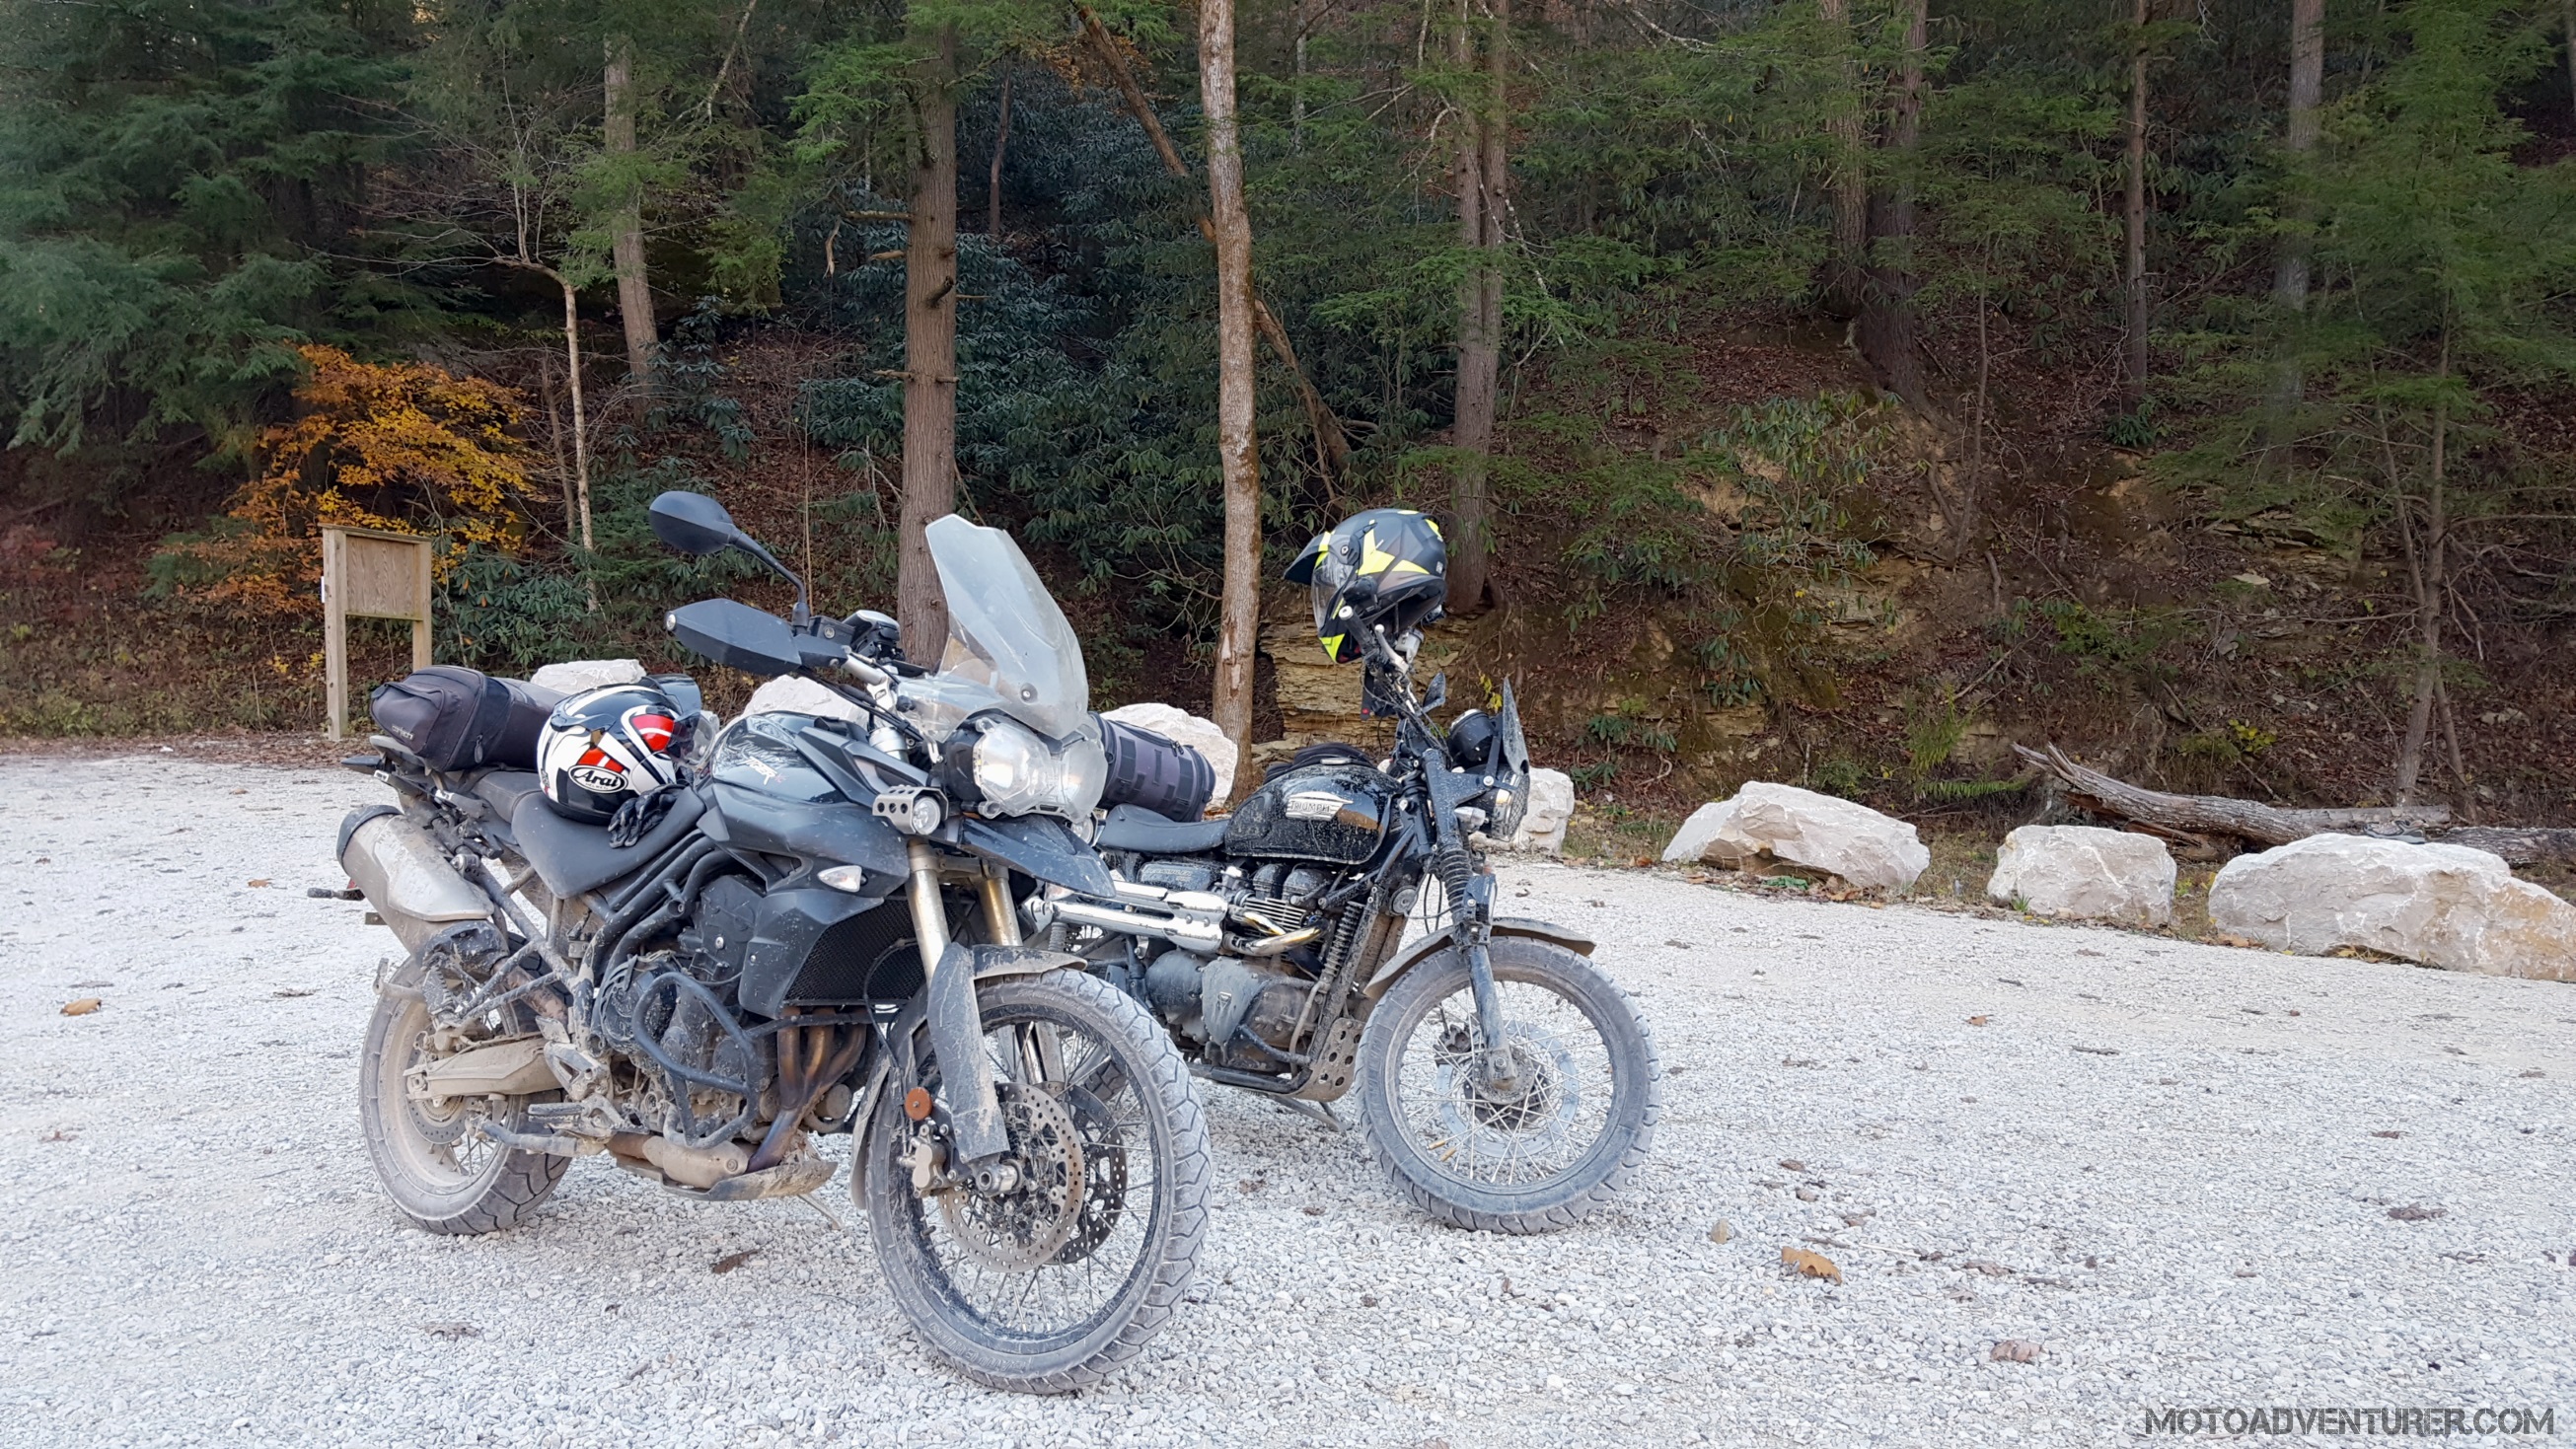
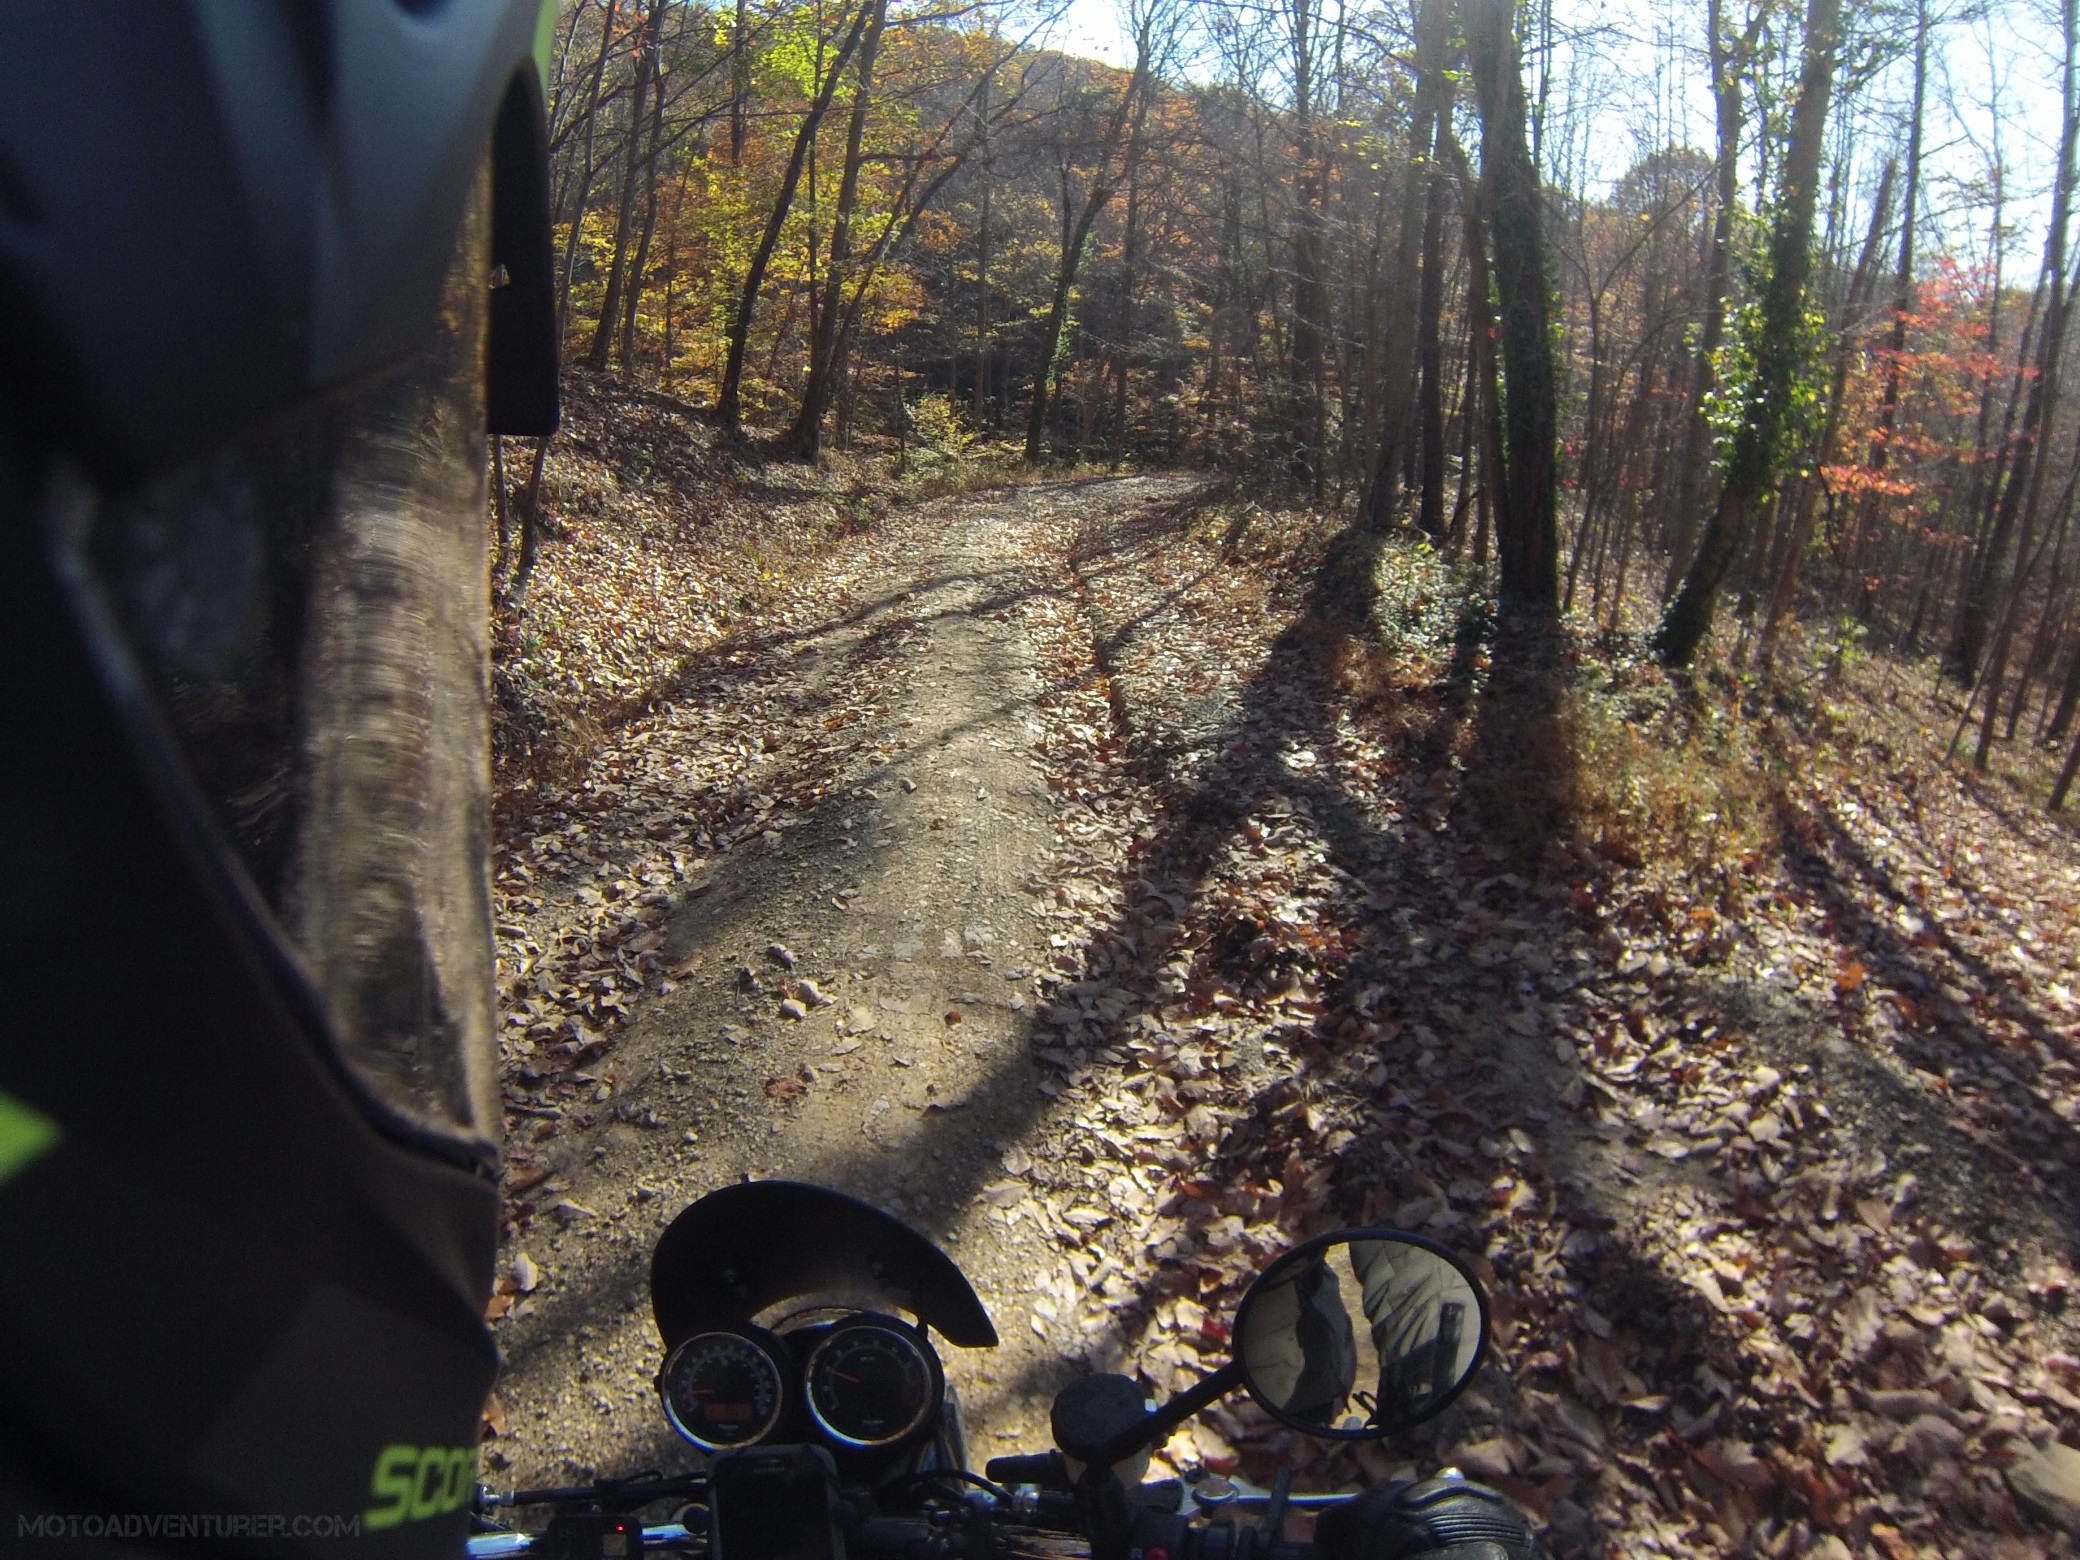
With a few new parts bolted on, it was finally time to go find some real dirt to test Rosie the Scrambler off-road, or as I quickly realized, my off-road competence. A few weeks back, I got a text from a buddy about taking a day trip down to Shawnee State Forest between Hillsboro and Portsmouth; unbeknownst to me, there is a well maintained network of gravel forest service roads down that way, along with many local “unimproved” roads. Aside from a day at the Dragon Raid, I have been dabbling in whatever dirt of gravel I can find locally as of late, along with reading whatever I can about dirt riding skills, but there’s no substitute for the real thing. As a guy who’s never ridden a dirt bike, it’s still overly obvious that the Scrambler can be quite the handful once you leave the tarmac. That said, I have this sick obsession with squeezing a little more out of a given tool… and well, doing things people say you can’t or shouldn’t. Despite all my pipe dreams about racing the Scrambler in the Baja 1000, it’s not gonna happen; it’s still a street bike, venturing off into fire roads, pinning the throttle on the uphill stints, flinging gravel and having a good time, but it’s still out of its league when trail gets wet. That doesn’t mean I’m not having a damn good time, and learning more and more about how to ride a bike off-road, it’s just a matter of keeping that front wheel from washing out. Anywho, I figured I’d share a few photos of the adventure; I’m still learning my way around down that way, but hopefully more to come!
As I mentioned way back when, I already had an extensive list of goodies picked out; having ridden over 6,000 miles with Rosie the Scrambler I established prioritized list of modifications, on the top of which was bar risers. I was immediately surprised by how comfortable the stock bars were in and around town, combined with the fact I could easily reach the bars when standing. That said, on longer days, straight stretches of highway, and when standing up while riding gravel, I realized that the bars could stand to be a notch higher. Thanks to a little help from Revzilla, I picked out a set of SW-Motech 30mm bar risers that were direct bolt-on accessories to the standard Triumph bar clamps. I carefully laid a thick towel over the tank, and methodically removed the stock bar hardware, gently resting the handlebars on the tank. The SW-Motech kit includes the riser inserts and increased length fasteners in the box. The 30mm risers easily go in place and I hand tightened the bolts down to check comfort and fitment. The electronical connections and clutch cable were both long enough for sufficient suspension travel, however the front brake line was a little taut because of the clamp on the triple tree. With a little elbow grease, I slid the brake cable up slightly for proper fitment.
After putting a few miles on the bike with the risers in place, there’s no denying that a one inch change in rise equated to a significant difference in feel. I do feel slightly more upright and much for comfortable when standing. That said, it feels a bit unnerving leaning into the twisties at first; your hands just feel so close to you face initially. I would recommend these risers to casual riders, and folks that take the Scrambler off-road; however, if you prefer spirited riding or mostly stick to the urban jungle, the stock bar height is probably better. I expect I will keep these risers long-term as I have adapted to the initial change after several trips to Kentucky in the last few weeks (and some off-road in Shawnee Forest). I have considered rolling the bars back just a bit for increased “touring” comfort, however I’m afraid that will negatively affect the off-road riding position.
Denali D4 Auxiliary Lights
Riding down the Dragon this year it was abundantly clear that the stock lamp is absolutely helpless. Item two on the buy list was some sort of lighting upgrade. I was on the fence between the Denali M5 headlight replacement and a set of Denali D4 auxiliary lights. After a short chit-chat with the gear geeks over at Revzilla, we agreed that the D4s would put down the most light and provide the best service for the type of riding I do. I admit that I was extremely excited about getting the D4s up and running, while at the same time a little intimidated by the wiring. I put heated grips on the Speedmaster (link) no problem, but that was a simple lug to the battery ordeal. The Denali setup includes two direct connections to the battery, and a third connection to a positive 12V wire on a switched connection to make sure the bike is on before the lights will operate. Having push started the Speedmaster no less than twice because I left the heated grips on, killing the battery, I’m a huge fan of this idea; however that didn’t make the install any less intimating. Fortunately, I had my trusty Haynes manual laying around, but the concern wasn’t about reading the wiring diagram, it was more about finding the actual wire on the bike, everything is easy on paper. Considering most of the wiring was going under the seat, I decided that the rear “running” light was probably the best candidate for this “Tap-in” for +12VDC. As it turns out, the wiring harness for the tail light is quite close to the battery box, so I was really concerned for nothing. Having positively identified the best solution for the third connection, I installed the battery connections and the “Posi-tap” on the running light, then ran all of the connections down to one of the lamps just to test the system. Pressed the button, light came on, done deal. At that point it was time to remove the tank and run all of the cables properly. I also purchased Denali Fork Tube Auxiliary Light Mounts (50-60mm) to go along with the D4 setup as I didn’t have many other mounting option for the Scrambler. The kit comes with necessary tools and fasteners to bolt right onto the lower fork tubes. Once the mounts were in place, I installed the lights, checked the cable runs up to the headstock for necessary free play, stashed the fasteners behind the headlight bulb, and then tidied up the rest of the cables under the gas tank. All said in done, probably two hours to get things set.
Triumph Engine Dresser Bars
I find the term “dresser bars” to be a bit humorous because we’re talking about a Scrambler here; you can “dress” this bike up all day, but it’s a shadow of any bagger I’ve ever seen. At any rate, I wanted some sort of crash protection for Rosie as I knew it was going to be a very short time before I started riding in places where the pavement stopped. Despite my teasing, I assume Triumph calls them “Dresser Bars” because they don’t want to call them “Crash bars”. Beyond the negative connotation of “Crash”, I also suspect they were called “dresser” bars because they’re going to need a slight modification to make them a tad sturdier; the crossbar under the engine doesn’t actually contact the mating bar on the opposing side. Obviously, they’re better than nothing, but I intend to do a little shopping at the local hardware store and remedy this situation in short order.
At any rate, these bars are about $180, and virtually the only option on the market that will fit the Scrambler. These bars are obviously a factory option and come with all of the necessary hardware; following the directions from Triumph’s parts website I had the bars installed in about fifteen minutes. I also expect that long-term I may find a bolt-on “highway peg” option for these just make touring a bit more comfortable.
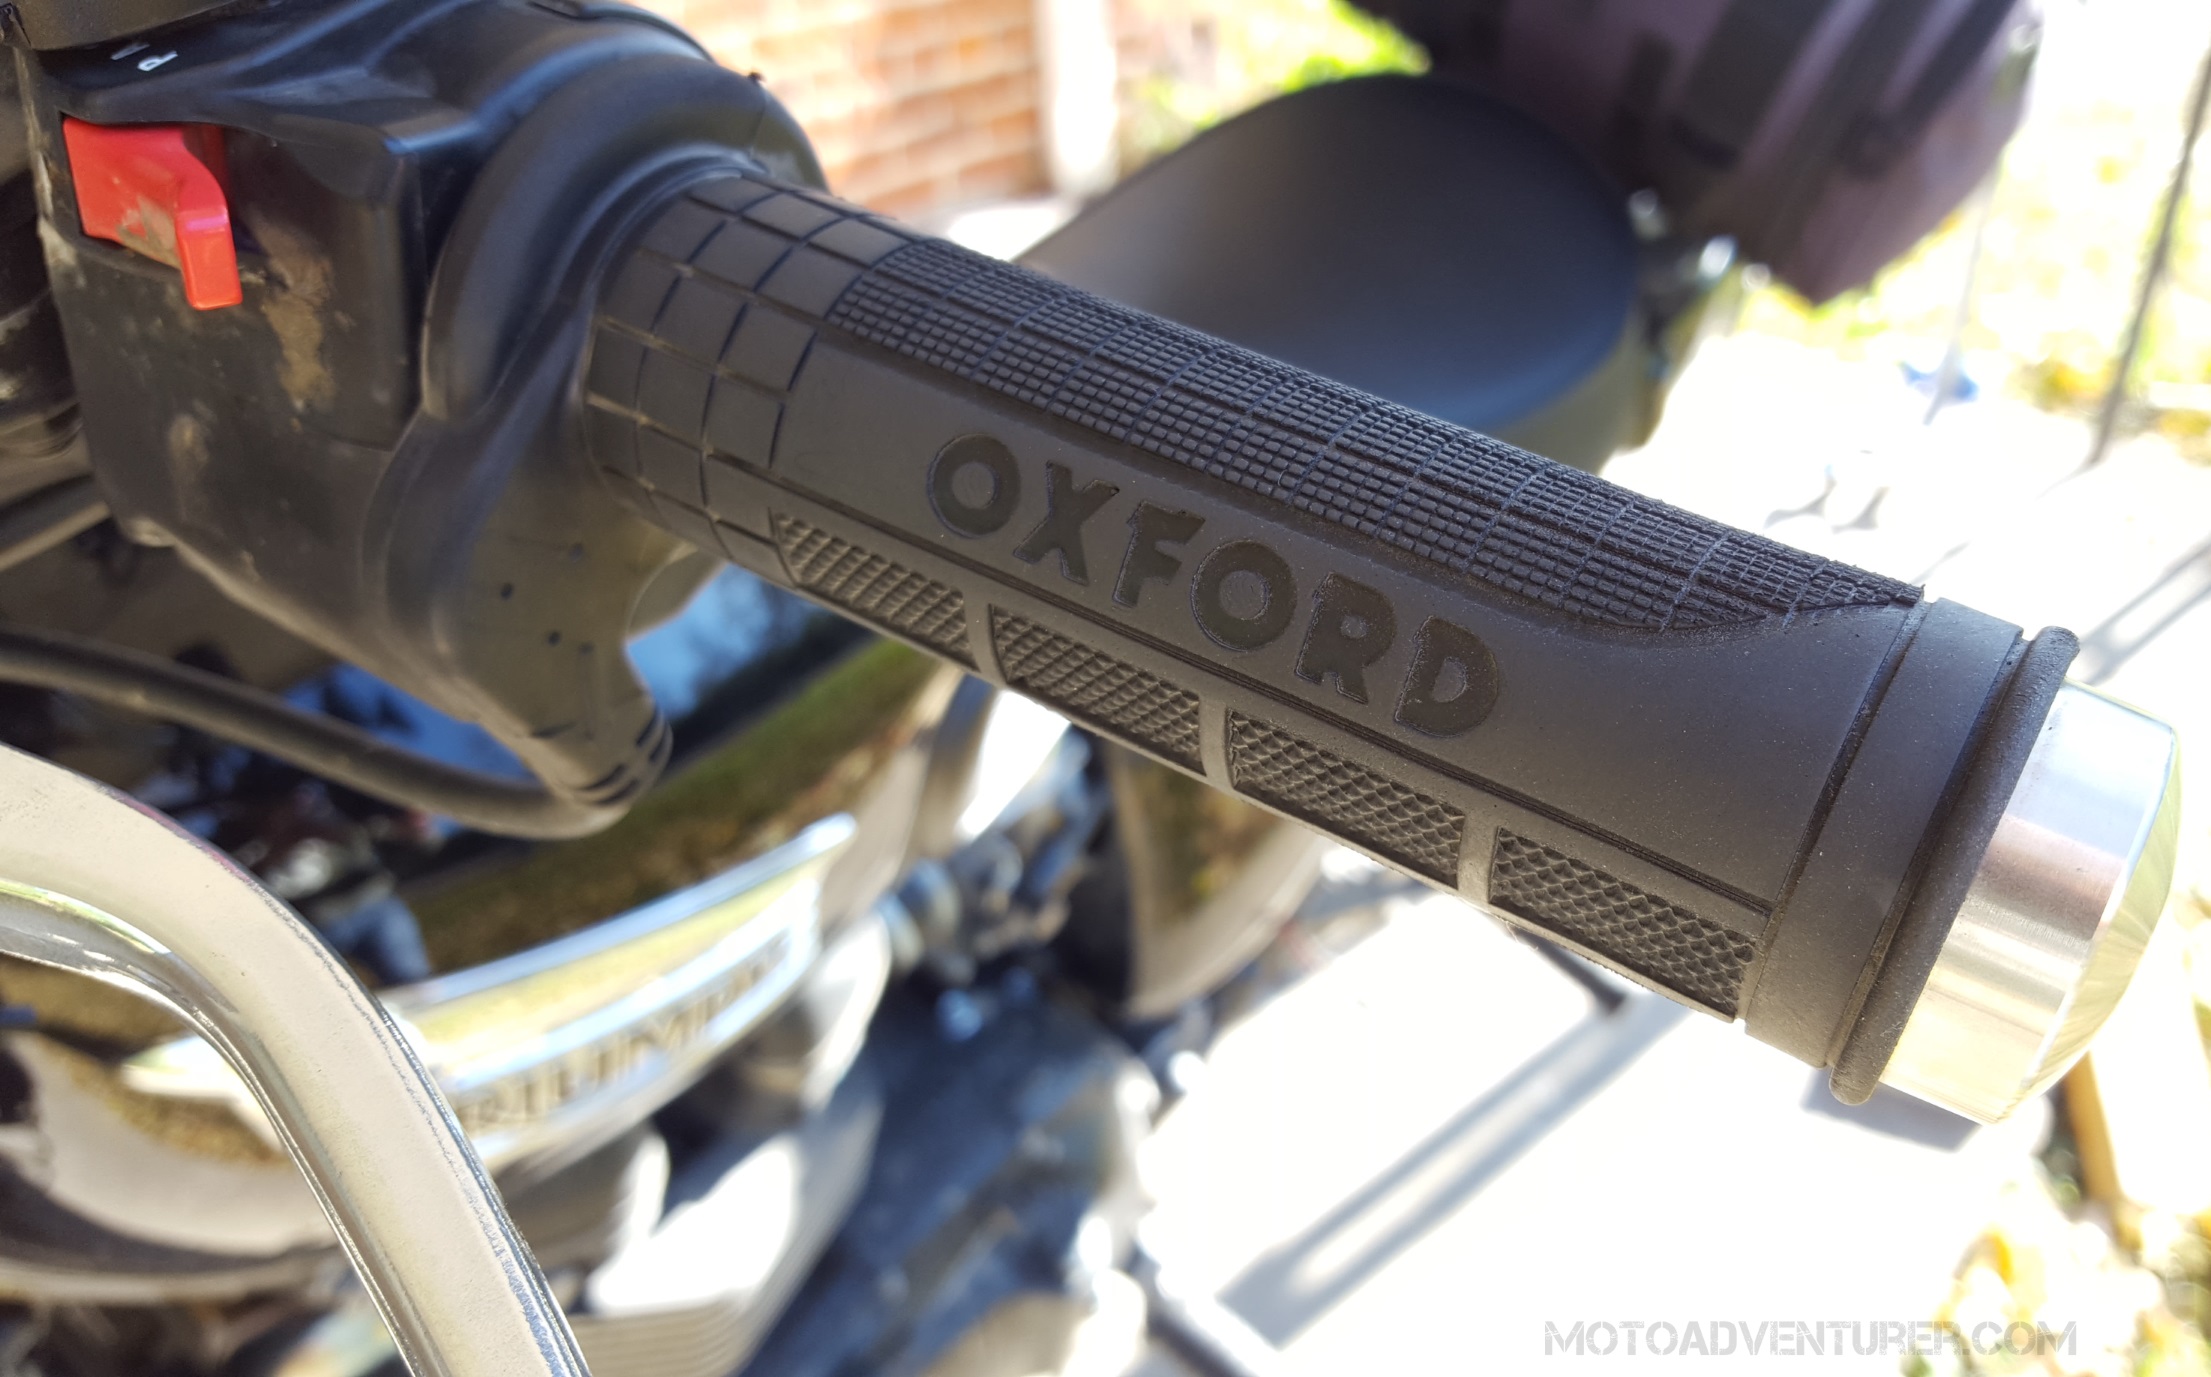
Oxford Heaterz Premium Adventure Heated Grips
If I had to guess, I expect that Rosie the Scrambler will undoubtedly spend more time on the road during the winter months than Lola the Speedmaster; that pretty much made heated grips a sure thing from day one. After perusing the ADVrider Scrambler Board, I discovered that many riders have had a lot of success with Oxford brand heated grips. I had BikeMaster heated grips on the Speedmaster, but without handguards, once below freezing, the heated grips were really struggling to keep up with the cold air. Considering that Oxford Heaterz were included in the Revzilla Adventure Parts Guide, I threw them on top of the stack of new add-ons.
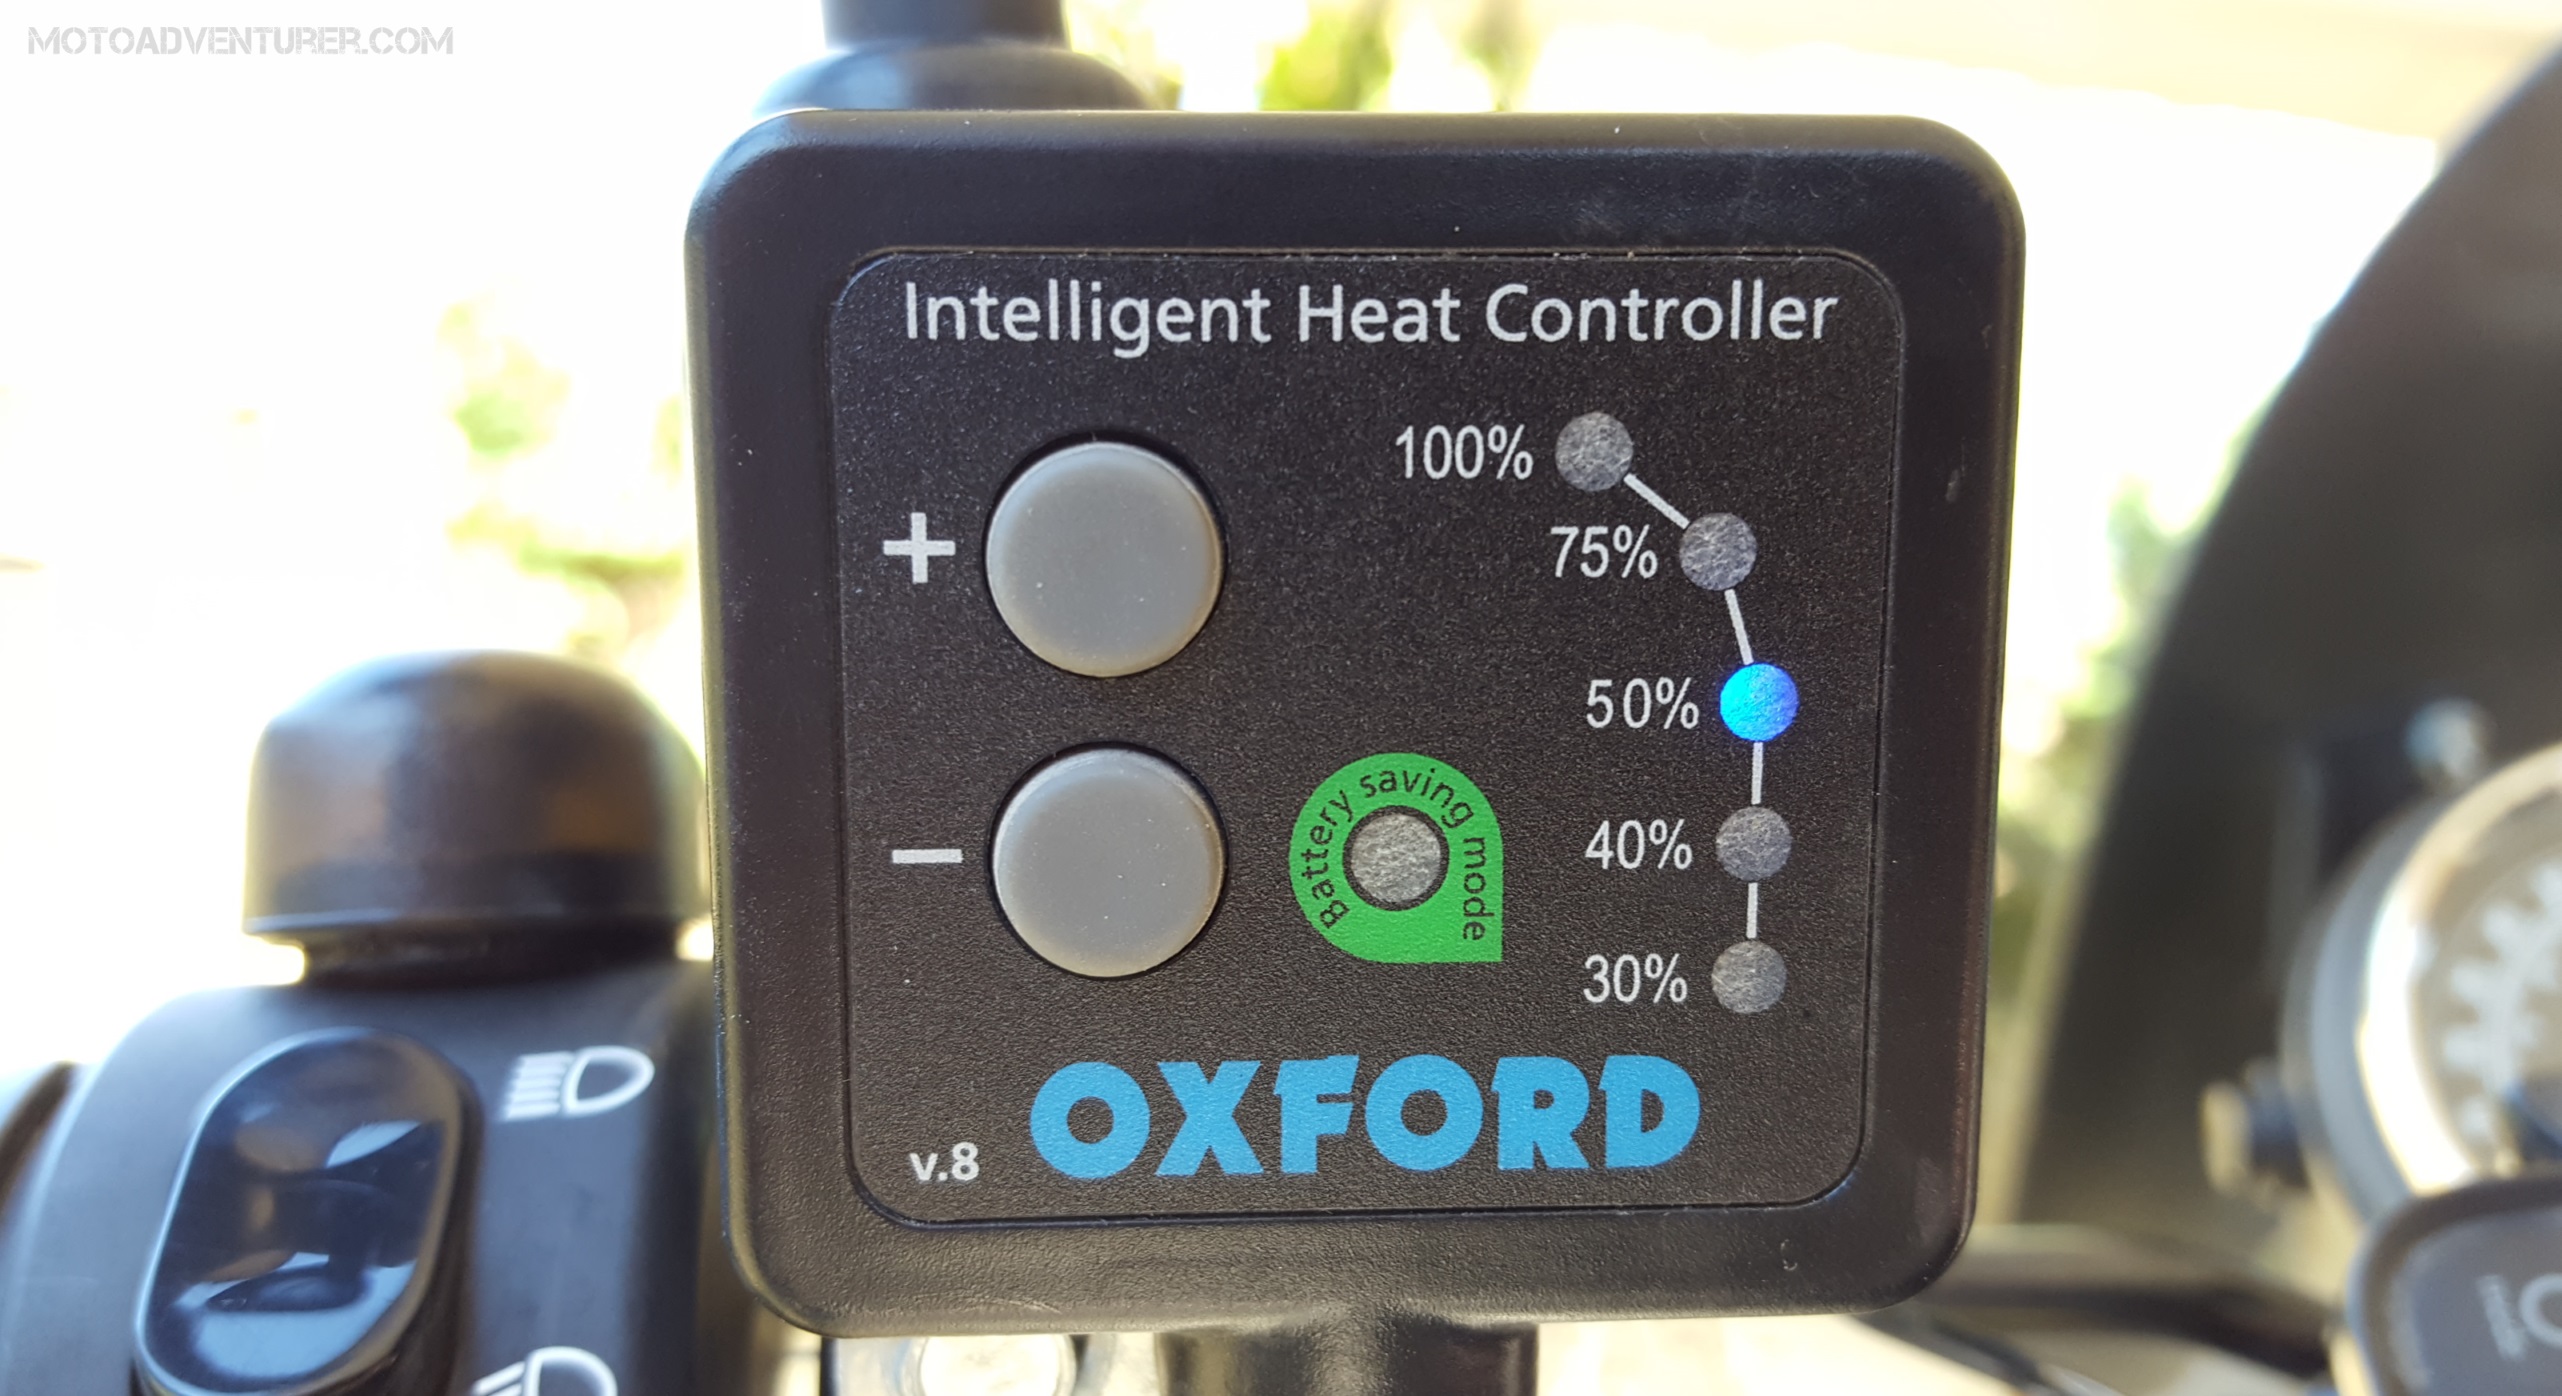
Heated grips are actually a really cheap and easy upgrade; I’m somewhat surprised that more people don’t have them. I get many folks on touring bikes get them standard, but the grips on my old bike were only like $50 and were plenty warm for most riders (IMHO), and it’s honestly an easy install. Speaking of install, in this case, with a little Windex and an extremely small screwdriver, the stock grips come off pretty easily and can be set aside for later use. I took the tank off again to make sure the wiring harness ran cleanly along the frame spine with the other electrical bits from the auxiliary lights. From there it is just two direct leads to the battery. I was a little hesitant to install another set of grips connected directly to the battery, however the Oxford Heaterz come with some sort of electronic sensor that monitors the supplied voltage from the battery and shuts off when low power is detected. I’ve had these grips installed on the bike for over a month now, thus far I have been really impressed with the level of heat I’m getting. This morning in fact, it was 32F on my commute to the office, while I did have my heated gloves on, I did not need the grips at full power while on the highway. That’s a welcome change considering I have no handguards at the moment. I have also left the grips on at gas stops with the bike turned off; after a few moments a warning light starts flashing on the rheostat to tell you they are about to shut off because the bike is not running.
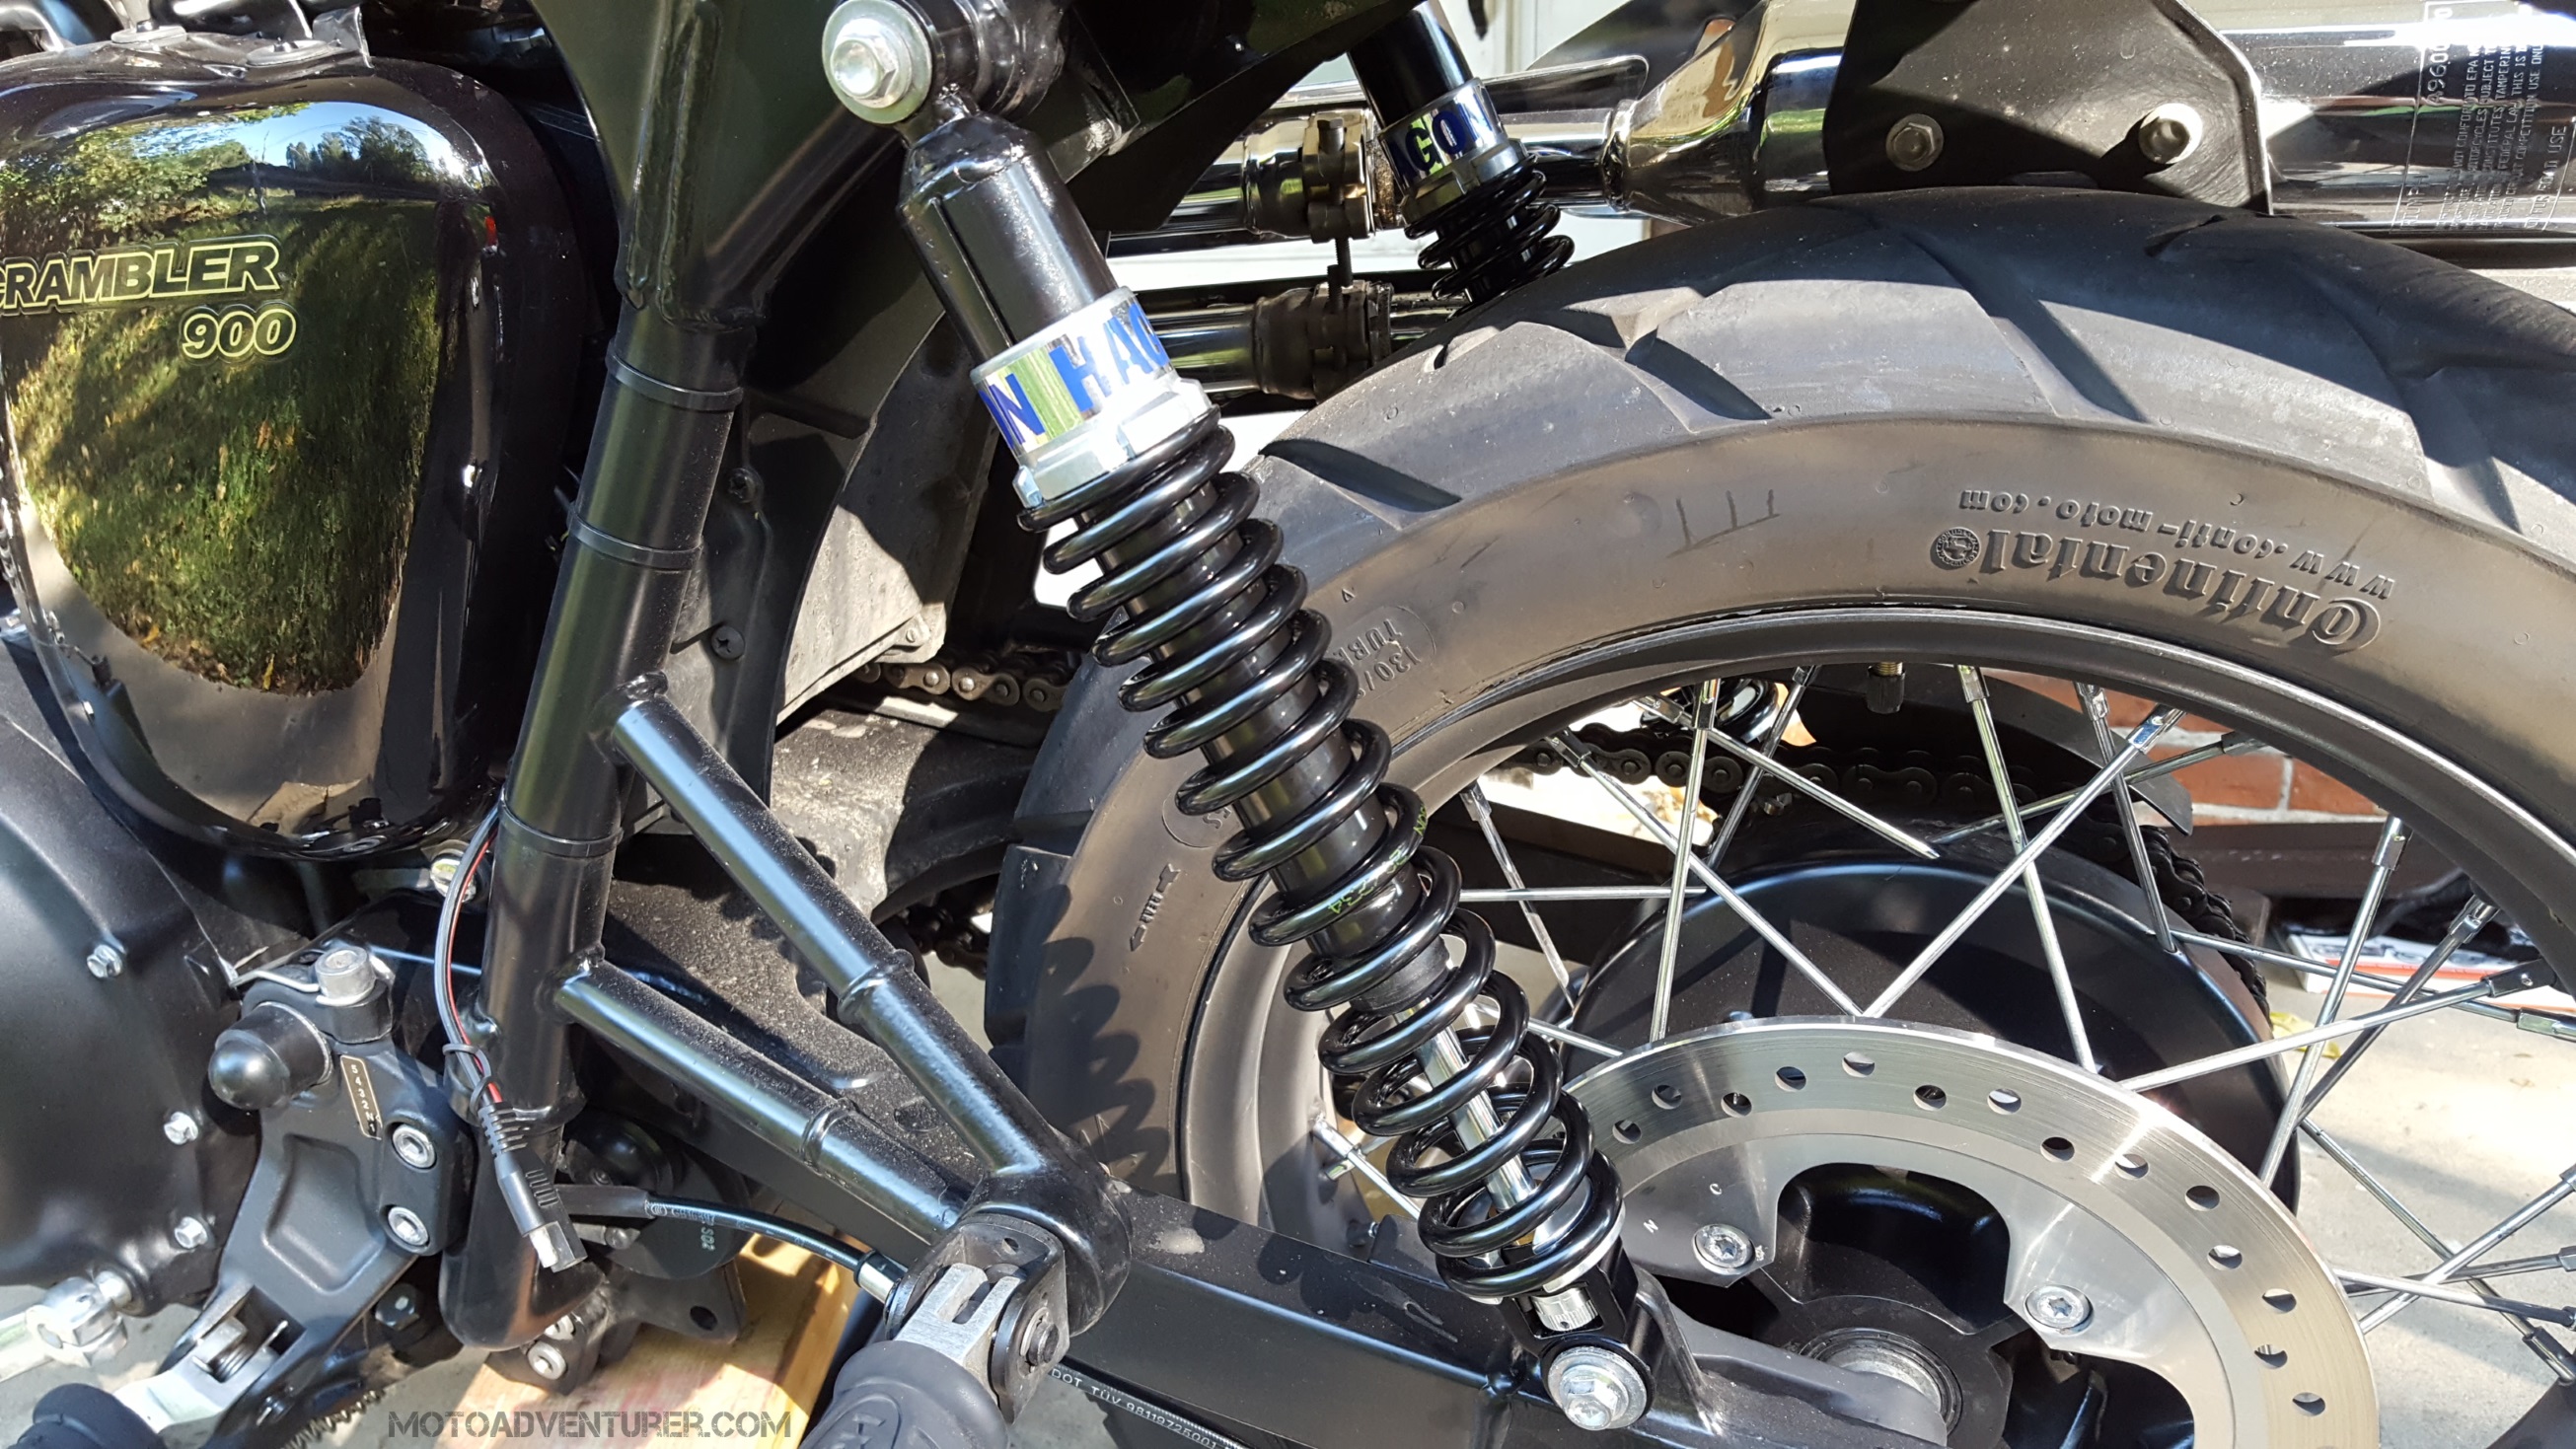
Hagon 2810 Shocks
I admit that I had really big dreams of upgrading the Scrambler’s suspension to a 6” travel kit. I’m not going to say that will never happen, but I did not anticipate that riding the Scrambler on the street would strike my fancy as well as it did; I expected that the different geometry might shake things up a bit, but I didn’t realize how much “faster” it would feel. Making that discovery at the Dragon, I had some long conversations with fellow, long-term, Bonneville owners at the raid. Ultimately I came to the conclusion that as it stands today, I have very little dirt experience, and very few places to ride dirt locally (best locations are at least 2 hours away); keeping that in mind, it will be best to invest a little into some better street oriented suspension upgrades, and consider increased travel as a long-term project.
Thus, after some shopping around on the web, a little back and forth via e-mail, and a conversation with my local Triumph Dealer (Joe’s Cycle Shop), I landed on the Hagon 2810 rear shocks for the first upgrade. The 2810 shocks come with 3 preload adjustment settings and 10 dampening settings. I am by no means a suspension expert (layman… at best), so I thought that 10 dampening settings was a bit excessive. That said, over the past month I have found that just a small bump in dampening can make a big difference in the overall ride behavior; besides, they’re black… what’s not to like?!
Once you’re able to get the weight off the rear swing arm (Motorcycle jack preferred), swapping out rear springs is a just four bolt affair. Just make sure you don’t break one of those bolts while torqueing them to spec, that mistake adds an hour to the process, take my word for it.
MSF Folding Shift Lever
This one is kind of like adding a piece of chrome to your bike (or in my case something black in lieu of chrome), but I also installed a folding shift lever shortly after the above upgrades. Determining what would fit was a bit tough, so I sent an email to the gear geeks over at Revzilla. They informed me that replacement shift levers for a 2008 Honda CRF70 have identical fitment to the Scrambler, however they didn’t currently keep anything in stock. Fortunately, Motorcycle Superstore had MSF shift levers for under $20, so I ordered one, and the install is self explanatory.
Having checked the Dragon and Cherohala off the list for 2016, I was chomping at the bit for the Moonshiner (NC-28 into Franklin) come Wednesday morning. The morning was the usual routine, leisurely (but delicious) breakfast at the Iron Horse, getting my bike packed the way I like it for the day, and figuring out if “the boys” wanted to get on 28 and figure it out from there.
Obviously I’ve covered a bit on NC-28 from last year; this year was more of the same, save for the fact that I was, yet again, not terrified of the dreaded downhill twisties. This year was also another reminder that you should never underestimate a pickup truck with local plates. Headed south into Franklin, just as 28 started to get spirited, we found ourselves behind a beat-up Chevy (I think, couldn’t see past the primer). As soon as the driver realized he was being tailed, he put the pedal on the floor and tried to hold on. That guy deserves some credit, he was really cooking for a few, but eventually he just waved us by.
Once out of the stop-and-go around Franklin, we continued down to Bridal Veil Falls for the mandatory “group photo”. That idea was somewhat “abridged” as the access road was technically closed, expecting another boulder to break loose any moment. From Bridal Veil we were looking to get up onto NC-281, but somewhere in Highlands we found ourselves turned around and continued south on NC-28… which rapidly became Georgia. I’m not going to lie, I had no idea Georgia had such awesome roads. I don’t have a whole lot of “lost on a motorcycle stories”, but I can definitely say, if there’s gas in the tank and the roads are twisty… I’m not lost; 28 in GA was exactly that.
Back-tracking up 28 and across US-64 we finally found our way up NC-107 to NC-281 as planned. Similar to the ride on Monday, the plan was to take NC-281 over to NC-215 and back across the Blue Ridge Parkway. My buddy up front saw a sign for NC-215 “this way” and hung a left on a side-road. Apparently we were batting a thousand for “lost” on awesome roads, because as it turns out, Charley’s Creek Road is every bit as technical as NC-215 in places, including several downhill, decreasing radius turns, followed by a couple sharp ninety degree curves at the bottom.
Once up on the Parkway we enjoyed a bit of the view, and took another mandatory photo at the “Highest Point”. From there my buddy Tom led us over toward the “Mile High Camp Ground” for a short stint of off-roading on a few of the Bureau of Indian Affairs (BIA) Roads. Having been up and down the BRP a few times, I had no idea there were any intersections that weren’t access ramps. As it turns out, there are several forest service and BIA roads near the south end near Cherokee. NC. This was my first real “off-road” experience on the Scrambler beyond a short stint on Anthony Road back home. After a little gravel exploring, we continued down Heintooga Ridge Road (paved) to Heintooga Round Bottom Road (very much un-paved). The following twenty plus miles of unimproved gravel and dirt road was a good taste for what the Scrambler could and a little of what it probably shouldn’t do. Undoubtedly the “retro-road-faring-throwback-cruiser” could handle some gravel, but there were definitely times I was abundantly aware of my suspension limitations. That said, on both stretches of gravel road, the Scram was a tractor, and it was… awesome…
DCIM115GOPRO
DCIM115GOPRO
DCIM115GOPRO
DCIM115GOPRO
DCIM115GOPRO
DCIM115GOPRO
DCIM115GOPRO
DCIM115GOPRO
Finally at the bottom of Heintooga Round Bottom Road, we took the last bit of hardball into Cherokee, and then burned out way back to the Iron Horse before dark. Sitting here, writing this now, several weeks later, I’m really impressed at all the miles we covered that day, and still got back in before sundown, especially with all the gravel thrown in. That said, it was actually so much fun on this particular Wednesday we hit the replay button on Thursday and did several sections of 281 and Charley’s Creek Road again.
The summer has been absolutely crazy, from May until last weekend I have spent most of the summer prepping for charity events, among other odds and ends (not to mention changing jobs). Certainly there have been good beers, bourbon, and cigars mixed in from time to time, but unfortunately no too many of note. October has also been unseasonably warm here in this part of Ohio, but with the temperatures finally below 70F, it was time to find a patio, a dark beer, and a good stogie.
The Stick
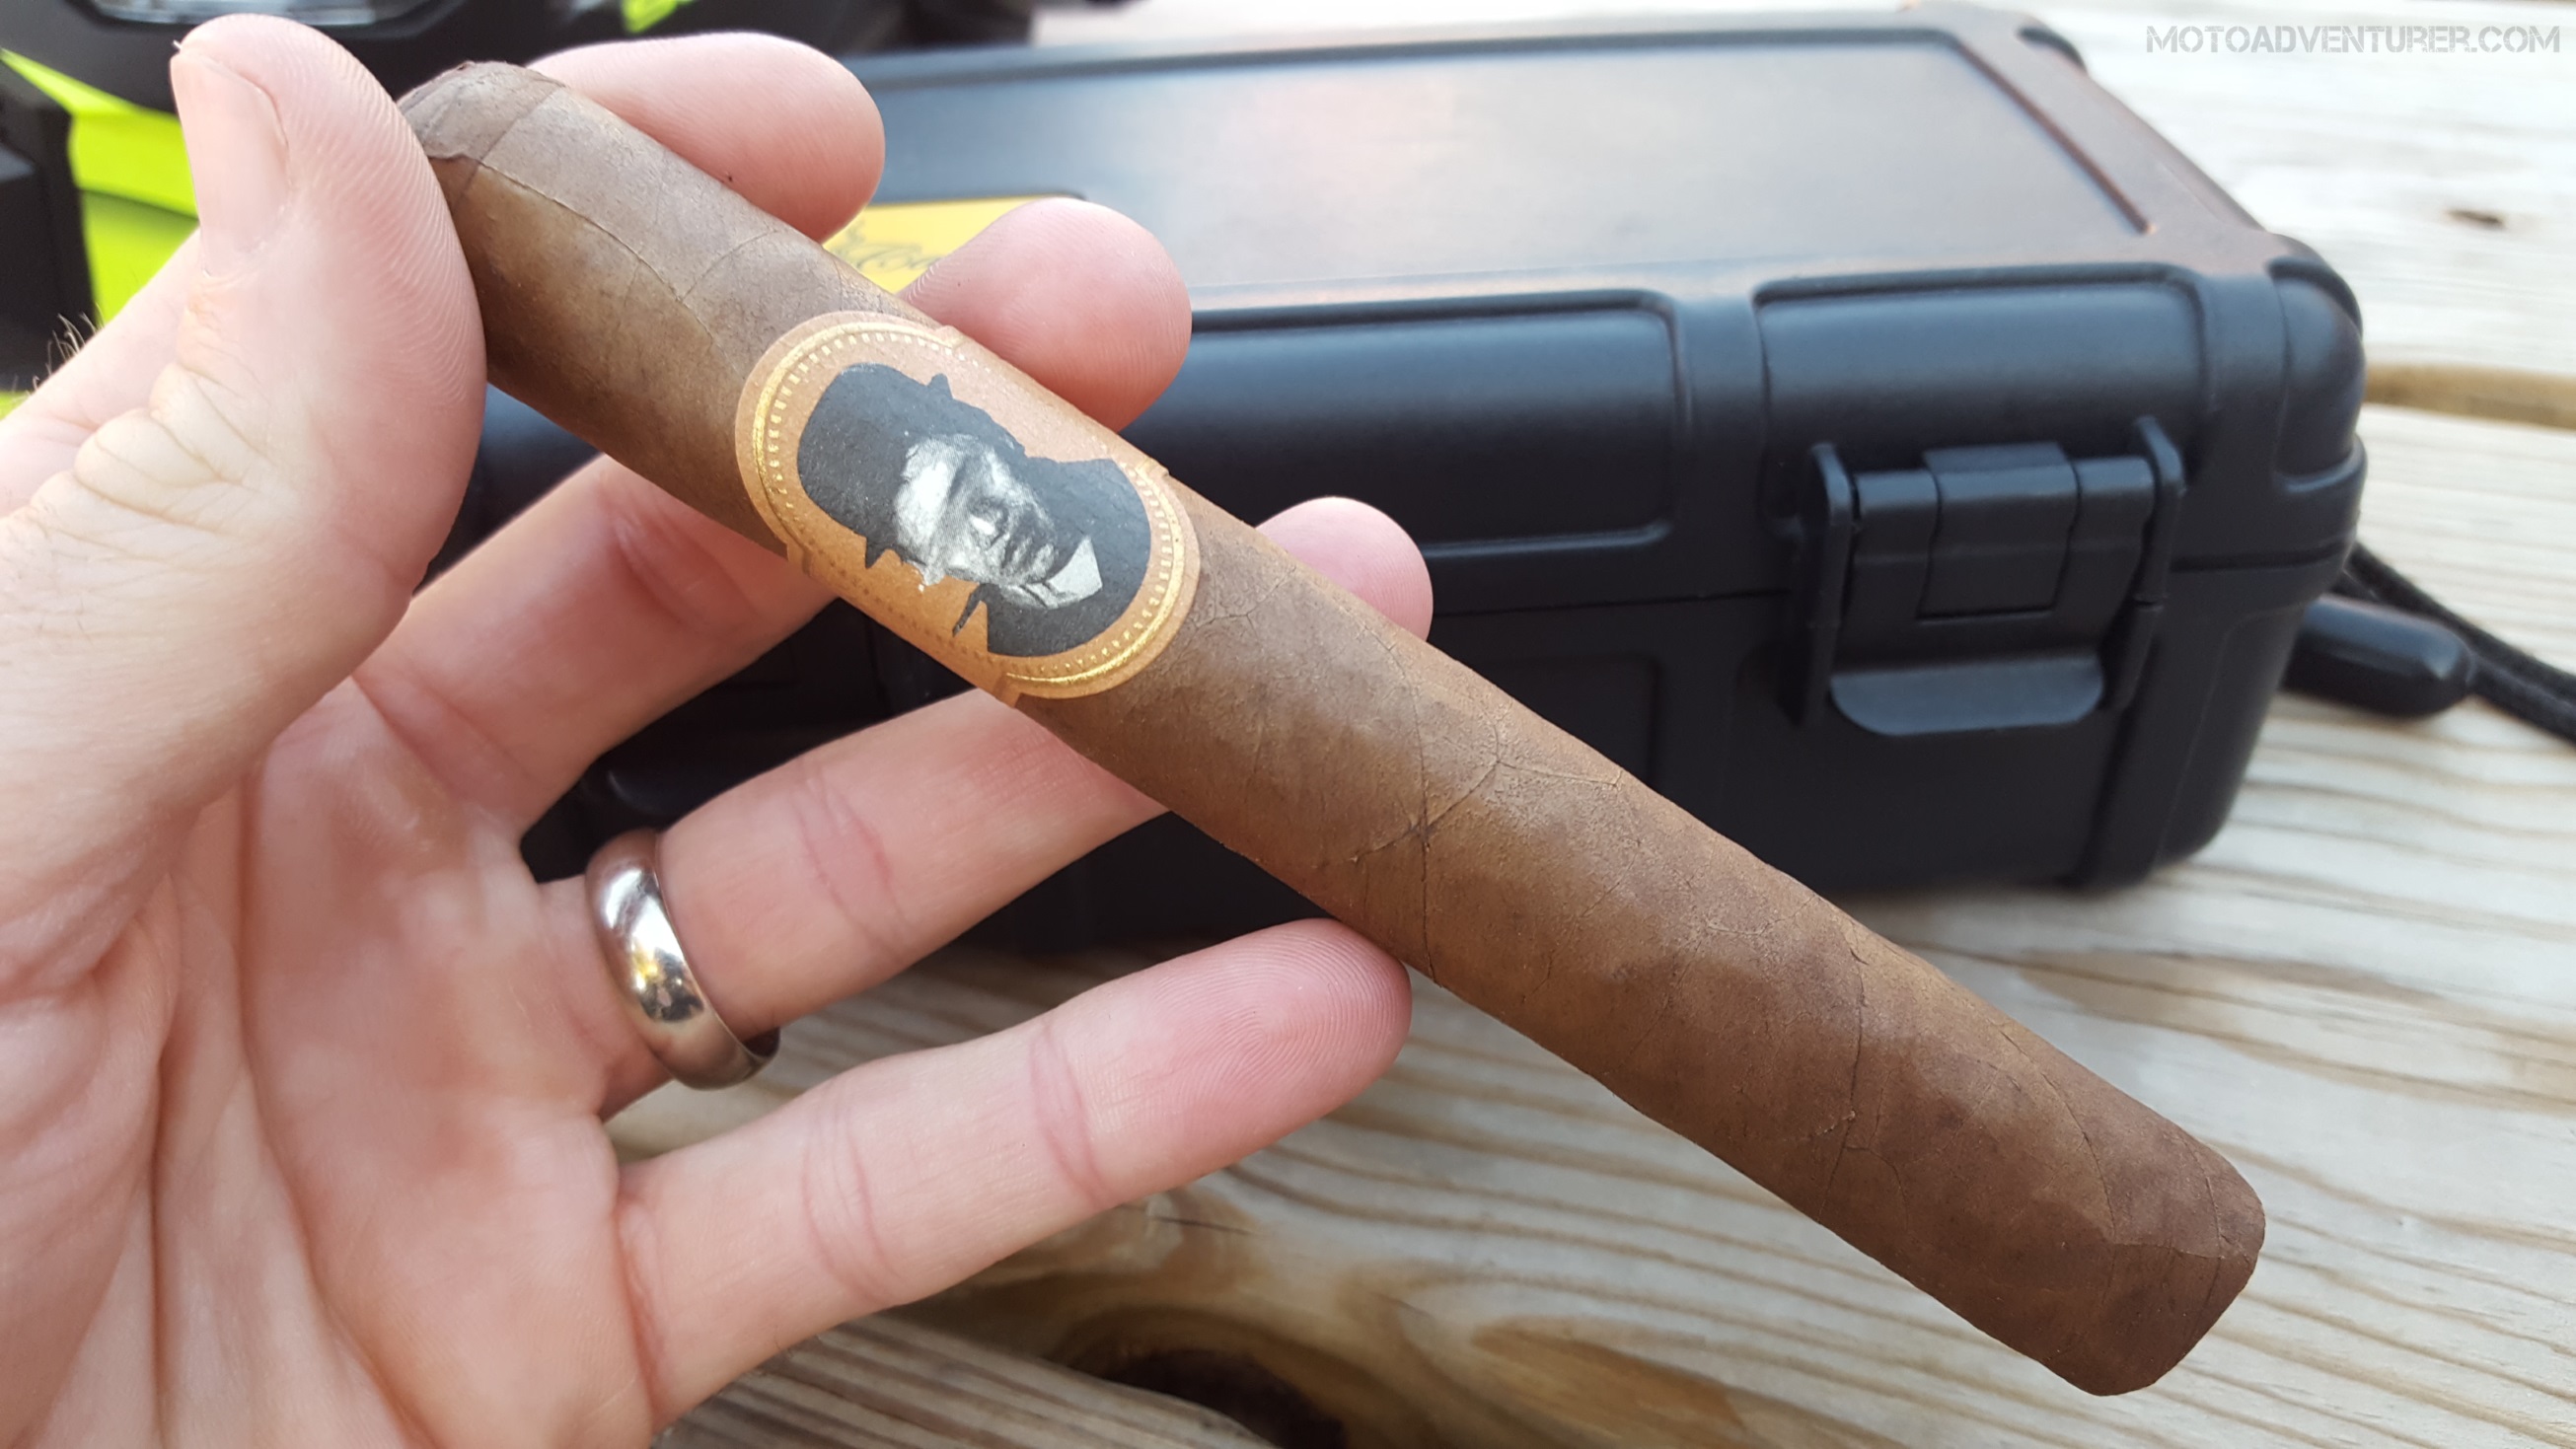
The Blind Man’s Bluff Toro, 6.0″ x 52 (complements of Cigars City), is produced by Caldwell Cigar Co. Blind Man’s Bluff also happens to me made at the same factory as Camacho and AKA cigars in Danli, Honduras. The blend is Honduran Criollo leaf as both the binder and part of the filler. Dominican San Vicente makes up the additional filler and the wrapper is Ecuadorian Habano.
The cigar is single banded, and somewhat subdued and unremarkable at a glance, with only the man in the bowler hat with his eyes scratched out. The sides of the band are marked with “We Own the Night”, apparently the Caldwell tagline, and “Blind Man’s Bluff” in bold type. I actually like subtlety (at times), but the banding is certainly in stark contrast to the Ava Maria.
Out of the other cigars stashed in my humidor, Blind Man’s Bluff feels about medium weight in the hand, and the stick was little spongier than I expected it to be. The wrapper is relatively dark; I was surprised by the rich color considering this was supposed to be a “medium” smoke. The smell of the tobacco was excellent, earthy, and I would almost say medium to full-bodied pre-light scents. I was very anxious to get it lit, it’s been a while since I had a good smoke and thus far it definitely appeared in line with my palate.
Once cut you could really see the veins in the fillers on the cut line. The draw was very smooth, with more rich tobacco smell.
The Toast
It took me an extra match to get lit evenly, but the draw was very easy. The first third was obviously the earthy tobacco notes I expected, but I soon noticed an obvious peppery taste, something I have only recently picked up on in other cigars. The amount of smoke was actually medium to heavy at times, with mostly grey-white ash, but with a few dark hints. As it burned further into the first third, I almost detected a fruity black cherry note, but it soon faded. The ash did not hold on too well in the first third, maybe an inch, but the flavor was very consistent.
Fall had finally settled in, the sun set behind the trees at 6:30 down by the river as I finished up the first third. The music at the bar next door paused for a moment and I could hear the crisp sound of the tobacco leaves burning with each puff. I love that sound; despite the fact that the jukebox tunes next door were agreeable. The heat began to build some as I crossed the halfway point, and again the ash fell off the stick. The mild peppery flavor seemed equally consistent in the second third, milder perhaps, possibly a little “nutty”; although it could be because I haven’t smoked much as of late.
I had a tough time detecting more than a rich tobacco scent early, but I was able to detect some woody, almost “cedar” notes entering the last third. I still didn’t detect any hint of nicotine, I suppose that smokers with less tolerance will appreciate that. I had to correct the burn line again in the last third but the ash held together much better than the first half. I’m not entirely sure if it was because it started to get cold as the sun went down and it neared 7 PM, but I could really feel the cigar start to get hot in the final third. It started to get softer as it burned down through the last section; obviously it loosens and expands with heat, but the wrapper did not crack, unlike other cigars I’ve had. In that last moments I actually thought I was done, but I couldn’t put it down until I was on the verge of burning my fingers. At which point, I finally detected a mild nicotine buzz in the last few puffs.
Closing Thoughts
The first half goes pretty fast, but the burn slows toward the end. Overall, the burn line was a bit uneven and needed correcting, but not a deal breaker, just somewhat surprising considering the smooth draw. As I mentioned, I actually like a slightly “tougher” draw than most, (even though I find it effects the burn), but even with the straight cut, this draw actually suited me just fine.
I definitely enjoyed the first third and last third the most, I typically find that cigars get bolder as they burn, but in this case there was a lot of flavor right after the initial light, very mild through the middle, then bolder in the last third as I would expect. Others have commented about flavors like earthy tones (freshly tilled soil?), leather and even coffee. I agree with some earth notes, but I really never detected coffee, maybe a tiny hint of cocoa, it just didn’t seem dark enough for coffee to me. Others have also suggested “oaky” notes, I suppose that’s also possible and I just missed it. Ultimately I feel that the light peppery flavor was most consistent throughout.
Total smoke time just over an hour. This cigar actually was actually a really good fit for my personal taste, the consistency throughout just can’t be ignored. While Drew Estate cigars are my typical go-to (usually Undercrown, maybe a Liga), I could definitely see myself keeping one of these in the humidor, at around $8 each, it’s just a good medium cigar.
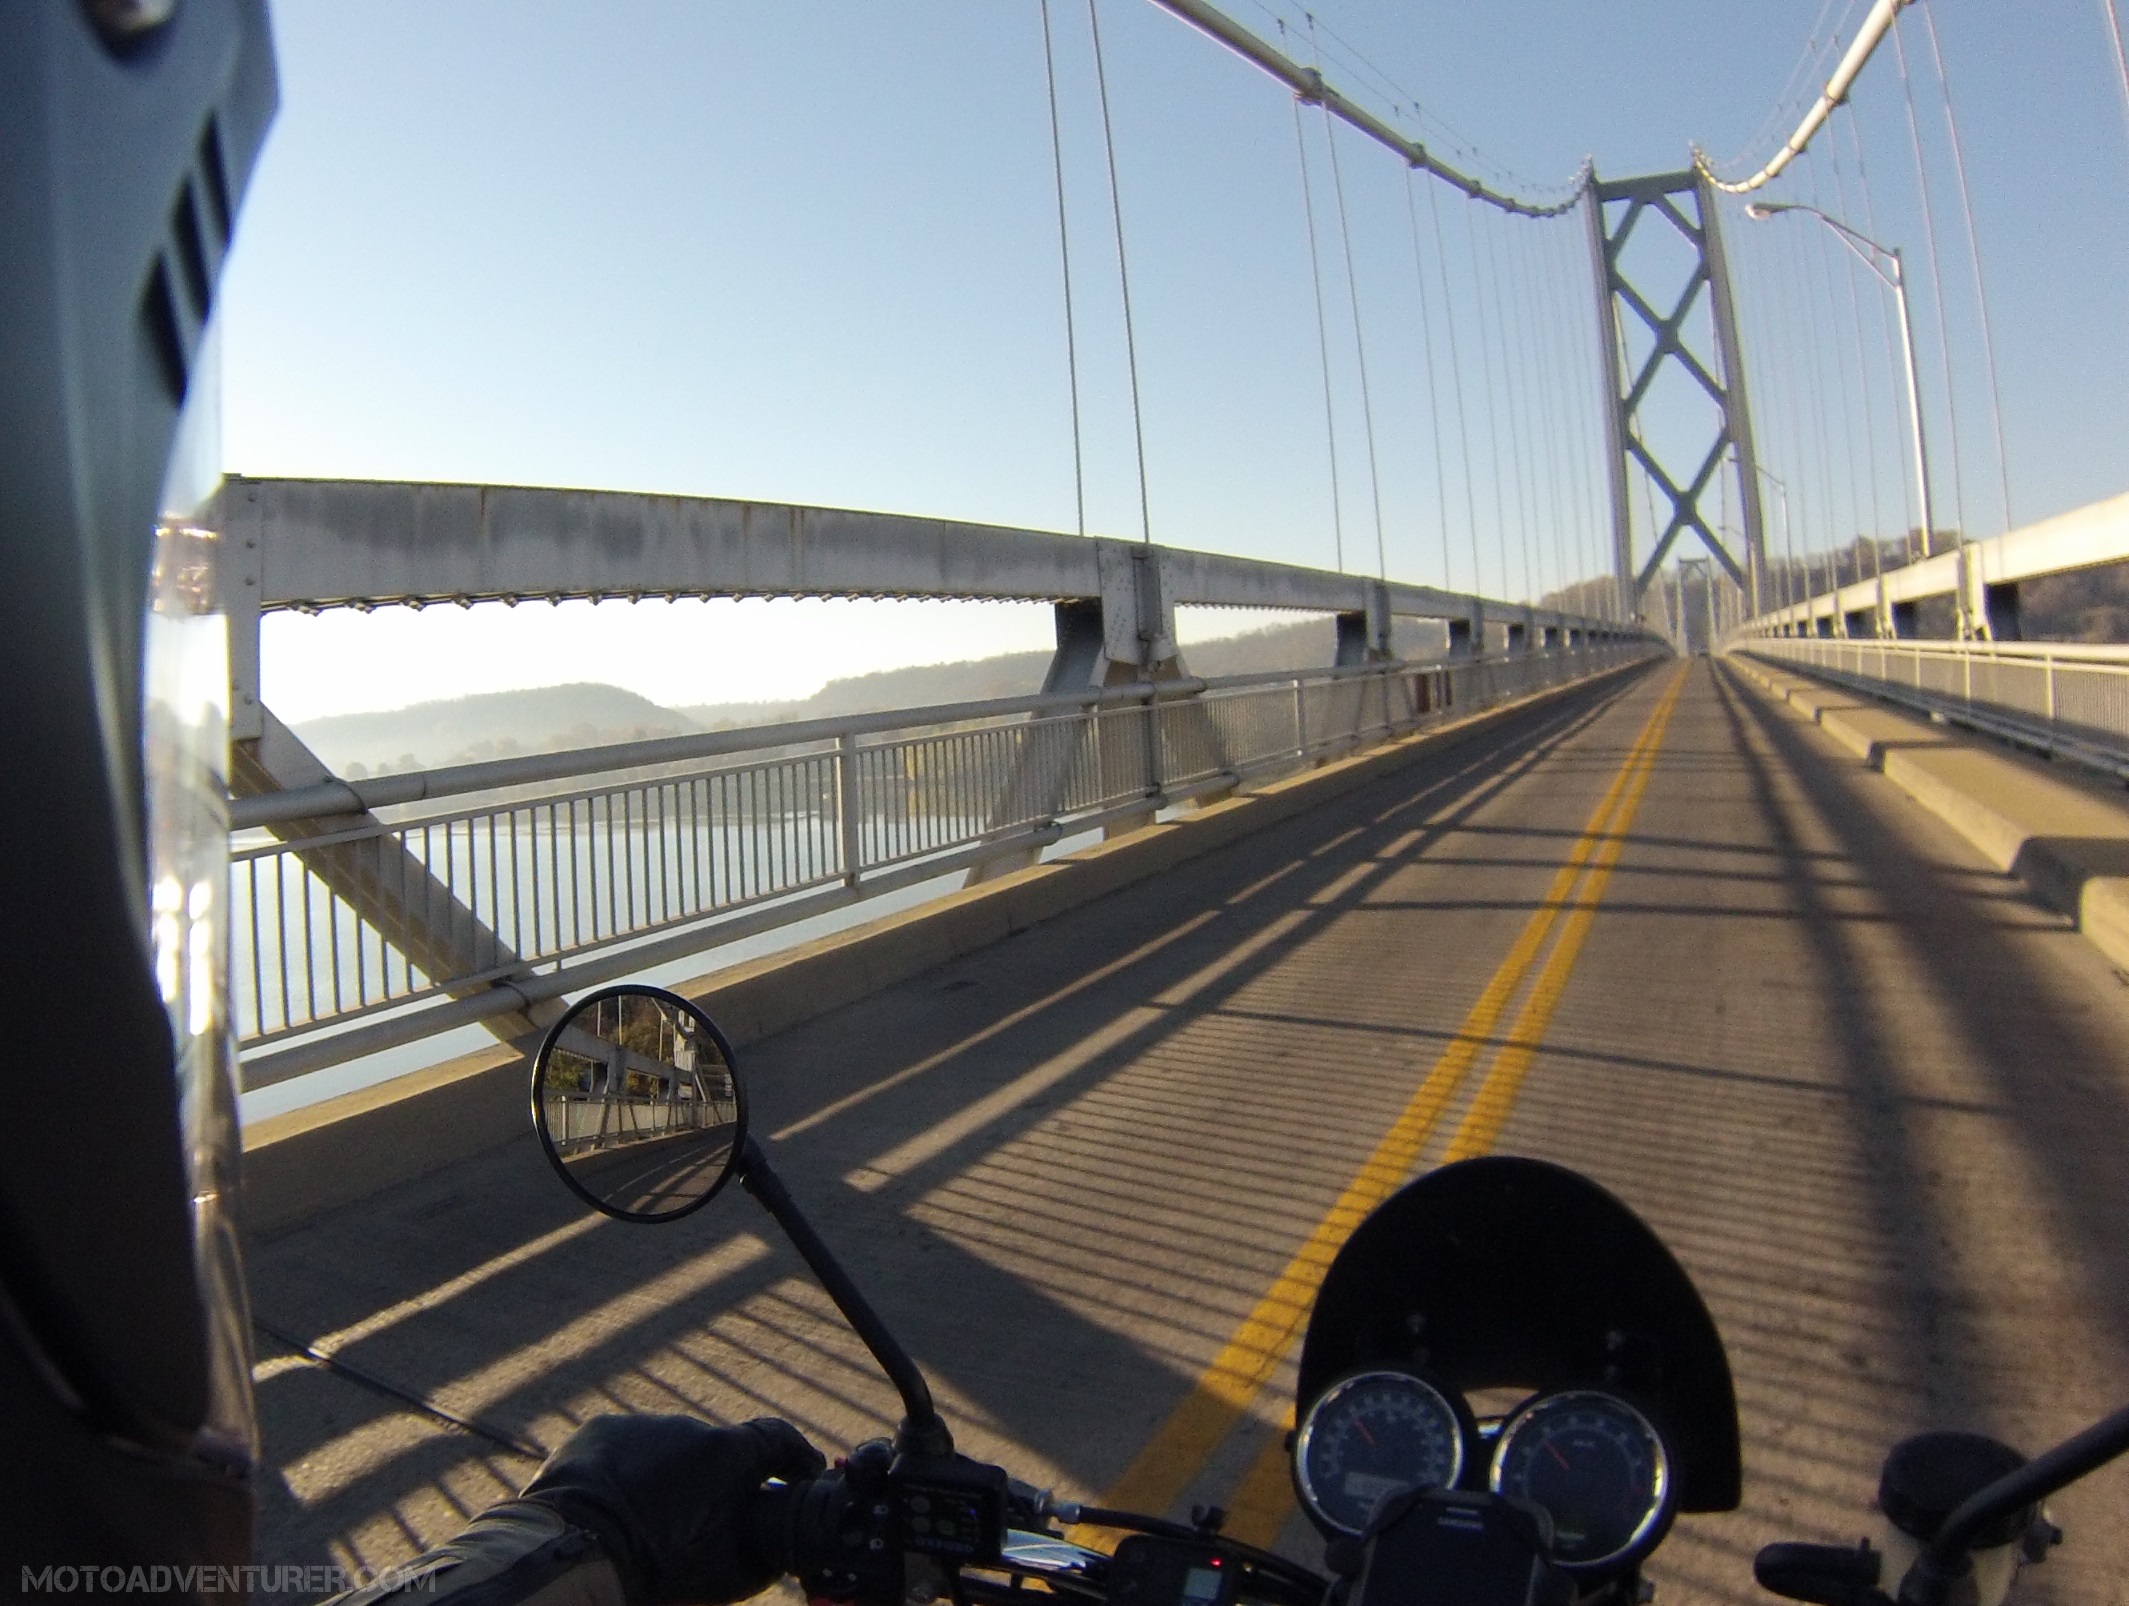
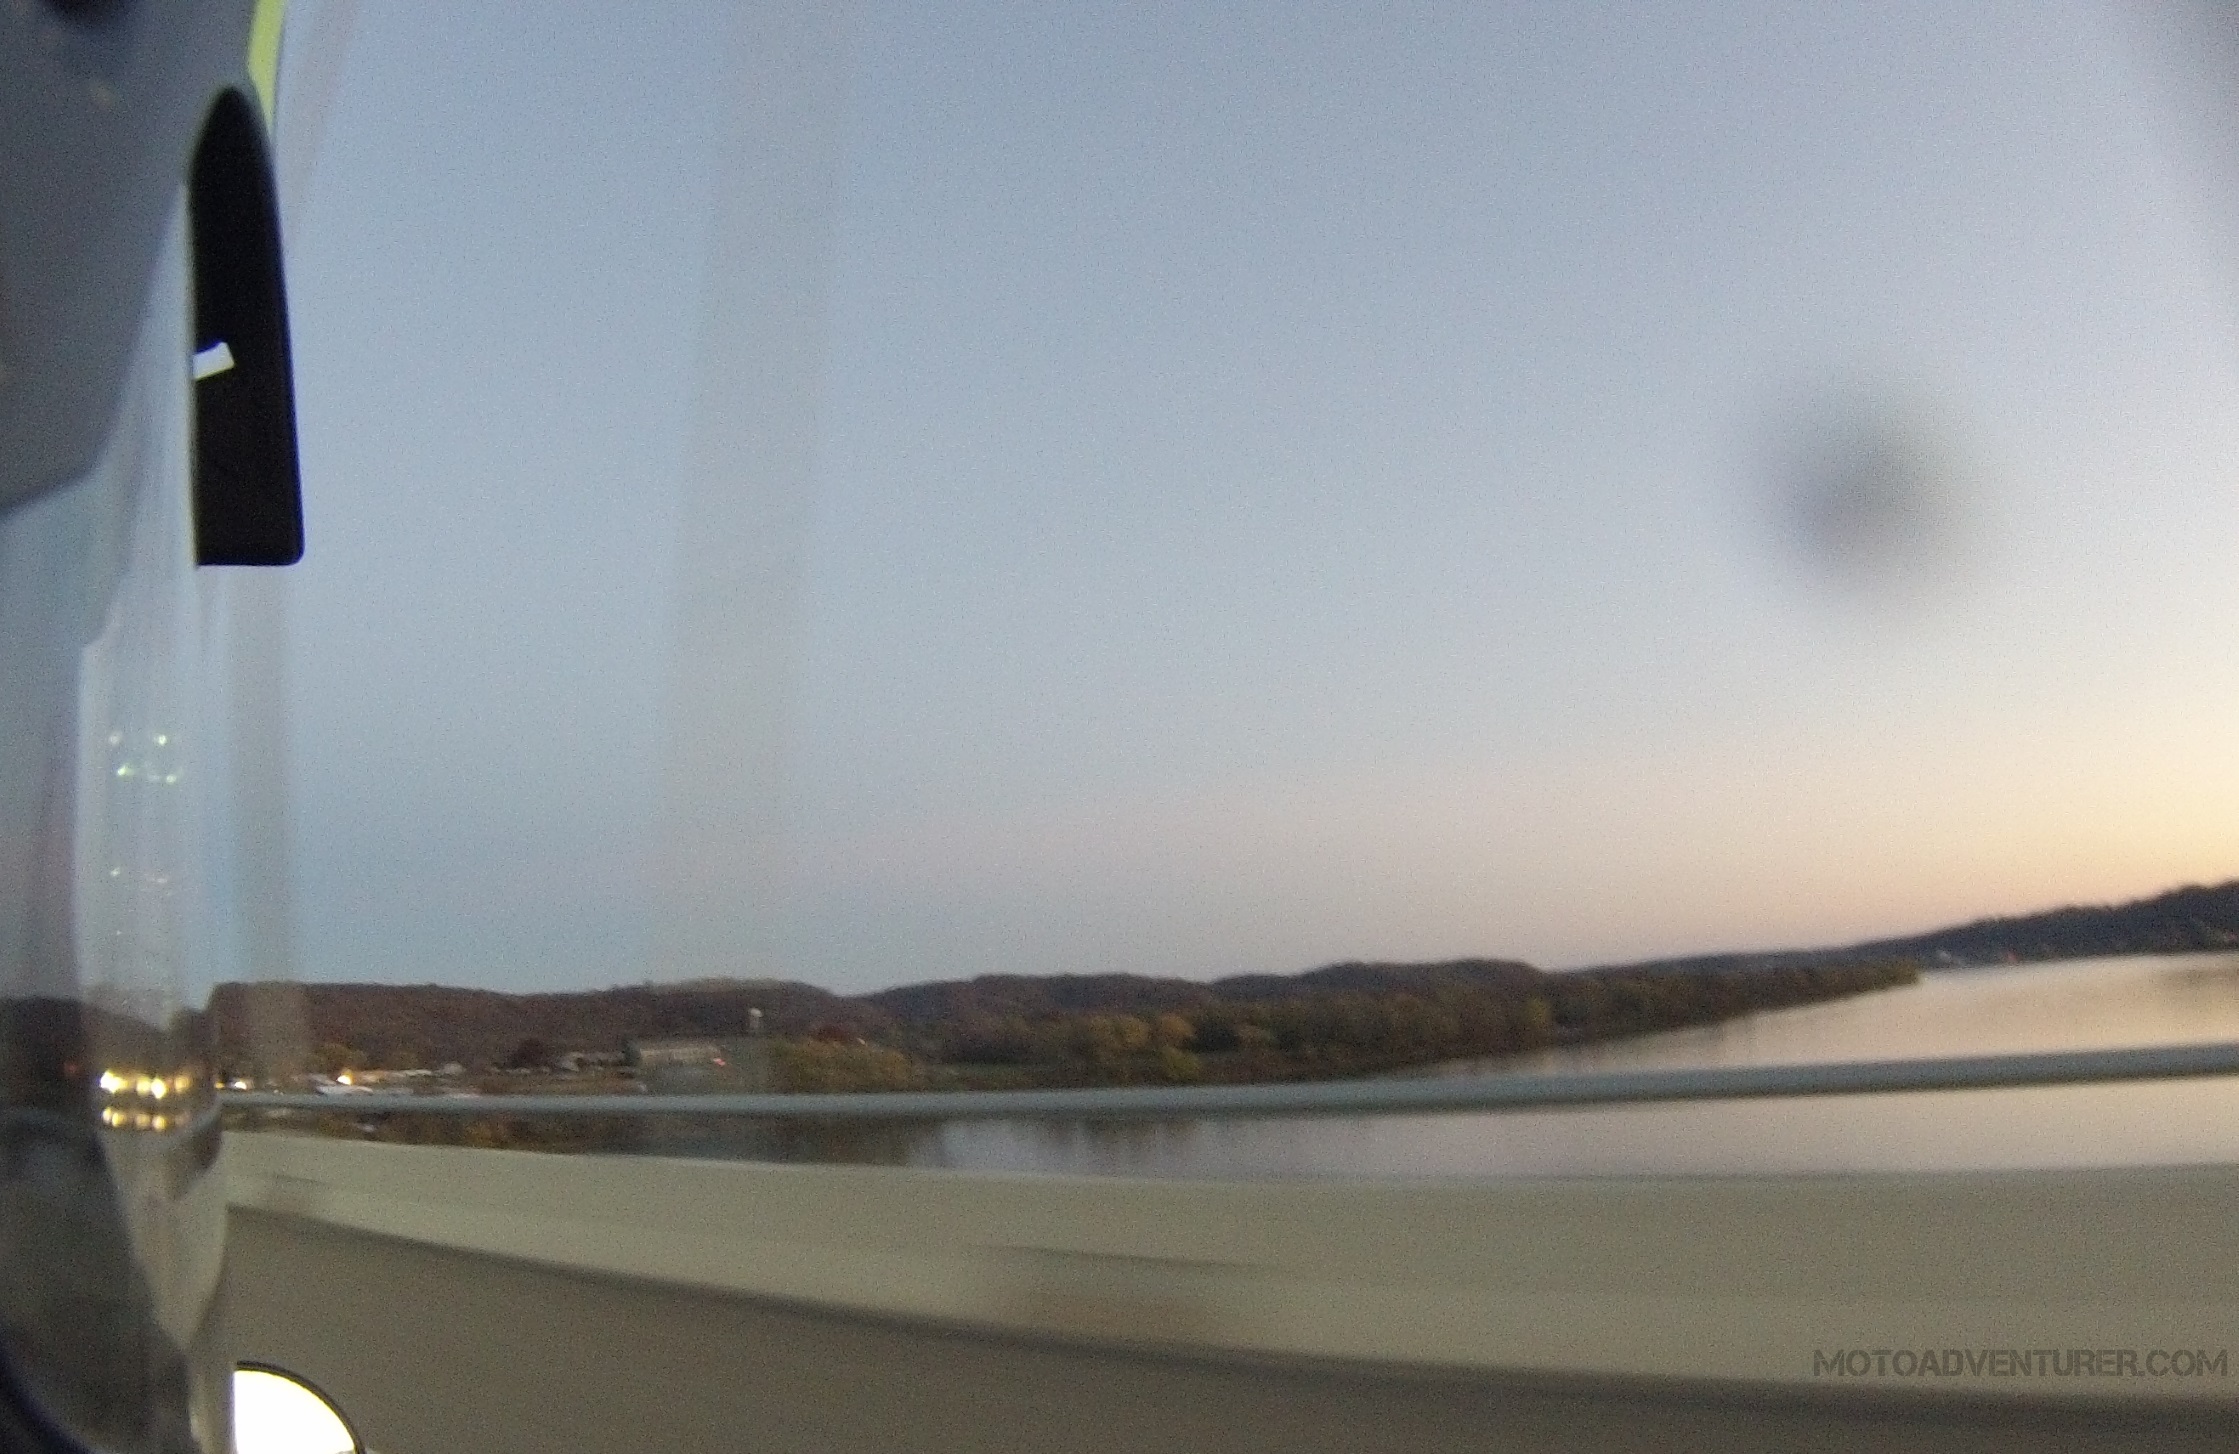
At last year’s Raid, I only traversed “The Skyway” once, and only from Stecoah into Tellico plains (during most of which I had no idea where I was). I was hoping to take the Skyway as part of the route home last year, but due to the cold temperatures, it just didn’t make sense. This year, just because of the way the chips fell, I have a whole new appreciation for the Cherohala as I crossed the mile high legend 4 times.
After tackling the Dragon Tuesday morning, my buddies and I continued down US-129, past Cheoah dam, and down to the outskirts of Robbinsville to pick up the tail end of NC-143 as it leads to the Cherohala. The south end of US-129 from Deal’s Gap to Robbinsville is another unsung hero down that way. I recommend riding it north from Robbinsville since uphill is usually more fun than down, but either way it’s a good ride as it hugs the hillside along the edge of Cheoah Lake. Assuming that you don’t get stuck behind a dump truck (more on that in a moment), the “access road” section of 143 that leads to the Skyway is a nice, twisty, technical section of roadway that bends between the creek beds that feed Santeetlah creek (and subsequently Lake Santeetlah). From the fork at Santeetlah Road, the Cherohala runs (virtually) unobstructed from intersections and residential traffic for almost 40 miles until it nears Tellico Plains, Tennessee.
There are limited number speed markings for a few of the 25 and 35 MPH curves along the Skyway, I assume because the speed limit is marked at 45 MPH (at least in North Carolina). Following my buddy on his shiny new 2016 Thruxton R, I quickly realized why sport bike riders appreciate the high-speed, long sweepers of the Skyway versus some of the more technical roads in the area. I imagine liter bikes can regularly reach triple digits on this stretch (and many do…), however my horsepower limitations became evident on the uphill straights as I chased the new Triumph 1200 mill.
DCIM115GOPRO
DCIM115GOPRO
DCIM115GOPRO
North Carolina had actually repaved their section of the Skyway this year, and were actively adjusting the grade level of the shoulder to match the freshly pressed asphalt. Unfortunately that meant stopping for a “pilot vehicle” to lead us through the construction zones as work crews laid fresh dirt at the edge of the road, pressed it even with a steam roller, and swept up the mess. I assume this is some sort requirement for State or even Federal roadways; kudos to North Carolina for at least using dirt, in Ohio they tend to use gravel… which naturally finds its way back into the road in all of the curves as cars cut the corner. While freshly minted asphalt is normally a very welcome sight to motorcyclists, the shiny new blacktop on the Skyway appeared a bit oily to me, compounded by the fact there was a fair amount of “dust” left behind by construction, so I found myself much more comfortable on the “gritty” Tennessee sections.
After lunch at Krambonz BBQ in Tellico plains, it was another spirited ride across the Skyway back to the Iron Horse. As I reached an intersection at the end of the Skyway, I pulled over to wait up for a buddy. In the few moments I stood there, a neighborhood dog wandered up to greet me. Reminiscent of other stories, that’s one of those things I love about rural America, dogs that don’t know strangers, and always know where home is and therefor don’t need fences. Moments after taking a “selfie” with my new friend, it became evident I was on the verge of getting wet, again. Fortunately, after the hard lesson from the night before, I was dressed for battle. If I hadn’t mentioned it before, I’ve discovered that one, Rosie is apparently the “Rain-Maker”, and two, I don’t mind riding in the rain as long as I’m dressed for it. Donning my hood and helmet, my buddy rolled up, back to the lodge we went, day two in the books.
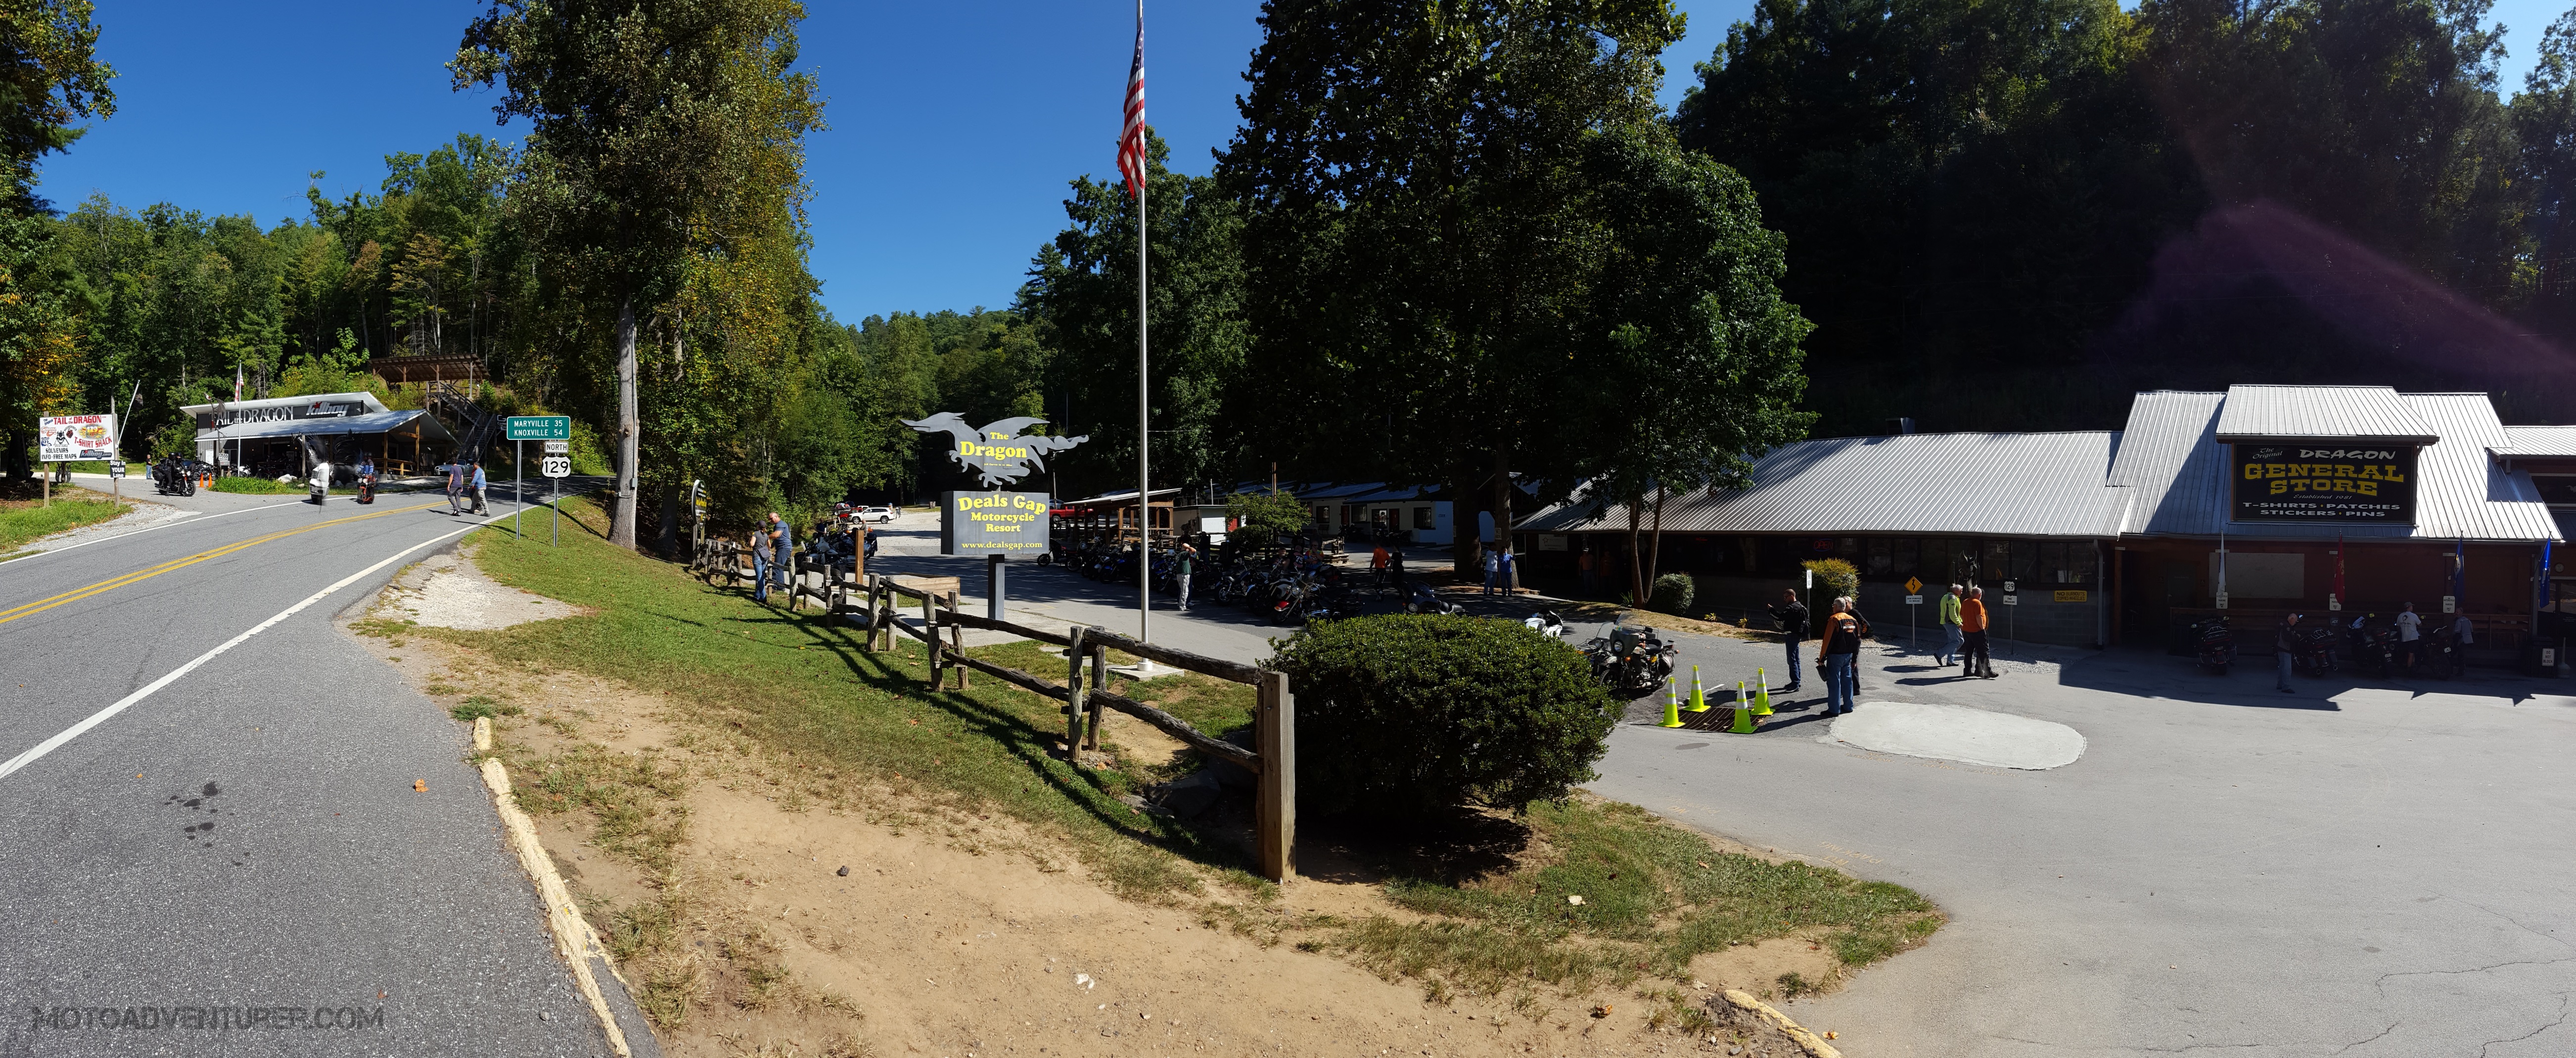
At some point this year I vowed “come hell or high water”, I was riding a different motorcycle to this year’s Dragon Raid. As such, with Rosie taking up residence on the porch, riding a sportier chassis across “The Tail” was certainly on the top of the “to-do” list. I made several trips across the Deal’s gap legend last year on the Speedmaster, but somehow only managed to get one (down and back) trip across the mythical creature at this year’s Raid. Fortunately, I got my money’s worth, despite the traffic, it was still a good run (for a “cruiser”). After reviewing the video, I think I’ve captured all the key elements of the stereotypical ride across the Dragon; I successfully got stuck behind a car, was passed by a supermoto with no restraint, got held up behind a bagger, and was passed by a liter bike (or three). For a random Tuesday, I was especially surprised by the traffic on the Dragon as it approached lunch time. The conventional wisdom at the Dragon Raid is typically that you can get a safe trip across the notorious roadway during the week; considering that the hot heads (and a few straight-line riders) make the weekend trip the Gap to “test their skills”. I would go as far as to say that this random Tuesday was actually busier than the Friday afternoon the wife and I traversed it in 2014. I have to assume it was the unseasonably warm weather, who knows; all I know is that parking at the Deal’s Gap Motorcycle Lodge came at a serious premium.
Obviously, I already covered the details about this fabled 11 mile stretch of US-129 last year, but for those that are unfamiliar with the fire-breathing creature in southeast Tennessee, here’s a few blurbs about “taming the Dragon” from yours truly:
Any competent rider can successfully ride the Dragon; that said, the conditions are typically more dangerous than the road itself; and by conditions I mean other riders. I recommend adjusting your lines further to the right side of the roadway (great tip from a buddy), that way you’re less likely to come face to face with another vehicle in your lane; be it a bagger crossing the center line, a liter bike using the entire roadway, or a semi setting up an impromptu roadblock, just be prepared.
You’re not the fastest rider on The Dragon (this is true for at least 95% of us), so step it down just a bit, watch your mirrors, and be polite when possible. There are thirty-some pull-offs on The Dragon, use them when available.
That said, don’t be a jerk. US-129 is a public road, not a racetrack; a spirited ride is one thing, but Tennessee is a long way from the Isle of Man TT. Look, I’m the last guy to come down on people about excessive speed, that said at some point speeds approaching “The Ton” have cascading effects on the other vehicles on the road. I’d like to say otherwise, but I’ve passed my fair share of lone sport bikes “resting” in the wood line, I’m confident speed didn’t play a role…
Be in the right gear. That means use the shifter AND cover your arse. The Dragon can be technical, especially for new riders, along with anyone that feels easily pressured from traffic and faster riders, needing another gear mid-apex is a bad plan. I do know some folks that ride the whole stretch in 2nd or even 3rd, but there are a couple 15 MPH curves, that system may not work for your bike. At the same time, despite your impressive riding prowess, you never know when there’s noob on a trike or a Goldwing that’s borrowing your lane around the next curve, scrubbing asphalt out of your elbows is unpleasant.
Tires and brakes are paramount down that way, not only on the Dragon; make sure your tires are within spec (tread life and inflation), and your brakes are well within serviceability. If you live in farm country (like I do), you find a whole new appreciation for advanced breaking techniques in and around “The Gap”; that’s a bad time to search for a new tire and replace brake pads. This is also a bad place to learn and practice those braking techniques, trail braking can backfire on the inexperienced.
Despite my bantering about safety, Deal’s Gap is unquestionably a “Must Ride”, especially for riders on the east coast. Please feel free to share comments about close calls and other lesson’s learned below!
During these year’s Dragon Raid, it goes without saying I rode many of the same routes that I covered last year. That said, while the roads didn’t change a whole lot, the way they feel under a new motorcycle certainly does. Right out of the gate this year my buddy Jon wanted to ride down to Oskar Blues Brewery near Brevard, North Carolina. I really enjoyed the ride and the brewery last year, so I eagerly got my gear together to come along.
Last year on the way out to Oskar Blues I found myself a bit white-knuckled on a few of the downhill sections of NC-281 and NC-215. This year was a completely different story. While I don’t think there’s a considerable difference (if any) in the single disc front brakes on the Scrambler vs. the Speedmaster, with the pegs directly below me and the overall geometry change, the bike felt astronomically more composed on the downhill. A buddy of mine that picked up a Bonneville New Church last year called it “Confidence Inspiring”; he’s dead on.
DCIM114GOPRO
DCIM114GOPRO
DCIM114GOPRO
At any rate, with a slightly later than usual start (we wanted to be there in time for a late lunch, I may or may not have skipped off to ride the Hellbender while I waited…), we headed over to NC-281, a should jaunt across US-64, then back up NC-215 toward the Blue Ridge Parkway (BRP). We got spit on for a short bit as we got settled on the BRP, then down US-276 into Brevard. I revisited many of these roads during the Raid, so I’ll cover more of that later.
DCIM114GOPRO
DCIM114GOPRO
DCIM114GOPRO
DCIM114GOPRO
DCIM114GOPRO
DCIM114GOPRO
Ultimately we arrived just before the food truck started serving, so I grabbed a stool and found a pint of tasty suds. Folks that talk to me on a regular basis will attest to the fact that I feel that IPAs are a fad at the moment, much to my irritation. Yes, I know IPAs have been around forever, I’m just saying they’re disproportionally popular against the field of beers available. That said, I remembered that I liked the G’Knight Red IPA, so I decided I’d have a short pour while I waited for some all-American street food (I wasn’t disappointed; is this the start of a trend?). When the time came, true to form, I ordered the hot dog, with an side of “Big ‘Ole Fries”. Naturally it was a bit dark upstairs, so no photo for the foodies (sorry), but it was a good dog …maybe not $5 good, but the “atmosphere” made it worth it.
No sooner than I received my food order than the skies opened up. It was sunny and 70 when we left the Iron Horse, so against my better judgement, I wore the mesh gear, and didn’t pack any rain gear. We managed to wait out most of the steady rain and left Oskar Blues in a really light mist that dissipated shortly after departure. We made it all the way to NC-28 near the Lodge before any more rain drops formed. Pulling onto Gunter Gap Road, with less than a mile to go, it started coming down in buckets. I told myself earlier this year that after last year’s Raid, there was no sense in bringing mesh gear. Soaked to the bone, that was the last bit of my mesh kit I donned at this year’s Raid.
After three years and over 45,500 miles, Lola moved on to a new owner last week. It’s unfortunate that I had to let the Speedmaster go, but there’s simply no room for two, and I wanted to fund the Scrambler project. Needless to say she and I collected a lot of memories over the past three years, and certainly gave me a lot of experience, much of which is documented here. While I’ve already done one Long-term review, to pay her in kind, I feel it’s only fitting that I throw down some final thoughts on the Speedmaster as a whole.
Let me start off by saying that I will put the Speedmaster up against any 900 cc cruiser in its class. Honestly, I simply feel like you get more bike for what you pay where the Triumph is concerned versus the Sportster and its Asian clones. Let me also go on to say that I feel that the Harley Davidson 883 Sportster is the primary competitor to the Speedmaster. Now, I will give Yamaha a lot of credit with the new Star Bolt, that’s a legit bike, and I will hold it a close second to the Sporty, but in the end the Speedmaster still has more gas and equal (if not better) performance against the Bolt. The Sportster on the other hand has boat load of street credit to compete with. Harley Davidson is obviously the cruiser brand of choice for the vast majority of Americans, and (at least on paper) there are some distinct advantages to buying a Sportster. For one, maintenance (in theory) should be simpler with pushrods and rockers versus the Speedmaster with dual overhead cams. In addition, the aftermarket parts available for American made bikes is ridiculous; if you want to farkle your Sporty, it’s merely a click away. The Sportster (as with the Bolt) is also belt drive, which makes that maintenance even easier if you’re just an urban cruiser. That said, professional moto-journalists agree, the Speedmaster offers better all-day comfort out of the box, and still holds its own on the stat sheet. In the long run, I also believe the Speedmaster fits a wider breadth of motorcycle consumer (that want more than to just own a Harley) than other leading competitors in the 900 class. Aside from the seating position, the five gallon gas tank will get you upwards of 200 miles to a tank if you ride conservatively. I will also add that all of the parts on the Triumph America are interchangeable with the Speedmaster, so if you want windshield, bags, and a plush pillion seat, that’s easy to come by. I also want to throw in, aside from my comments about the 900 cc class, the Speedmaster unabashedly keeps up with big bore cruisers as well. In three years, at no point did I ever feel like I needed a little more “power” to hang with my buddies on their “Big boy bikes”; moreover, on at least one occasion, I was told I was “walking away from the group”.
Despite my obvious bias toward the Speedmaster, Lola was not without faults. Plainly, the rear shocks suck. I tolerated the stock rear suspenders primarily out of “cheapness”, and then eventually because I was expecting a new bike on the horizon. If you’re in the market for a new Speedmaster, save a little cash in the bank, and go ahead and spend $300 on an aftermarket set of rear shocks (Hagon and Progressive solutions are readily available). I personally find that the rear shocks stand out immediately considering the ease of bottoming out thanks to a pothole, but it’s worth mentioning that the front springs could stand to be upgraded as well. Again, I myself did not make the investment, and the casual rider need not fear the stock setup, but for folks that prefer a more “spirited” ride, it’s worth spending $100 on a set of progressive springs for the front forks, and (I’m told) it’s an easy swap in the garage. Chain maintenance can also be a bit annoying. I would recommend that anyone who plans on “upgrading” the exhaust pick up shorty Triumph Off-Road pipes (TORs) or British Customs Cocktail Shakers (if you really want loud) just for the ease of chain maintenance; the long stock exhaust gets in the way. I will also say that a center stand is available (although it’s bloody ugly), or you may want to invest in a paddock stand, just to make things easier. I already covered the concerns about wind protection in the long term review, but I will reiterate, $130 on a Dart Flyscreen will completely change the way you view cruising on the highway. In fact, for under $1,000, you can easily throw some highway bars, bags, and a flyscreen at the Speedmaster and turn it into a budget touring bike. That said, some guys complain about the higher engine revs on the freeway. I’m going to say that the engine revs to 8k, so cruising at 4500 isn’t a big deal, but if you do find that annoying, you can upgrade to a 19 tooth front cog when you replace the chain (but lose some torquey character). For folks laying down more than 12,000 mile annually, the valve clearance check and adjustment can be a bear. Fortunately, the 865 engine is shim over bucket, and uses a drive gear for the cam gears, which makes it easier (no fussing with cam chain), but it’s obviously more work than pushrods. In the end, chain and valve maintenance is the price you pay for better performance.
In spite of its shortcomings, the Speedmaster was still a great ride. As I’ve mentioned before, the choice to move on was because I wanted mid controls, the option of (realistically) riding dirt, and ultimately a bike that I didn’t feel guilty for getting filthy and possibly neglecting (like riding in the salt and snow). Feet forward became a real issue for me; yes, you can upgrade the seat and suspension, but with forward controls, all your weight is essentially on your butt, and therefore your spine absorbs the shock load. If money were no object, and I actually had a garage to fill, Lola would be parked next to Rosie right now. I love the 865 air cooled twin; while not quite a stone ax like a 650 single, the Speedmaster engine offers the performance of DOHC, simplicity of air-cooled, and character in spades, especially with the 270 crank (which sounds great with aftermarket exhaust). The air-cooled Triumph twin simply begs to be flogged and is (typically) bullet-proof reliable. Despite the ease of putting a peg down (as with most cruisers), the Speedmaster still loves the twisties, and I was often surprised at how nimble it felt after riding a lot of other cruisers.

 Three days of hooliganism (albeit “cruiser” hooliganism) had taken a heavy toll on the stock Bridgestone Trail Wing that came stock on Rosie. Chasing my buddy Jerry on the Skyway on Tuesday, I noticed the front end was developing an unnerving vibration at speed. Based on the heavy scalloping I could see in the tread pattern, I realized that tire’s days were numbered if I was going to keep up that aggressive riding for the rest of the week. Knowing I still had a 500 mile ride home on Sunday, Thursday morning, (9/15/16) , I decided to bite the bullet and rush over to Wheeler’s Performance in Robbinsville as soon as they opened.
 Walking up to the counter I noticed what I assume was a cockatiel (or perhaps a breed of parrot?) perched on a parts display. Ringing the bell, I was greeted by a discreet young man who was attempting to manage the flood of incoming phone calls meanwhile trying to get the shop open for the day’s work. We perused over the available tires in the size needed for the Scrambler, a list that was quite short considering I needed something right then and there. Fortunately, they did have a Michelin Anakee 3 on hand (the display in fact). I had heard really good things about the Anakee from a fellow “inmate” on ADVrider, but I admit I was a bit concerned about the quality of the tire considering how long it may have been sitting around the shop waiting for someone like myself.
 Shortly after the Scram found its way up on the lift, Mr. Wheeler himself arrived. We shot the breeze a bit while I waited; noticing several wrecked bikes parked next to the garage, we exchanged a few anecdotes about the unsuspecting moto-tourists and the decreasing radius turns in the local area. As I’ve already covered, “The Dragon” is quite the destination, as such that brings Wheeler’s quite a bit of business, unfortunately for some, at times that business is the result of someone’s poor judgement. During this exchange he said something that really struck me, “On the Dragon… Horse Power IS NOT your friend”; very true. Letting him move on to more pressing things (more phone calls), I browsed through sale parts and whatnot around the shop.
 In less than an hour (in and out), the young man (whose name is unfortunately escaping me ), had the new tire mounted, balanced, aligned the front forks, re-mounted the wheel, and even lubed throttle cables. I admit that the price was a little north of what I would have paid locally in Dayton, but when you’re over the barrel and supporting a local economy that may not see as much business, it’s the way things have to go. Despite any misgivings I may have had about “shelf life”, the Anakee stuck like glue after scrubbing it in over just a few short miles up US-129 and back to the Iron Horse. Moreover that Anakee is still going strong almost 7,000 miles later, something I couldn’t say for the Bridgestone.